
Welcome to this step-by-step introduction to C# scripting for Unity — designed especially for those who are just starting to learn programming.
In this lesson, we’ll explore the basic elements of the C# language and show how they are used inside Unity. You’ll learn how scripts are structured, why they are important, and how they help control objects in your game.
Scripts in Unity define the behavior of objects: they allow you to react to player input, trigger animations, handle collisions, and much more. Without them, a game is just a collection of static images.
Don’t worry if you’ve never written code before — everything here is explained as simply and step-by-step as possible. Let’s get started!
If you haven’t installed Unity yet, download and install it via Unity Hub. This is the official installer, which helps you select the right version and install the editor.
While you can use various editors to write C# scripts, it’s recommended to start with Visual Studio. Unity is well-integrated with it: it supports autocomplete, shows errors, and understands how a Unity project is structured.
When installing Unity via Unity Hub, you can select Visual Studio in the list of components — just don’t uncheck the box. If you’ve already installed Unity and the editor wasn’t connected automatically, you can choose it manually:
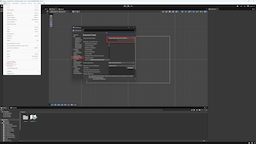
Open Edit → Preferences → External Tools and make sure that the External Script Editor field is set to Visual Studio.

💡 You can also use Visual Studio Code, but it requires additional setup and plugins. For beginners, the classic Visual Studio is the better choice.
Let’s understand how Unity automatically calls the right methods in your scripts and where execution begins.
void Update()
{
    Debug.Log("Frame!");
}
Let’s talk about ways to store data: numbers, strings, vectors, and more.
int score = 0;
Vector2 move = new Vector2(1f, 0f);
How to store multiple values and access them in order.
string[] fruits = { "apple", "pear" };
List<int> scores = new List<int>();
How to add, compare, and change variables using basic operations.
score += 10;
speed = distance / time;
Let’s learn how to make decisions in code using if, else, and switch.
if (score > 0)
    Debug.Log("Points!");

switch (mode)
{
    case 0: break;
}
Repeating actions: how to write code that runs multiple times.
for (int i = 0; i < 3; i++)
    Debug.Log(i);
We’ll split code into separate blocks to make it clearer and more manageable.
void SayHello()
{
    Debug.Log("Hello!");
}
Store game objects in variables to control them from your code.
public GameObject player;
player.SetActive(false);
We’ll extract needed components (like physics or a sprite) and work with them.
Rigidbody2D rb = GetComponent<Rigidbody2D>();
rb.velocity = Vector2.up * 5f;
Let’s explore built-in Unity functions: movement, activation, destroying objects, and more.
transform.Translate(Vector2.right);
Destroy(gameObject);