A GameObject by itself is just a container. What makes it a real participant in the scene are its components. They give the object visuals, physics, audio, animation, and much more.
In this lesson we’ll learn how to access an object’s components via
GetComponent<Type>() so we can change their settings
from code. It’s simple — step by step with examples.
A component is a piece that adds some functionality to a GameObject. On its own, the object can’t do anything until you give it the needed “abilities” through components.
Every object in Unity always has a Transform component — it’s responsible for position, rotation, and scale. After that, you decide what else to add: rendering, physics, collisions, audio, or even your own script.
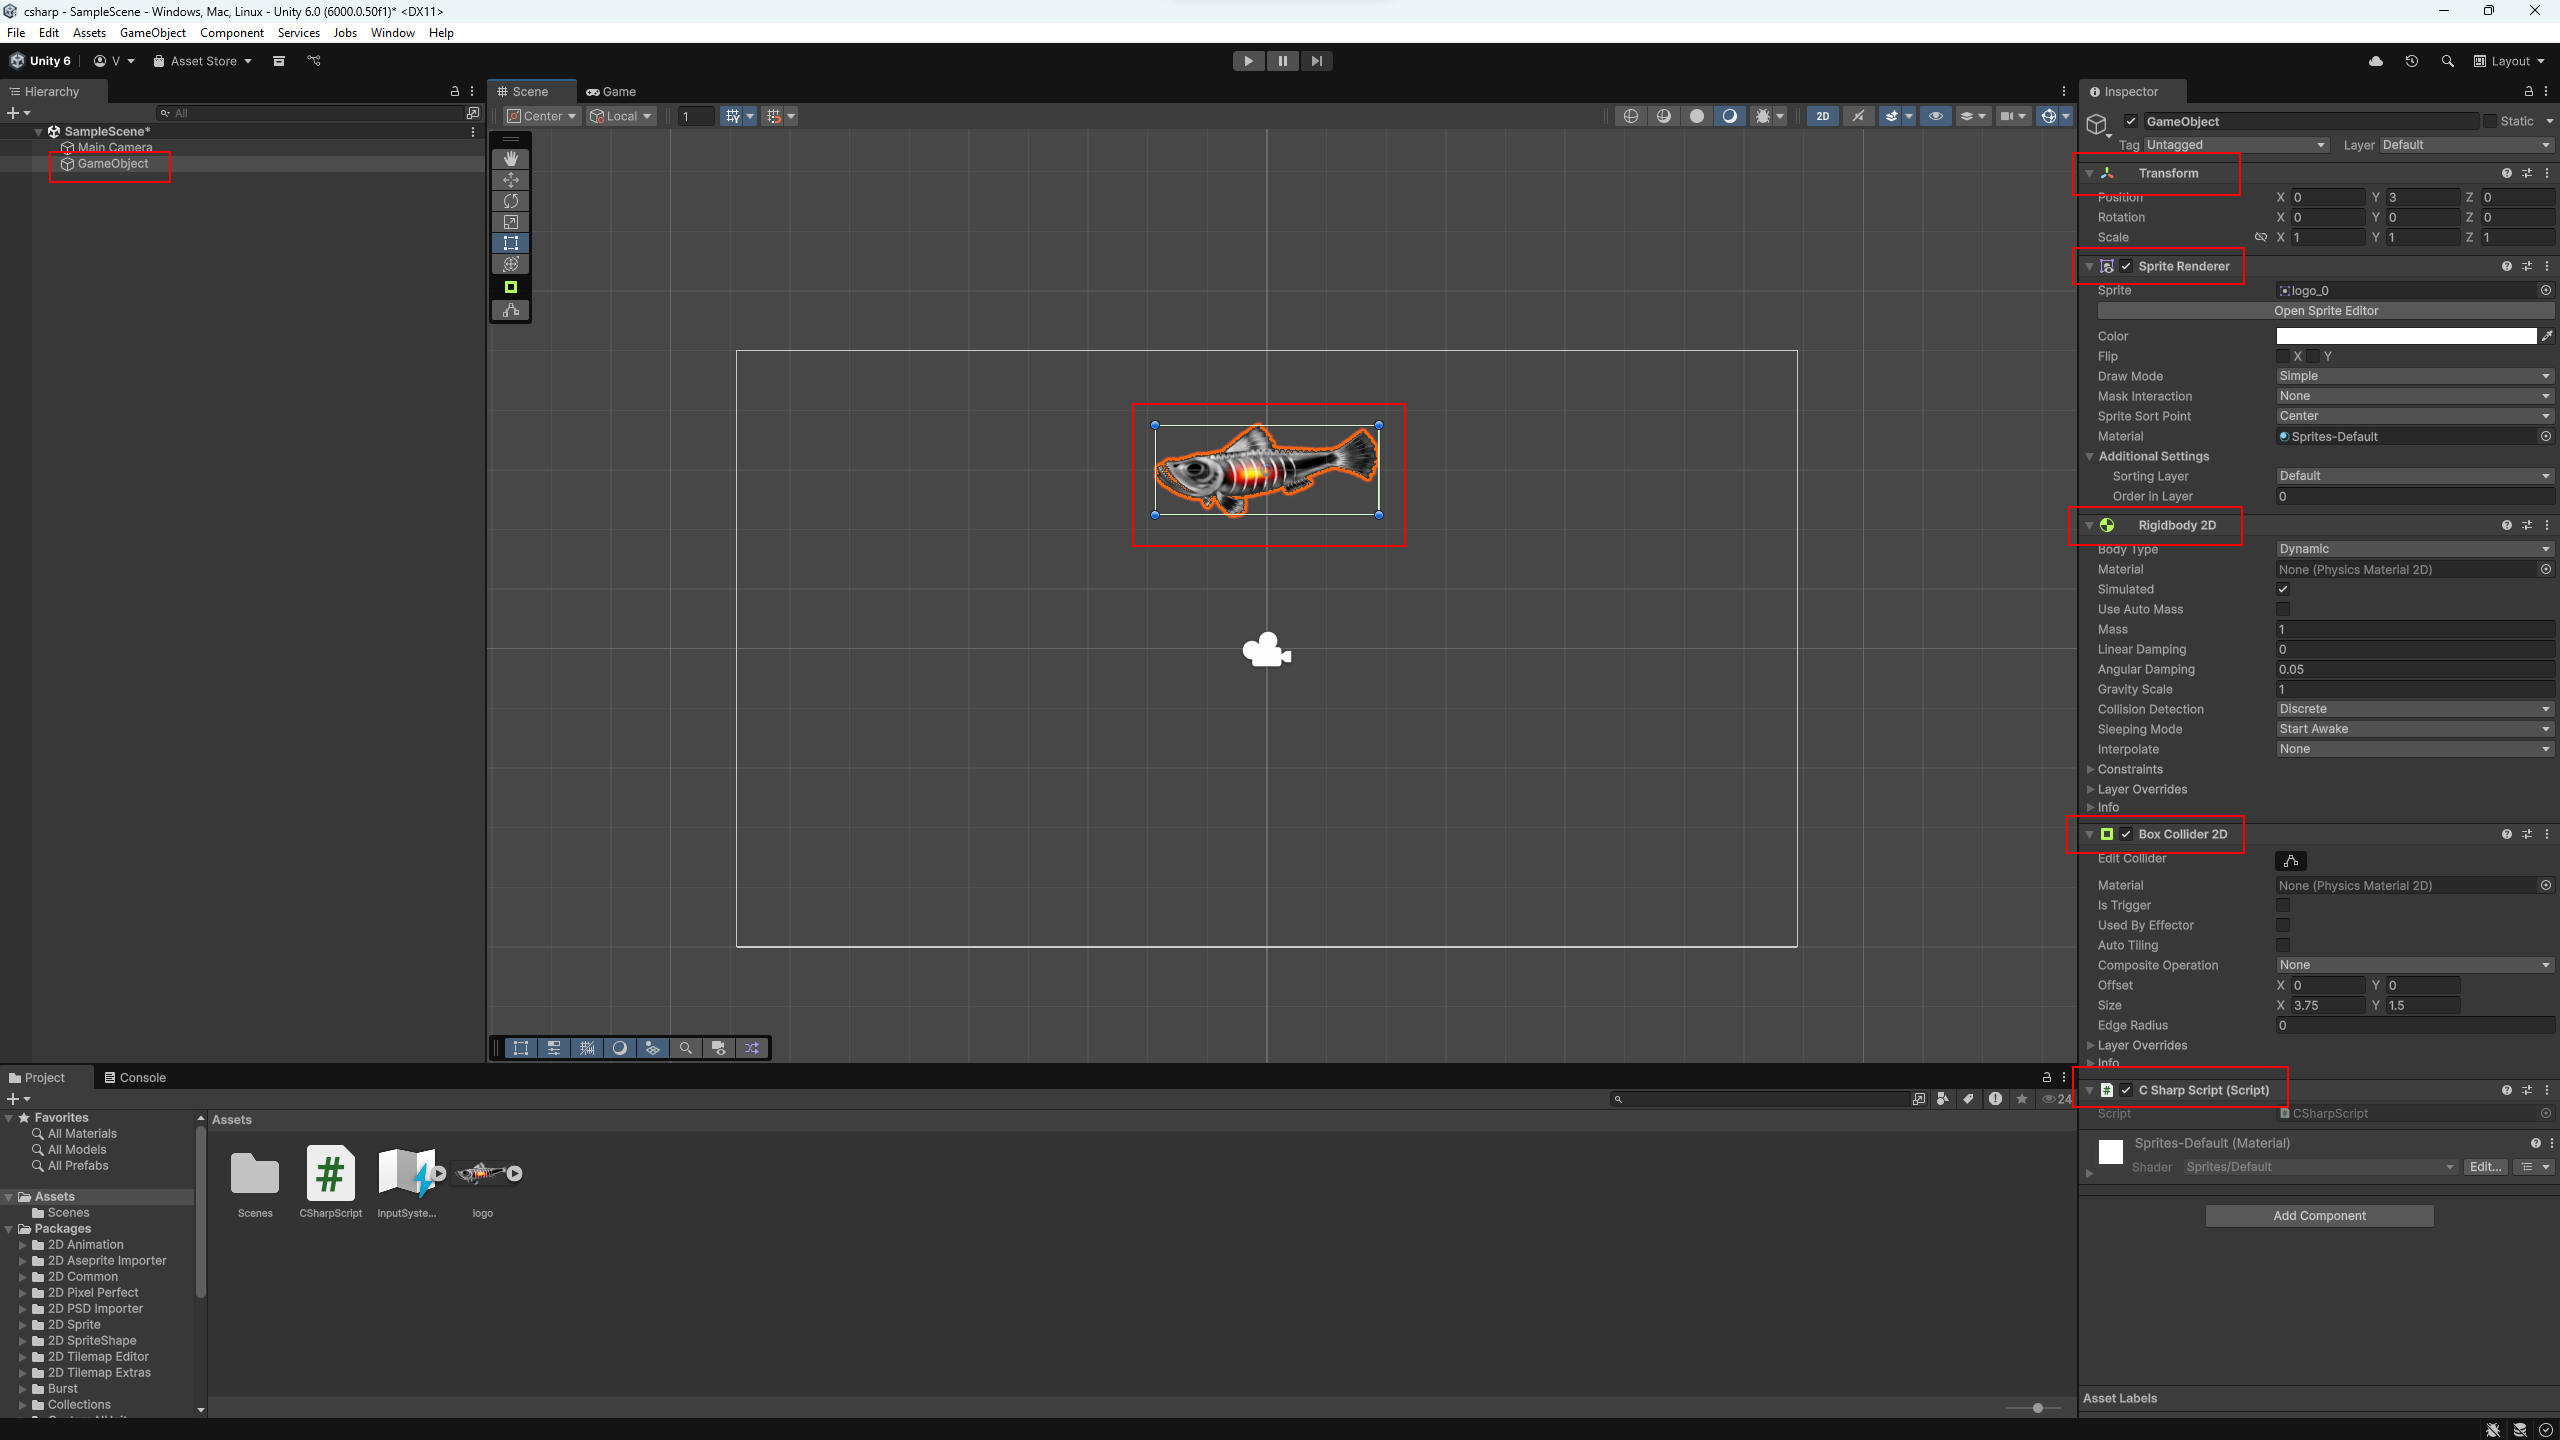
For example, a character might have this set of components:
Transform — where the object isSpriteRenderer — how it looksRigidbody2D — to make it follow physicsBoxCollider2D — to let it collide with othersCSharpScript — your custom behavior script💡 You can see all of these in the Inspector when you select the object in the scene. You can configure or remove components there — and you can control them directly from code too.
To control a component from code, you first need to find it. Unity has
a special method for that: GetComponent<Type>(). It
gives you access to the part you need — physics, sprite, collider, and
so on.
Imagine the object is a backpack full of tools. Calling
GetComponent is like saying “Give me the flashlight” or
“Give me the map.” Unity will find a component by its type and return
it to you.
Here’s an example: we get a Rigidbody2D component and
store it in a variable so we can control the speed later:
using UnityEngine;

public class PlayerMover : MonoBehaviour
{
    // Variable to store the Rigidbody2D component
    private Rigidbody2D rb;

    // Start is called once when the object is created
    void Start()
    {
        // Get the Rigidbody2D component on this object
        rb = GetComponent<Rigidbody2D>();
    }

    // Update is called once per frame
    void Update()
    {
        // Move the object to the right by setting its X velocity
        rb.linearVelocity = new Vector2(5f, rb.linearVelocity.y);
    }
}
In this example, the Rigidbody2D is taken from the same
object the script is attached to. Then we simply set its X velocity.
💡 GetComponent only works with components the object
already has. If you try to get something that isn’t there, it will
return null.
You can get components not only on the same object where your
script lives, but also on others. For that, you first need a reference
to another GameObject and then call GetComponent on it:
otherGameObject.GetComponent<Type>(). This is handy
when you want to control the sprite, health, or physics of another
object from the current script.
using UnityEngine;

public class CSharpScript : MonoBehaviour
{
    // Reference to the object with the "Enemy" tag
    private GameObject enemy;

    // Rigidbody2D component of that object
    private Rigidbody2D rb;

    // Start is called once when the object is created
    void Start()
    {
        // Find the object by the "Enemy" tag
        enemy = GameObject.FindWithTag("Enemy");

        // Get its Rigidbody2D component
        rb = enemy.GetComponent<Rigidbody2D>();
    }

    // Update is called once per frame
    void Update()
    {
        // Move the enemy to the right by changing its velocity
        rb.linearVelocity = new Vector2(5f, rb.linearVelocity.y);
    }
}
Most components are visible right in the Unity Inspector — convenient!
For example, if an object has a SpriteRenderer, you’ll
see fields for sprite, color, opacity, and the
Flip X/Y checkboxes. If it has a BoxCollider2D,
you’ll see properties like the Is Trigger toggle.
And here’s the important idea: what you see in the Inspector are the component’s public properties. You can control them from code.
using UnityEngine;

public class CSharpScript : MonoBehaviour
{
    // Start is called once when the object is created
    void Start()
    {
        // Enable horizontal sprite flip
        gameObject.GetComponent<SpriteRenderer>().flipX = true;

        // Enable trigger mode on BoxCollider2D
        gameObject.GetComponent<BoxCollider2D>().isTrigger = true;
    }

    // Update is called once per frame
    void Update()
    {

    }
}
💡 The Inspector isn’t magic — it shows you the component’s public properties and fields. Almost everything you see there can also be changed from code.
Working with GetComponent is straightforward, but there
are a few important things to keep in mind.
If the object doesn’t have the needed component,
GetComponent returns null. That can cause an
error if you try to use it immediately. Always check the result:
var rb = GetComponent<Rigidbody2D>();
if (rb != null)
{
    rb.linearVelocity = Vector2.right * 5f;
}
Ideally, make sure the component is there. But if you’re not certain, add a check — it helps avoid unexpected errors while the game is running.
You can call GetComponent at any time, but it’s a bit
slower than using a regular variable. If you need a component often,
get it once in Start() and cache it in a field.
using UnityEngine;

public class CSharpScript : MonoBehaviour
{
    private SpriteRenderer sr;

    // Start is called once when the object is created
    void Start()
    {
        sr = GetComponent<SpriteRenderer>();
    }

    // Update is called once per frame
    void Update()
    {
        sr.flipX = true;
    }
}
💡 The fewer GetComponent calls you make per frame, the
more stable and performant your game will be.
Unity has dozens of components — from AudioSource to
Animator, from Camera to Light.
Here we covered the basics and the general
workflow with components — that’s already enough to
control almost any of them.
You’ll meet other components in lessons where they’re actually needed. We’ll use them gradually and purposefully, so everything stays clear and not overloaded.
💡 The key thing is: you now know how to access them with
GetComponent<ComponentName>(). The rest is
practice.