Welcome to this step-by-step Unity 2D tutorial for beginners! In this lesson, you’ll create a simple city-defense game — City Defender, where your towers stop falling meteors.
You will learn how to:Everything will be done as clearly and simply as possible — step by step, without complex systems or unnecessary code. You’ll only need Unity 6.0 LTS or any version with 2D support. Even if this is your first time opening Unity, this tutorial is perfect for you.
Launch Unity Hub and create a new 2D project using the 2D Core (Built-In Render Pipeline) template — it’s a clean and simple foundation for your first 2D city-defense game.
To do this, open Unity Hub → the Projects tab → New Project. Find the 2D Core (Built-In Render Pipeline) template (it already includes basic 2D graphics and physics). Depending on your Unity version, the name may differ slightly — if you don’t see it, you can safely choose 2D (URP/SRP) or plain 2D.
In the project name field, type CityDefender or any name
you like, then choose a convenient folder for saving. Click
Create project and wait a moment while Unity sets
everything up.
💡 Tip: Use a short project name (for example,
CityDefender) — it helps avoid path errors and keeps your
project structure neat.
First, download the city background image that will serve as the backdrop for your scene.
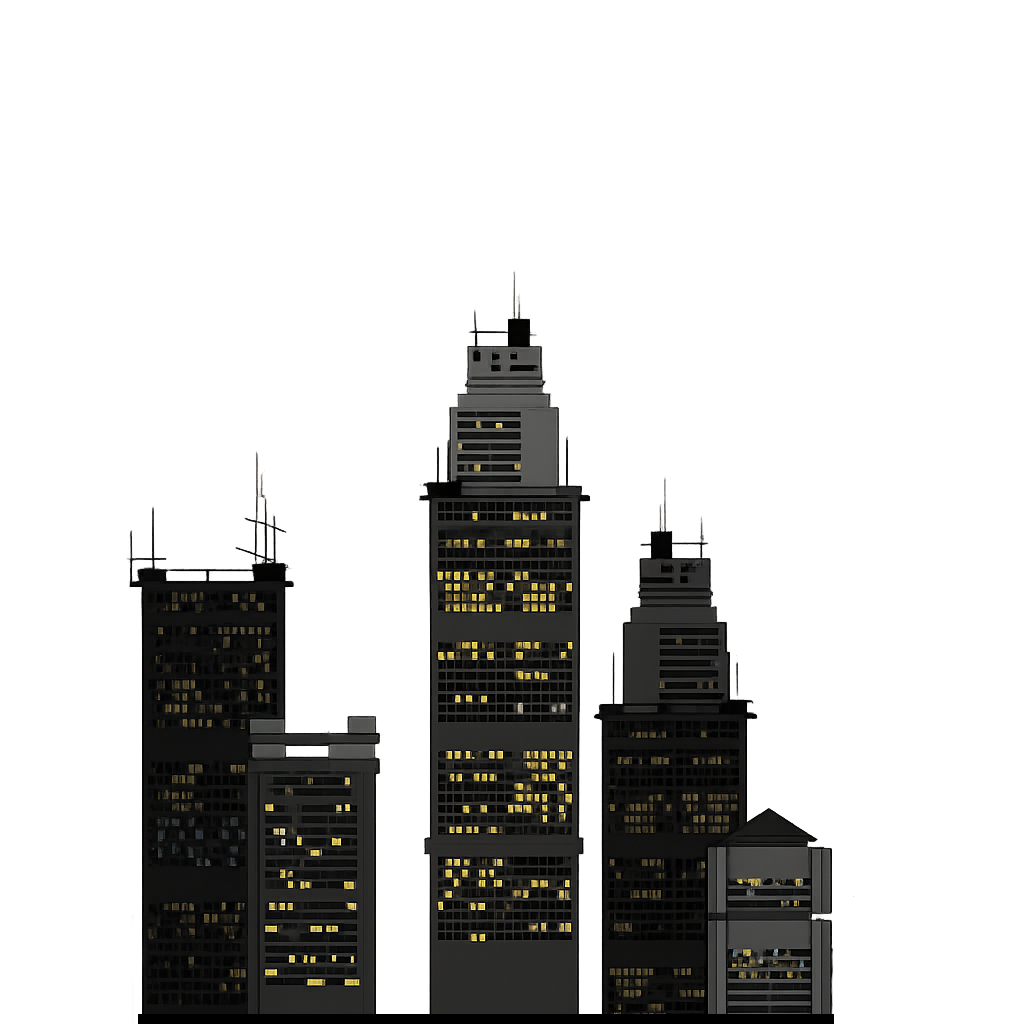
Import the downloaded image into Unity — either through Import New Asset... (right-click in the Assets window) or simply drag the file directly into your project folder.
Then add the city image to the scene: drag it from
Assets to the Scene window. Adjust
the size — for example, set Scale X = 0.5 and
Scale Y = 0.5 so the background isn’t too large.
Rename the object to City so you can easily find it later
in the Hierarchy.
The game will have two types of meteors: small and fast — causing light damage, and large and slow — dealing heavy damage to the city.
Download the meteor images below:
Import the downloaded images into Unity — right-click inside the Assets window and choose Import New Asset..., or simply drag the files directly into your project folder.
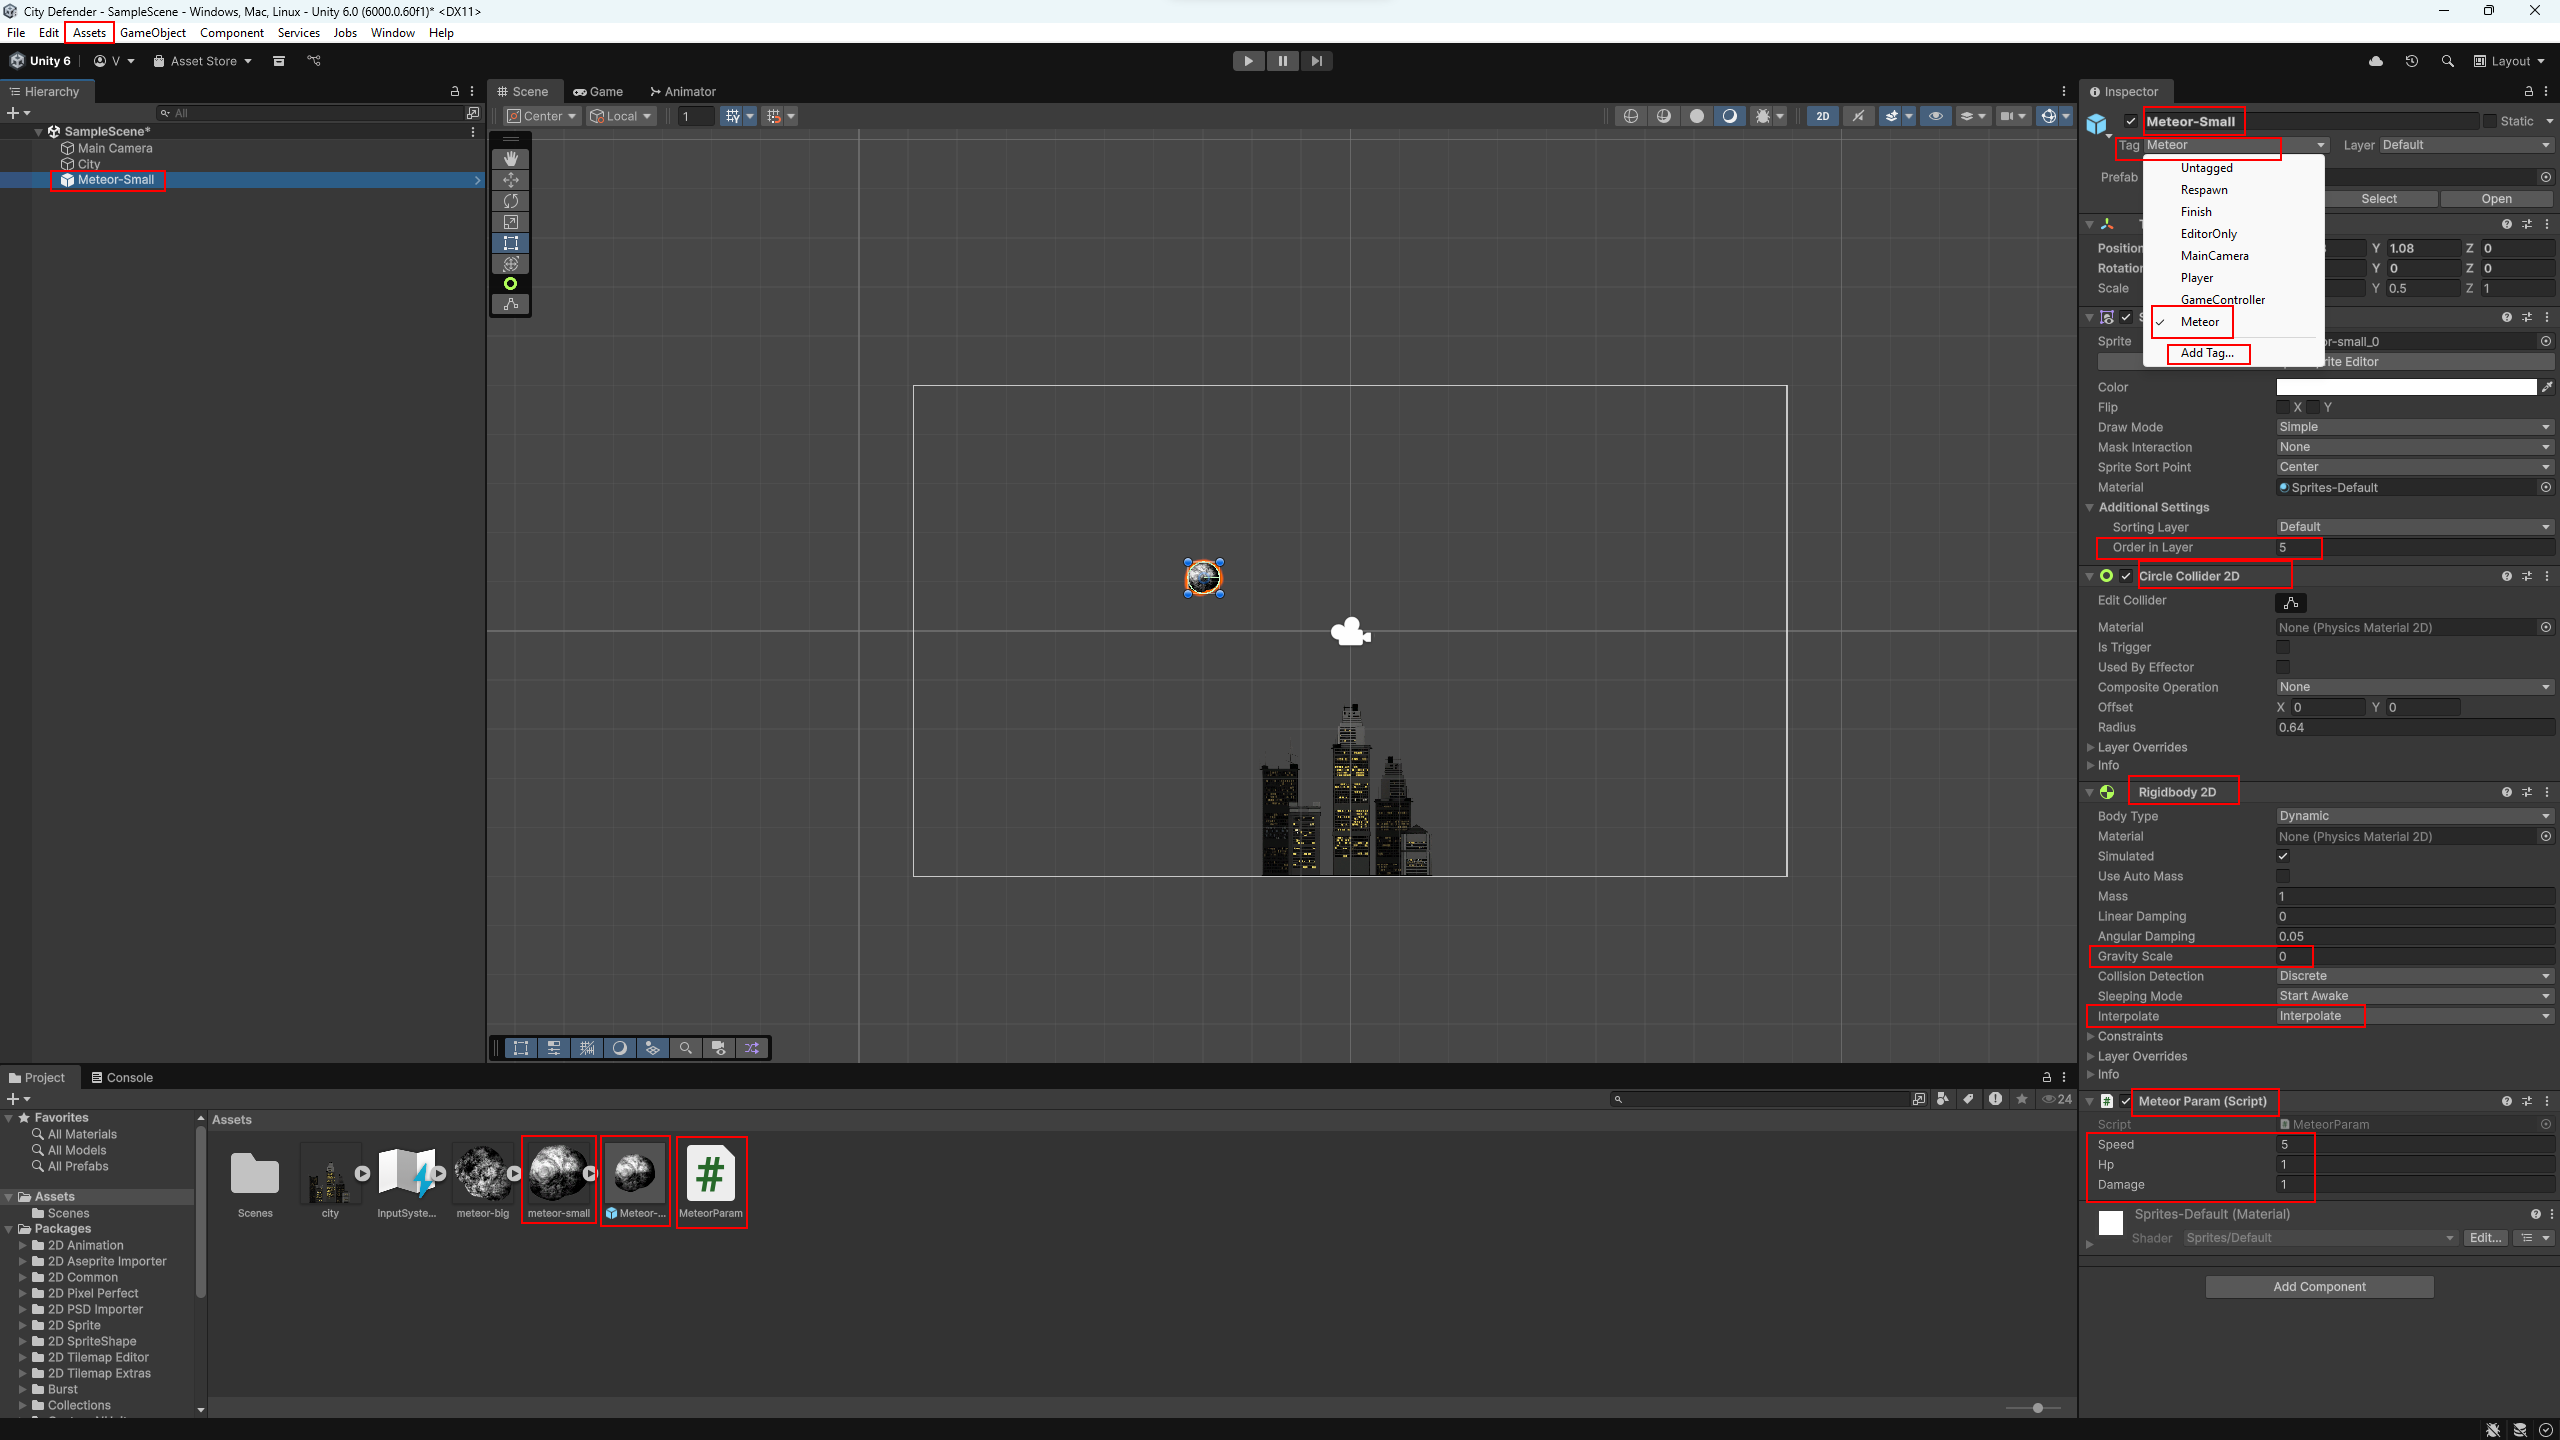
Drag the small meteor image into the scene and name the object
Meteor-Small. Adjust its size — for example,
Scale X = 0.5 and Scale Y = 0.5.
Create a new tag called Meteor and assign it to the small meteor object.
Set Order in Layer so the meteor is drawn
in front of the city background (for example, if
City has 0, set 5 for the
meteor). This keeps it from disappearing behind the background.
Add a Circle Collider 2D (for hit detection) and a Rigidbody 2D (so the meteor participates in physics).
In the Rigidbody 2D component, set Gravity Scale = 0 (we’ll move it manually with a script) and Interpolate = Interpolate for smoother movement.
Next, let’s create a small script to store the meteor’s parameters and
make it auto-destroy after a while (so it doesn’t stay in the scene
forever if it flies off-screen). Create a new
MonoBehaviour script named MeteorParam — the
file name and class name must match.
using UnityEngine;

public class MeteorParam : MonoBehaviour
{
    public float speed;
    public int hp;
    public int damage;

    // The meteor destroys itself after 10 seconds
    // to avoid staying in the scene forever.
    void Start()
    {
        Destroy(gameObject, 10f);
    }
}
Attach the MeteorParam script to the meteor object as a
component. In the Inspector, set:
speed = 5, hp = 1, damage = 1.
Then create a prefab: drag the meteor object from Hierarchy into the Assets folder.
After the prefab is created, you can delete the small meteor from the scene — later, we’ll spawn it from the prefab.
Drag the big meteor image into the scene and name the object
Meteor-Big. Adjust its size — for example,
Scale X = 0.5 and Scale Y = 0.5.
Assign the Meteor tag to the big meteor object.
Set Order in Layer to 5 so the meteor is
drawn in front of the city.
Add a Circle Collider 2D and a Rigidbody 2D.
In the Rigidbody 2D component, set Gravity Scale = 0 and Interpolate = Interpolate for smooth movement.
Attach the MeteorParam script to the meteor object as a
component. In the Inspector, set the parameters:
speed = 2, hp = 10,
damage = 10.
Create a prefab: drag the meteor object from the Hierarchy into the Assets folder. After that, you can delete the big meteor from the scene — later it will be spawned from the prefab.

Create an empty object in the scene (Create Empty), name it
MeteorSpawner, and place it above the center of the
screen (slightly above the visible area). Inside it, create two more
empty objects and position them to the left and right respectively:
name them leftBound and rightBound. Make
sure all three objects have Z = 0.
Now let’s write a script that will: pick a random X position between the bounds, spawn small and big meteors at different intervals, and set their flight direction toward the city (big ones — directly at the city, small ones — to a random point above the city line).
Create a new MonoBehaviour script and name it
MeteorSpawner:
using UnityEngine;

public class MeteorSpawner : MonoBehaviour
{
    // spawn bounds and the city object to aim at
    public Transform leftBound, rightBound, city;

    // meteor prefabs
    public GameObject smallMeteorPrefab, bigMeteorPrefab;

    // intervals and initial delays
    public float smallRepeat = 1f, bigRepeat = 5f;
    public float startDelaySmall = 1f, startDelayBig = 5f;

    void Start()
    {
        // Unity will call these spawn methods periodically
        InvokeRepeating(nameof(SpawnSmall), startDelaySmall, smallRepeat);
        InvokeRepeating(nameof(SpawnBig),   startDelayBig,   bigRepeat);
    }

    // spawn a small meteor
    void SpawnSmall()
    {
        // random X between the left and right bounds
        float xPos = Random.Range(leftBound.position.x, rightBound.position.x);
        Vector3 pos = new Vector3(xPos, transform.position.y, 0f);

        // create the meteor
        var go = Instantiate(smallMeteorPrefab, pos, Quaternion.identity);

        // target: random X across the width, Y at city level
        float xTarget = Random.Range(leftBound.position.x, rightBound.position.x);
        Vector3 target = new Vector3(xTarget, city.position.y, 0f);

        // normalize the direction vector so length = 1 (speed is set separately)
        Vector3 dir = (target - pos).normalized;

        // get components and set velocity
        var mp = go.GetComponent<MeteorParam>();
        var rb = go.GetComponent<Rigidbody2D>();
        if (rb != null && mp != null)
            rb.linearVelocity = dir * mp.speed;
    }

    // spawn a big meteor
    void SpawnBig()
    {
        float xPos = Random.Range(leftBound.position.x, rightBound.position.x);
        Vector3 pos = new Vector3(xPos, transform.position.y, 0f);

        var go = Instantiate(bigMeteorPrefab, pos, Quaternion.identity);

        // big meteors aim at the center of the city
        Vector3 target = city.position;
        Vector3 dir = (target - pos).normalized;

        var mp = go.GetComponent<MeteorParam>();
        var rb = go.GetComponent<Rigidbody2D>();
        if (rb != null && mp != null)
            rb.linearVelocity = dir * mp.speed;
    }
}
Attach the MeteorSpawner script to the
MeteorSpawner object. In the Inspector,
fill in the fields: drag leftBound,
rightBound, and the City object into the
respective references, and assign the
smallMeteorPrefab and
bigMeteorPrefab prefabs. To start, keep the default
values: smallRepeat = 1, bigRepeat = 5,
startDelaySmall = 1, startDelayBig = 5.
💡 Tip: If the meteors “tear” or jitter on screen,
make sure their Rigidbody2D has
Interpolate = Interpolate and
Gravity Scale = 0 (we move them manually via
linearVelocity).
Play the scene — meteors should fall chaotically toward the city: small ones more often and faster, big ones less often and slower.

MeteorSpawner object with child bounds
leftBound and rightBound, plus assigned
prefabs and references in the Inspector.
Right now meteors just pass through the city. Let’s add hit detection and reduce the city’s health on impact. We’ll use collision handling via a Trigger.
Select the City object in the scene and add a Box Collider 2D to it. This won’t perfectly match the city silhouette, but a simple, clear setup is more important here than absolute precision.
Adjust the collider size so it covers the lower part of the buildings, and enable the Is Trigger checkbox.
Now create a script that tracks the city’s health and restarts the
scene if the city is destroyed. Create a new
MonoBehaviour script named CityDefense.
using UnityEngine;
// needed for reloading the scene
using UnityEngine.SceneManagement;

public class CityDefense : MonoBehaviour
{
    // city health
    public int hp = 30;

    // called when another 2D collider enters the trigger
    void OnTriggerEnter2D(Collider2D other)
    {
        // if it isn't a meteor — exit
        if (!other.CompareTag("Meteor")) return;

        // get the meteor parameter component
        MeteorParam mp = other.GetComponent<MeteorParam>();

        // if parameters exist — apply damage
        if (mp != null)
        {
            int dmg = mp.damage;
            hp -= dmg;
            // destroy the meteor after the collision
            Destroy(other.gameObject);
        }

        // if health is gone — reload the scene
        if (hp <= 0)
        {
            hp = 0;
            string currentScene = SceneManager.GetActiveScene().name;
            SceneManager.LoadScene(currentScene);
        }
    }
}
Attach the CityDefense script to the
City
object. Now meteors will deal damage on impact, and when health
reaches zero, the scene will restart.
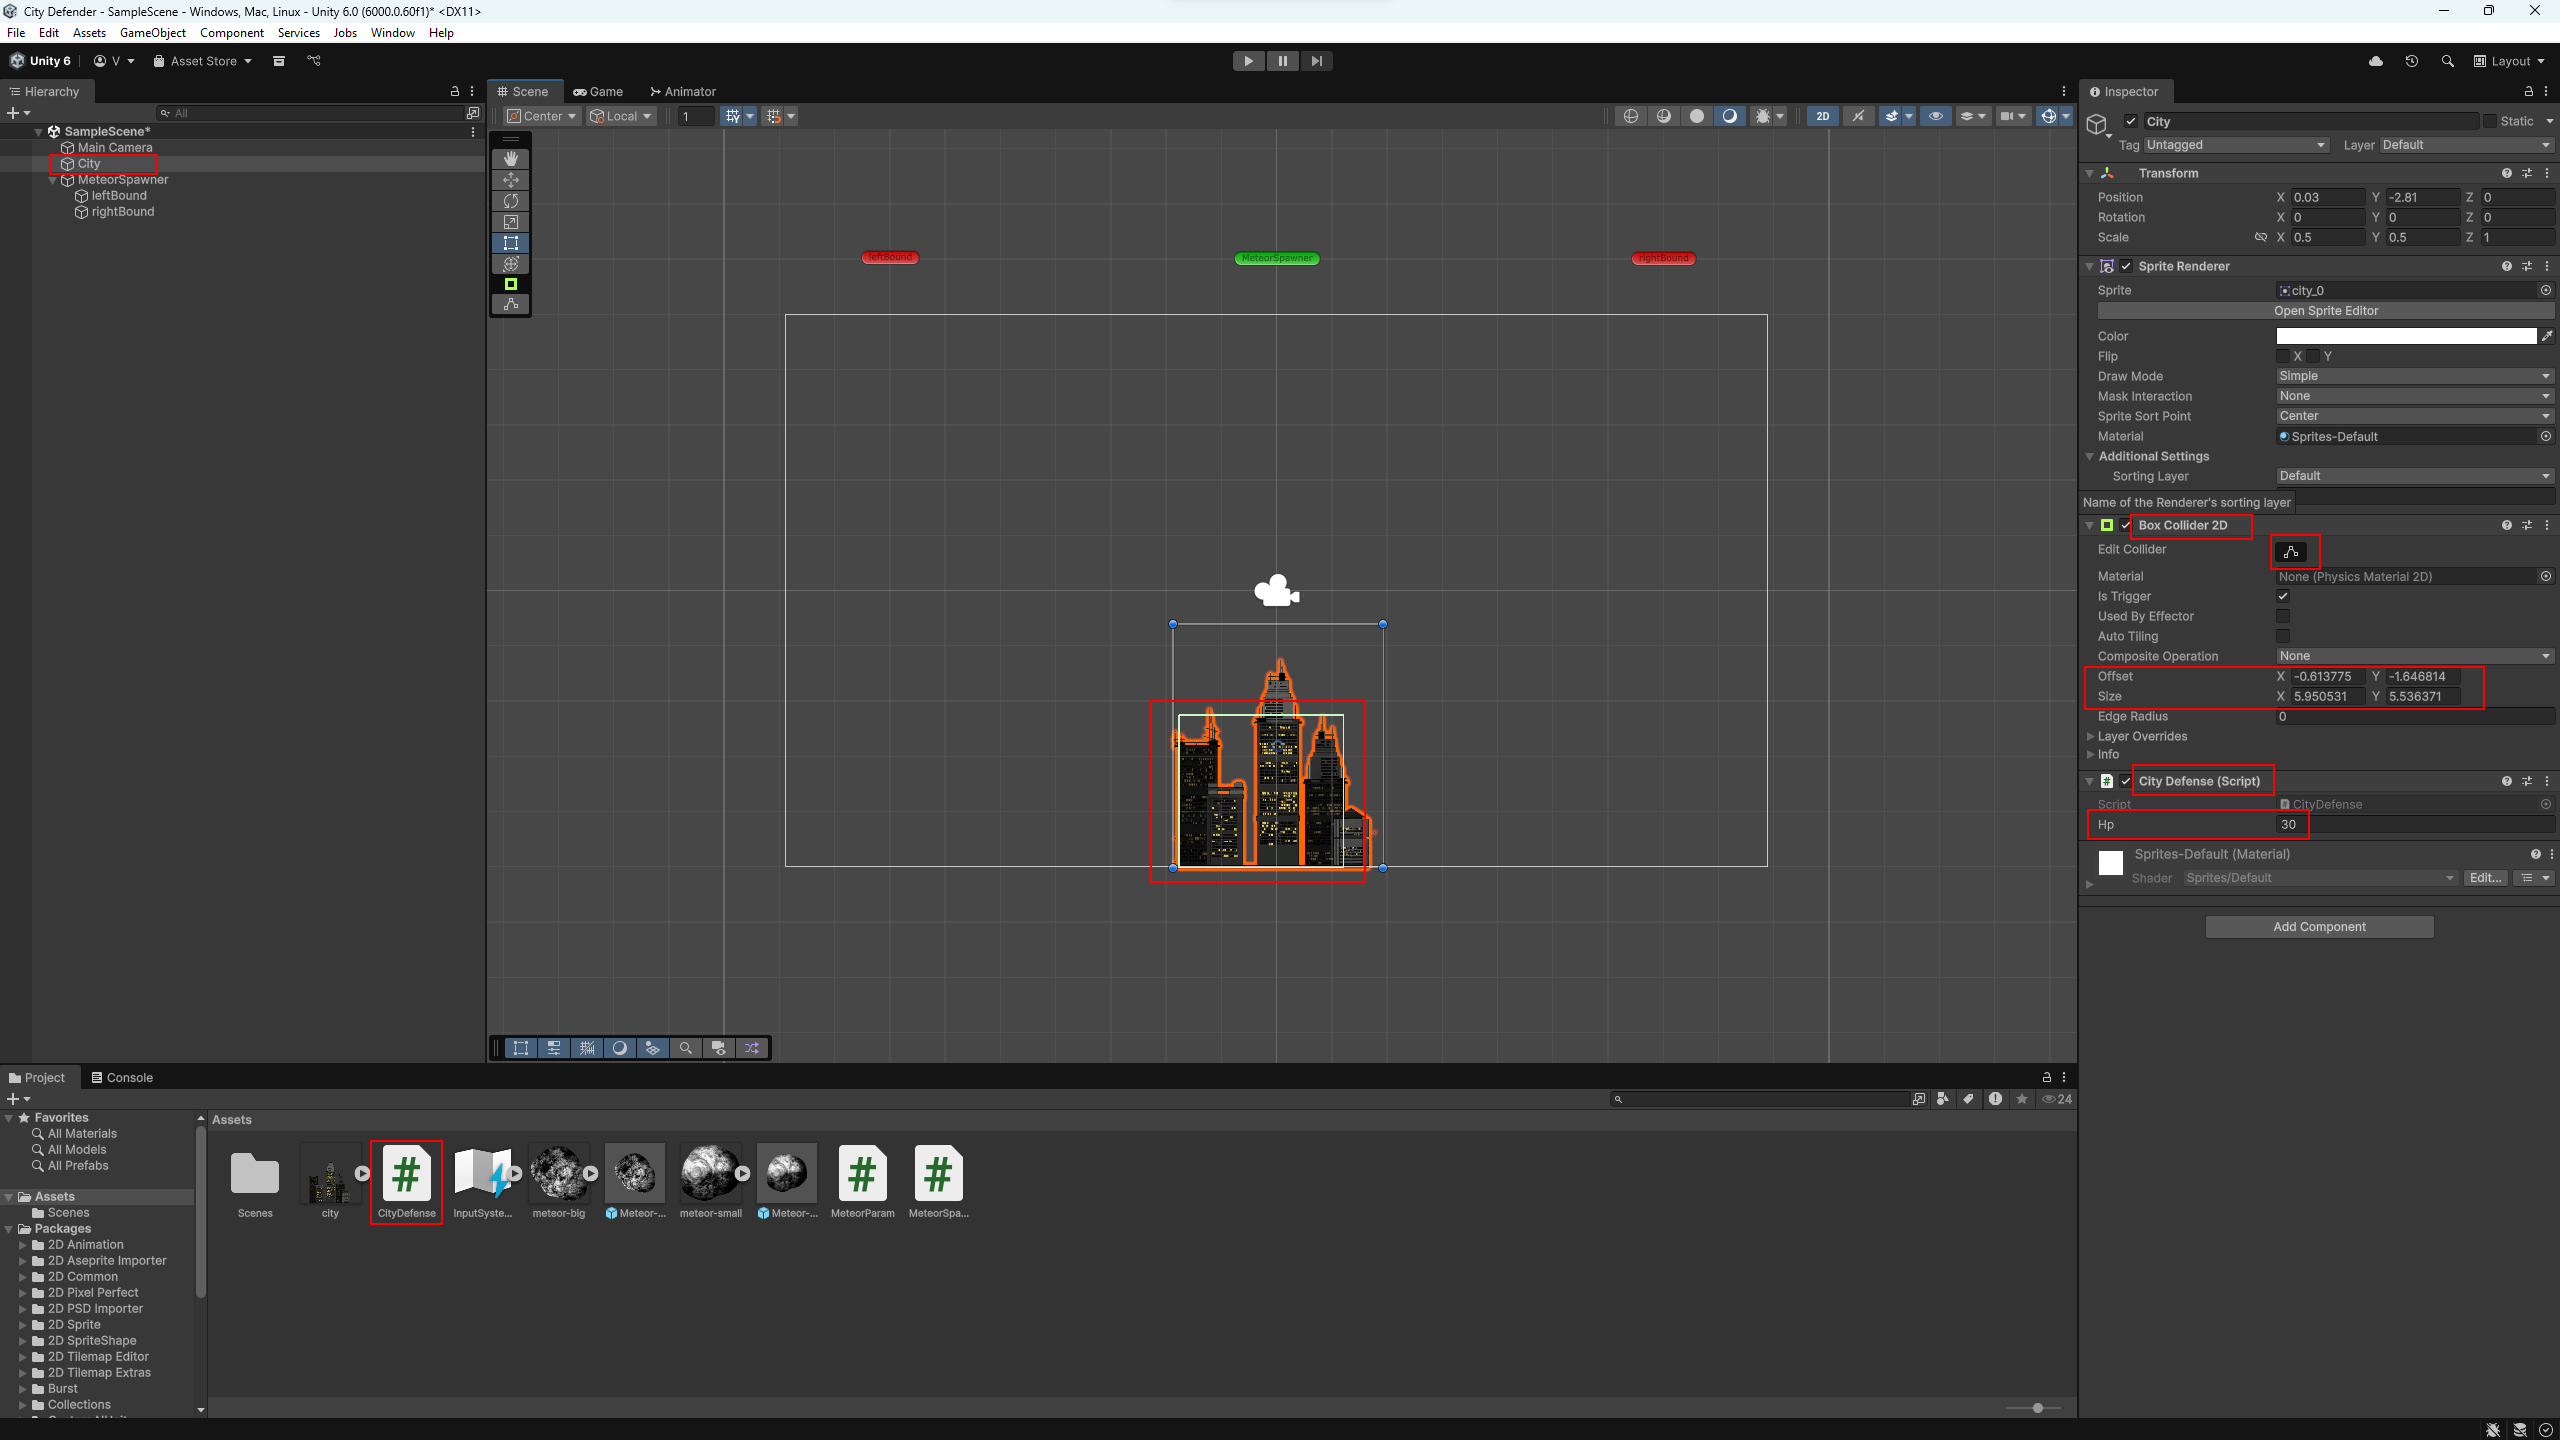
City object with a
Box Collider 2D and the
CityDefense script.
Meteors currently fall and destroy the city — time to build defenses! Let’s start with a laser tower. It will fire quickly and accurately at single targets, dealing small damage. This is your first line of defense, designed to quickly eliminate weak and fast meteors.
Download the laser tower image:
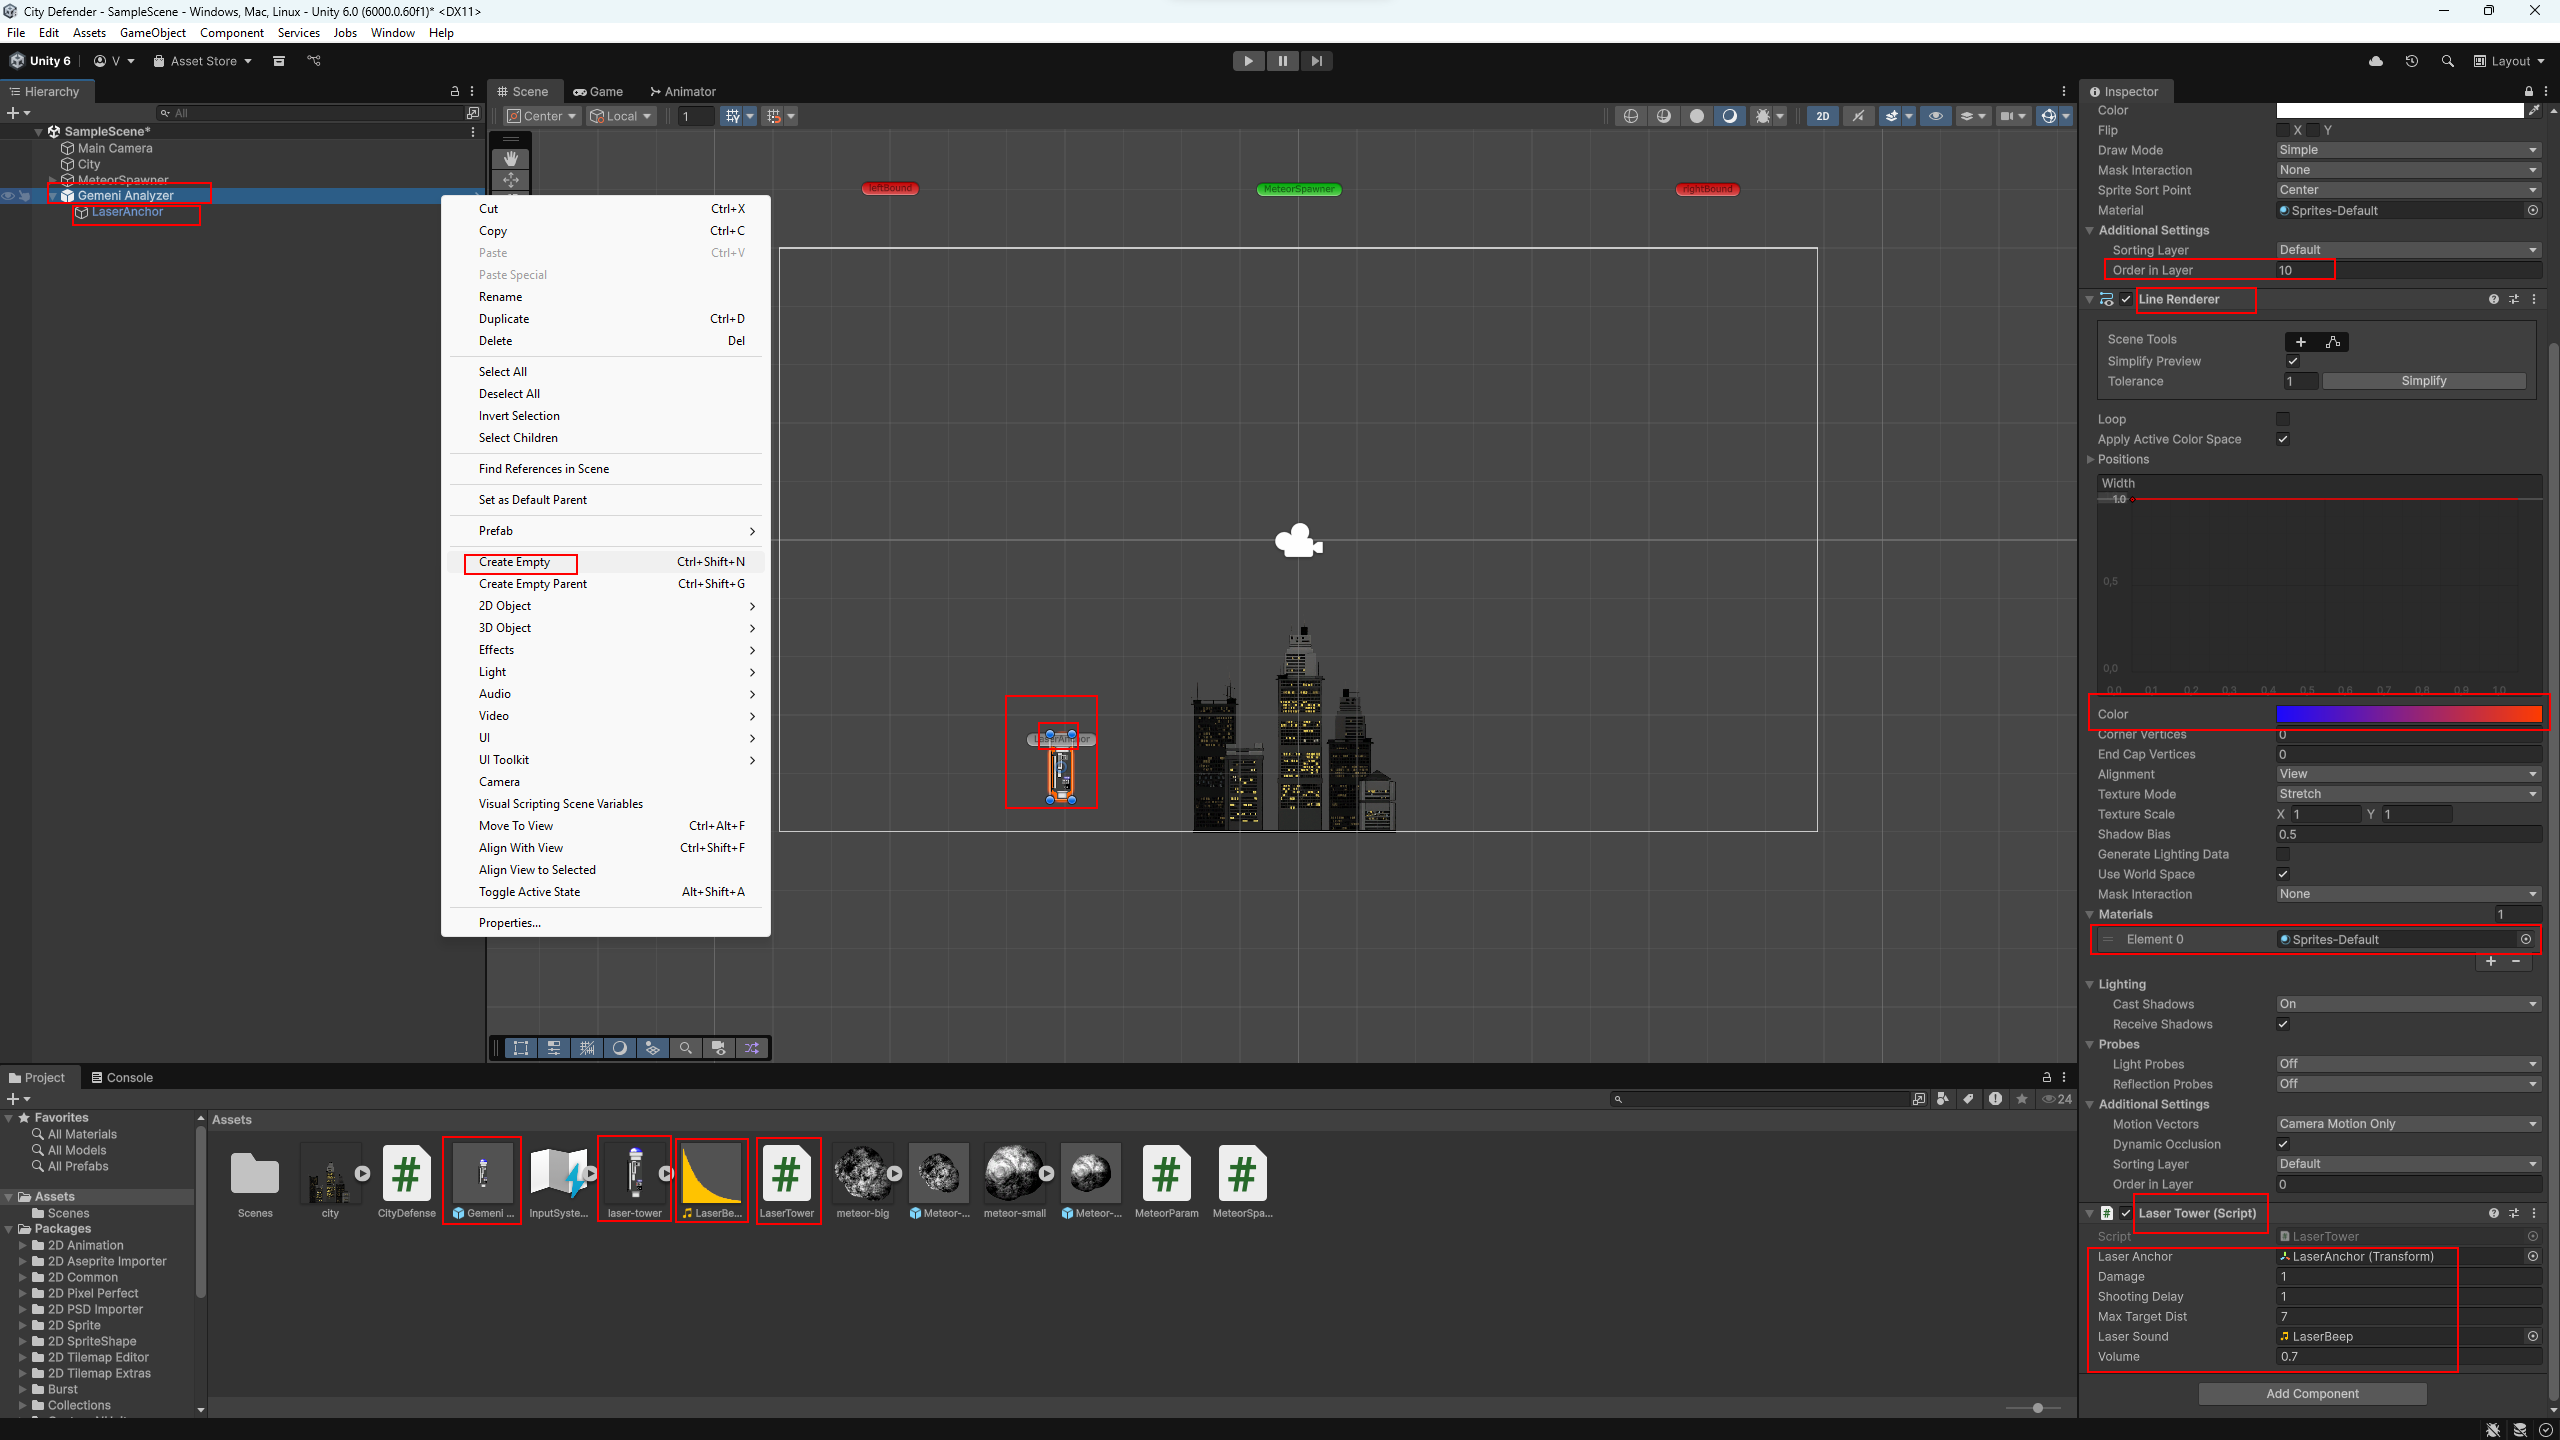
Import the tower image into Unity. Then create a laser tower object in
the scene — simply drag its sprite from Assets into
the Scene window. Name the tower, for example,
Gemeni Analyzer. Scale it (e.g., X = 0.5,
Y = 0.5) and set Order in Layer to
10 so it renders above the city.
For the firing effect we’ll use a Line Renderer. Add
it to the tower object and set the line color as you like. For
Material choose Sprites-Default.
Now add the point from which the laser will originate. Create a child
object (right-click the tower → Create Empty) and name it
LaserAnchor. Move it onto the tower’s lens and make sure
its Z = 0.
Create a new MonoBehaviour script named
LaserTower and attach it to the tower. Here’s the code:
using System.Collections;
using UnityEngine;

// Require a LineRenderer on this object
[RequireComponent(typeof(LineRenderer))]
public class LaserTower : MonoBehaviour
{
    public Transform laserAnchor;      // The point where the beam starts
    public int damage = 1;             // Damage per shot
    public float shootingDelay = 1f;   // Delay between shots
    public float maxTargetDist = 7f;   // Attack radius (in units)
    public AudioClip laserSound;       // laser SFX file
    public float volume = 0.7f;        // volume

    private LineRenderer lr;

    void Awake()
    {
        lr = GetComponent<LineRenderer>();

        // If no fire point is assigned — use the tower object itself
        if (laserAnchor == null) laserAnchor = transform;

        // Basic line settings so the beam is visible
        lr.useWorldSpace = true;
        lr.positionCount = 0;
        lr.startWidth = lr.endWidth = 0.06f;
        lr.sortingOrder = 5;
    }

    void Start()
    {
        // Periodically search for targets and fire
        InvokeRepeating(nameof(TargetSearchAndShoot), 1f, shootingDelay);
    }

    void TargetSearchAndShoot()
    {
        // 1) Find all meteors by the "Meteor" tag
        GameObject[] meteors = GameObject.FindGameObjectsWithTag("Meteor");
        if (meteors.Length == 0) return;

        // 2) Pick the nearest one within the radius
        GameObject best = null;
        float bestSqr = maxTargetDist * maxTargetDist;
        Vector3 myPos = transform.position;

        foreach (GameObject m in meteors)
        {
            if (m == null) continue;
            float sqr = (m.transform.position - myPos).sqrMagnitude;
            if (sqr <= bestSqr)
            {
                best = m;
                bestSqr = sqr; // found a closer one — update distance
            }
        }

        if (best == null) return;

        // 3) Visual shot — a short line flash
        StartCoroutine(FlashLine(laserAnchor.position, best.transform.position));
        // play the sound at the camera position
        if (laserSound != null)
            AudioSource.PlayClipAtPoint(laserSound, Camera.main.transform.position, volume);

        // 4) Reduce the meteor's health via MeteorParam
        var mp = best.GetComponent<MeteorParam>();
        if (mp != null)
        {
            mp.hp -= damage;
            if (mp.hp <= 0)
                Destroy(best);
        }
    }

    // Briefly enable and disable the laser line
    IEnumerator FlashLine(Vector3 start, Vector3 end)
    {
        lr.positionCount = 2;
        lr.SetPosition(0, start);
        lr.SetPosition(1, end);
        yield return new WaitForSeconds(0.05f);
        lr.positionCount = 0;
    }
}
In the Inspector, assign the LaserAnchor object to
the script’s laserAnchor field.
You can also add a laser sound to make the shot feel
more alive. Download the file
🎵 LaserBeep.
Import it into Unity (via Assets → Import New Asset...) and
assign it to the laserSound field.
Create a tower prefab by dragging the object from the scene into the Assets folder. Now test it: play the scene — the tower will automatically search for nearby meteors and shoot them. After testing, you can remove the tower from the scene since you already have a prefab.
LaserTower script.
We already have a tower against small meteors. Now let’s make a high-damage tower for large targets. This will be a rocket launcher: it fires rarely but hits hard. First we’ll create the missile itself — it will receive a target and use homing to fly toward it.
Download the missile image:
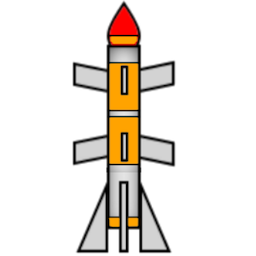
Import the missile image into Unity. Create a new object by dragging
the missile sprite from Assets into the
Scene window. Name the object Missile.
Scale it to about X = 0.2, Y = 0.2, and set
Order in Layer to 5.
Add a Box Collider 2D and enable Is Trigger. Then add a Rigidbody 2D and set:
0 (the missile doesn’t
fall);
Continuous (better for fast objects);
Interpolate (smoother
motion).
To control the missile, we’ll create a simple script. The missile flies forward relative to itself and smoothly rotates toward the target. The rocket tower will assign the target when launching the missile.
Create a new MonoBehaviour script named
MissileMove and paste in the code:
using UnityEngine;

public class MissileMove : MonoBehaviour
{
    // Missile target (assigned by the tower on spawn)
    public GameObject target;

    public float speed = 7f;             // flight speed
    public float rotationSpeed = 100f;   // turning speed (deg/sec)
    public int damage = 100;             // damage on hit
    public float lifeTime = 5f;          // self-destruction time (sec)

    private Rigidbody2D rb;

    void Start()
    {
        rb = GetComponent<Rigidbody2D>();
        // safety: if the missile hits nothing, it will disappear
        Destroy(gameObject, lifeTime);
    }

    void Update()
    {
        if (target == null) return; // the target might have been destroyed

        // direction to the target
        Vector3 dir = target.transform.position - transform.position;

        // desired rotation toward the target (in 2D the camera looks along Z)
        Quaternion targetRot = Quaternion.LookRotation(Vector3.forward, dir);

        // smoothly rotate the missile toward the target
        transform.rotation = Quaternion.RotateTowards(
            transform.rotation,
            targetRot,
            rotationSpeed * Time.deltaTime
        );
    }

    void FixedUpdate()
    {
        // move forward along the sprite's local "up" axis (transform.up)
        rb.linearVelocity = transform.up * speed;
    }

    void OnTriggerEnter2D(Collider2D collision)
    {
        if (collision.CompareTag("Meteor"))
        {
            var mp = collision.GetComponent<MeteorParam>();
            if (mp != null)
            {
                mp.hp -= damage;
                if (mp.hp <= 0)
                    Destroy(collision.gameObject);
            }

            // destroy the missile after the hit
            Destroy(gameObject);
        }
    }
}
Add the MissileMove script as a component to the
Missile object. Then create a
missile prefab by dragging the object from the scene
into the Assets
folder. Once the prefab is ready, you can delete the missile from the
scene.
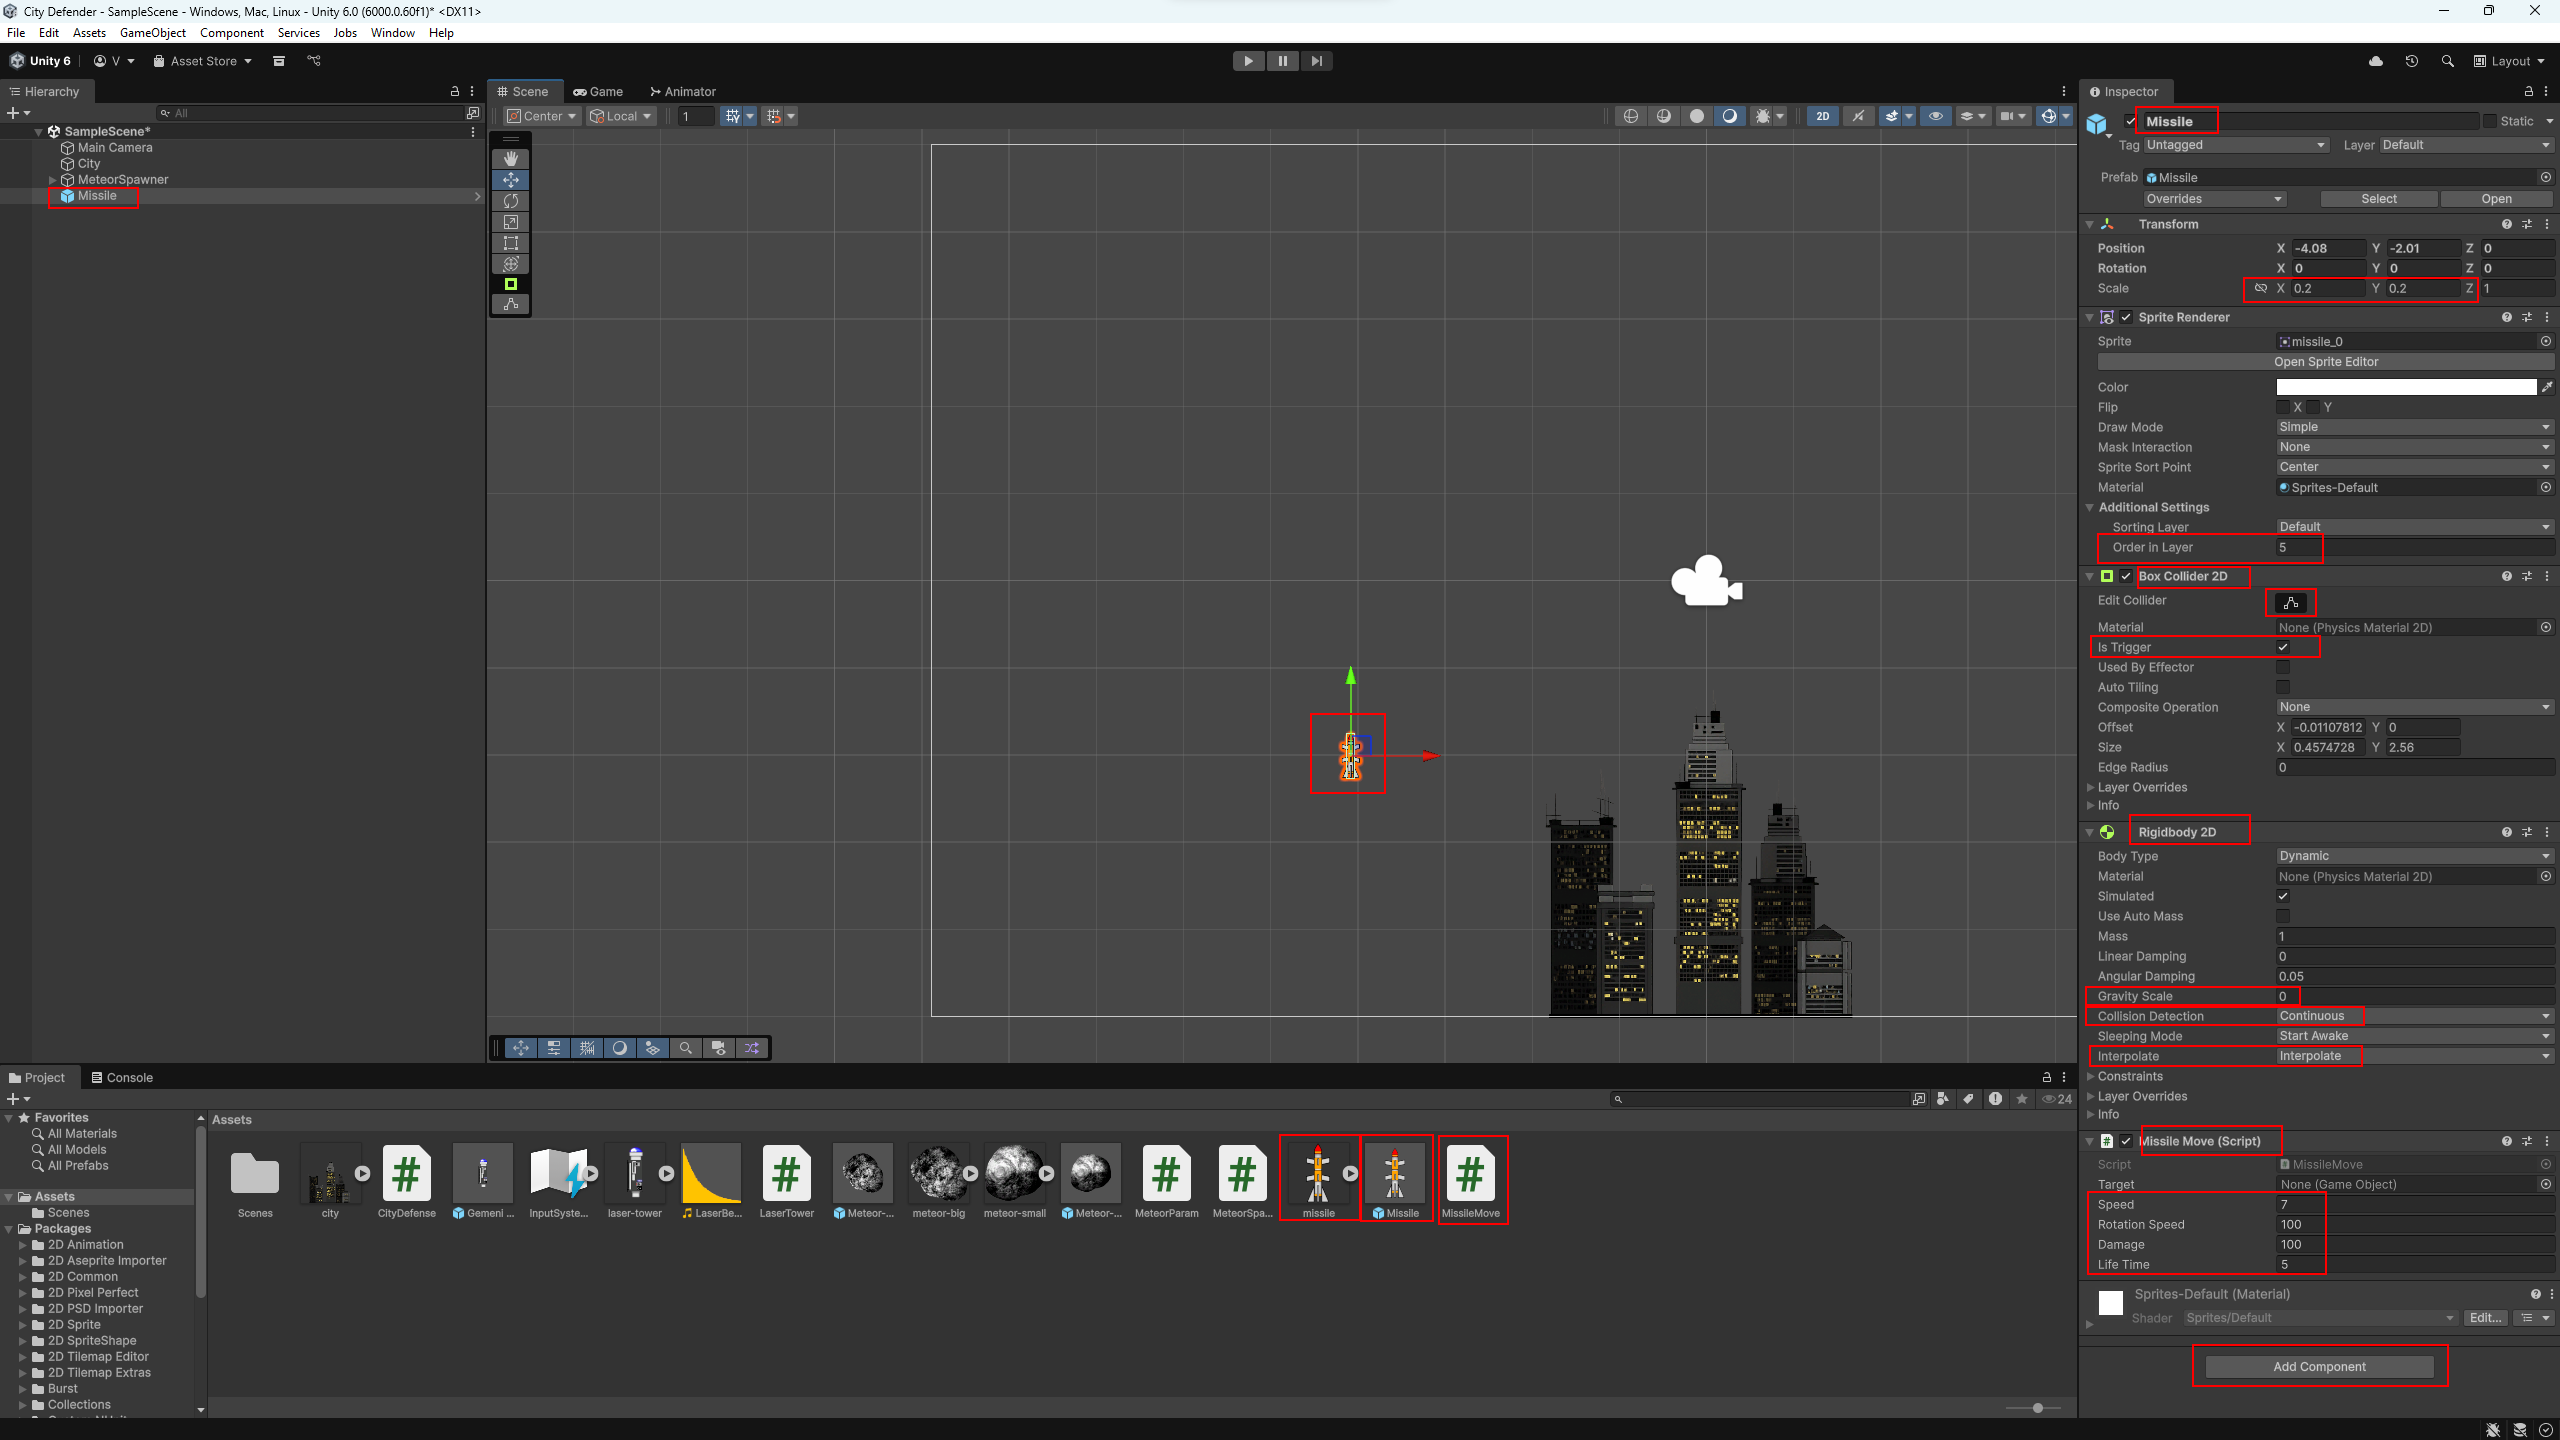
MissileMove script.
Done! In the next step we’ll create the rocket tower that launches these missiles at selected targets.
Now let’s add a rocket tower to handle large, tanky targets. This tower fires less frequently but deals high damage and, most importantly, it prioritizes meteors that have a high health pool (HP).
Download the tower image:
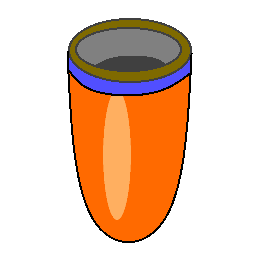
Import the image into Unity. Create a tower object by dragging the
sprite into the Scene window and name it, for
example, Kiava Flow. Scale it to about
X = 0.5, Y = 0.5, and set
Order in Layer to 10 so it renders above
the rocket.
Create a new MonoBehaviour script named
MissileTower. In this script, the tower will look for
“big” meteors (by HP) within a radius and launch a missile at them.
using UnityEngine;

public class MissileTower : MonoBehaviour
{
    // Maximum detection distance for meteors
    public float maxTargetDist = 10f;

    // HP threshold to treat a meteor as "big"
    public int minHpForMissile = 5;

    // Missile prefab (created beforehand in Assets)
    public GameObject missilePrefab;

    // Delay between shots (sec)
    public float shootingDelay = 1f;

    // Missile launch sound
    public AudioClip missileSound;
    public float volume = 0.7f; // volume 0..1

    void Start()
    {
        // Periodically fire
        InvokeRepeating(nameof(ShootBig), 1f, shootingDelay);
    }

    void ShootBig()
    {
        // Find all meteors by tag
        GameObject[] mets = GameObject.FindGameObjectsWithTag("Meteor");

        GameObject best = null;
        float bestSqr = maxTargetDist * maxTargetDist;
        Vector3 p = transform.position;

        foreach (var m in mets)
        {
            if (m == null) continue;
            var mp = m.GetComponent<MeteorParam>();
            if (mp == null) continue;

            // Take only "big" ones by current HP
            if (mp.hp < minHpForMissile) continue;

            float sqr = (m.transform.position - p).sqrMagnitude;
            if (sqr <= bestSqr)
            {
                best = m;
                bestSqr = sqr;
            }
        }

        if (best == null) return;

        // Launch a missile from the tower's center
        var missile = Instantiate(missilePrefab, transform.position, Quaternion.identity);

        // Assign the meteor as the missile's target
        missile.GetComponent<MissileMove>().target = best;

        // Play launch sound
        if (missileSound != null)
            AudioSource.PlayClipAtPoint(missileSound, Camera.main.transform.position, volume);
    }
}
Add the MissileTower script as a component to the tower
object.
Download a rocket launch sound:
🎵 Boom. Import it
into Unity and assign it to the missileSound field.
In the tower’s Inspector, fill in the fields: drag the missile prefab
into
missilePrefab and add the sound to
missileSound. After testing, create a
tower prefab by dragging the object from the scene
into Assets.
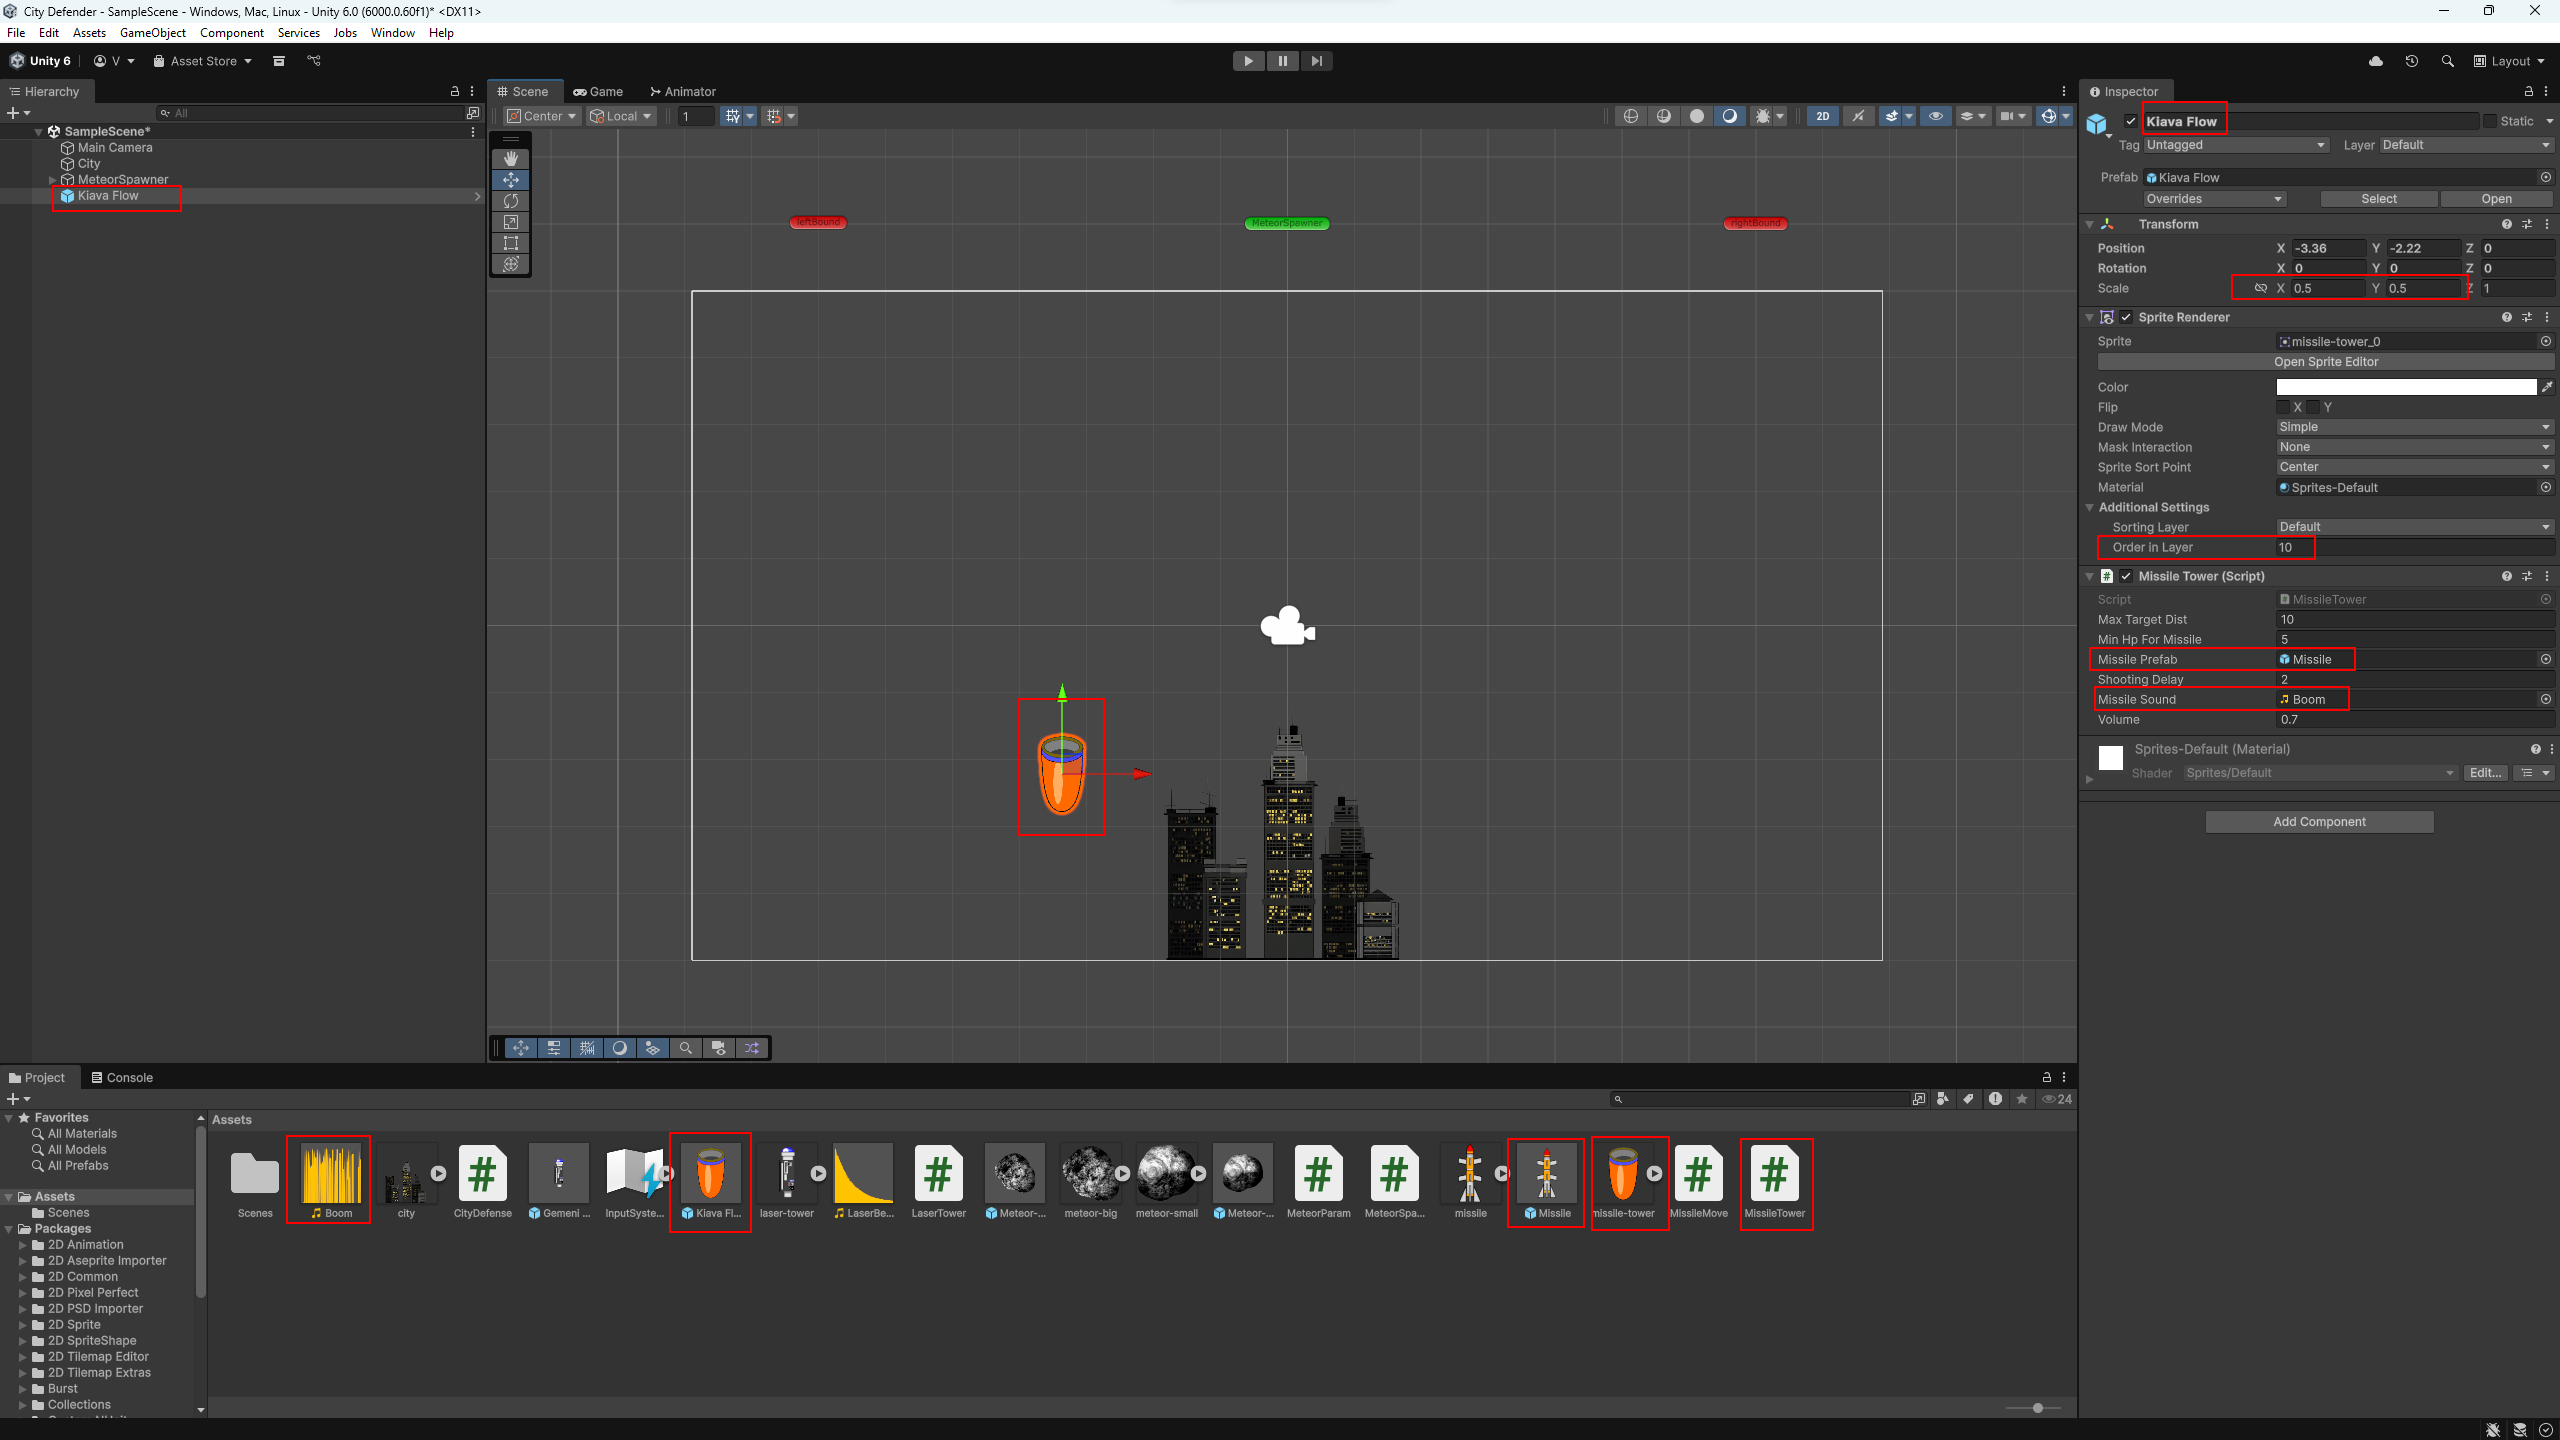
MissileTower component.
Now let’s create stands where the player can place towers. They serve as placement points and help control where towers are installed.
Download the stand image:
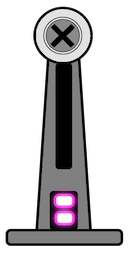
Import the image into Unity and create a game object from it — simply
drag the stand sprite into the Scene window. Name the
object Stand.
Next, add a new tag Stand and assign it to the stand (Inspector → Tag → Add Tag... → Stand). This tag will later be used to detect stands when placing towers with mouse clicks.
To ensure meteors don’t collide with the stands, create a separate physics layer:
Stand.
Then open the project settings:
Edit → Project Settings → Physics 2D. In the
Layer Collision Matrix, uncheck collisions between
Default and Stand. 💡 Now meteors will
simply fly through the stands without colliding with them.
To make the tower snap exactly into position, adjust the sprite’s Pivot slightly:
Set Order in Layer to 5 so the stand is
drawn below the towers. Add a Box Collider 2D — it
will be used to select the stand with a mouse click when placing
towers.
Now create a stand prefab: drag the object from the scene into the Assets folder. After that, place several stands in the scene — for example, five of them in a row.
💡 If you place a stand in front of the city, make
sure it isn’t overlapped by other colliders. To avoid this, you can
nudge the stand slightly along the Z axis — set a small
negative value (for example, -0.1). This brings it
forward in the scene’s layering without affecting 2D rendering.
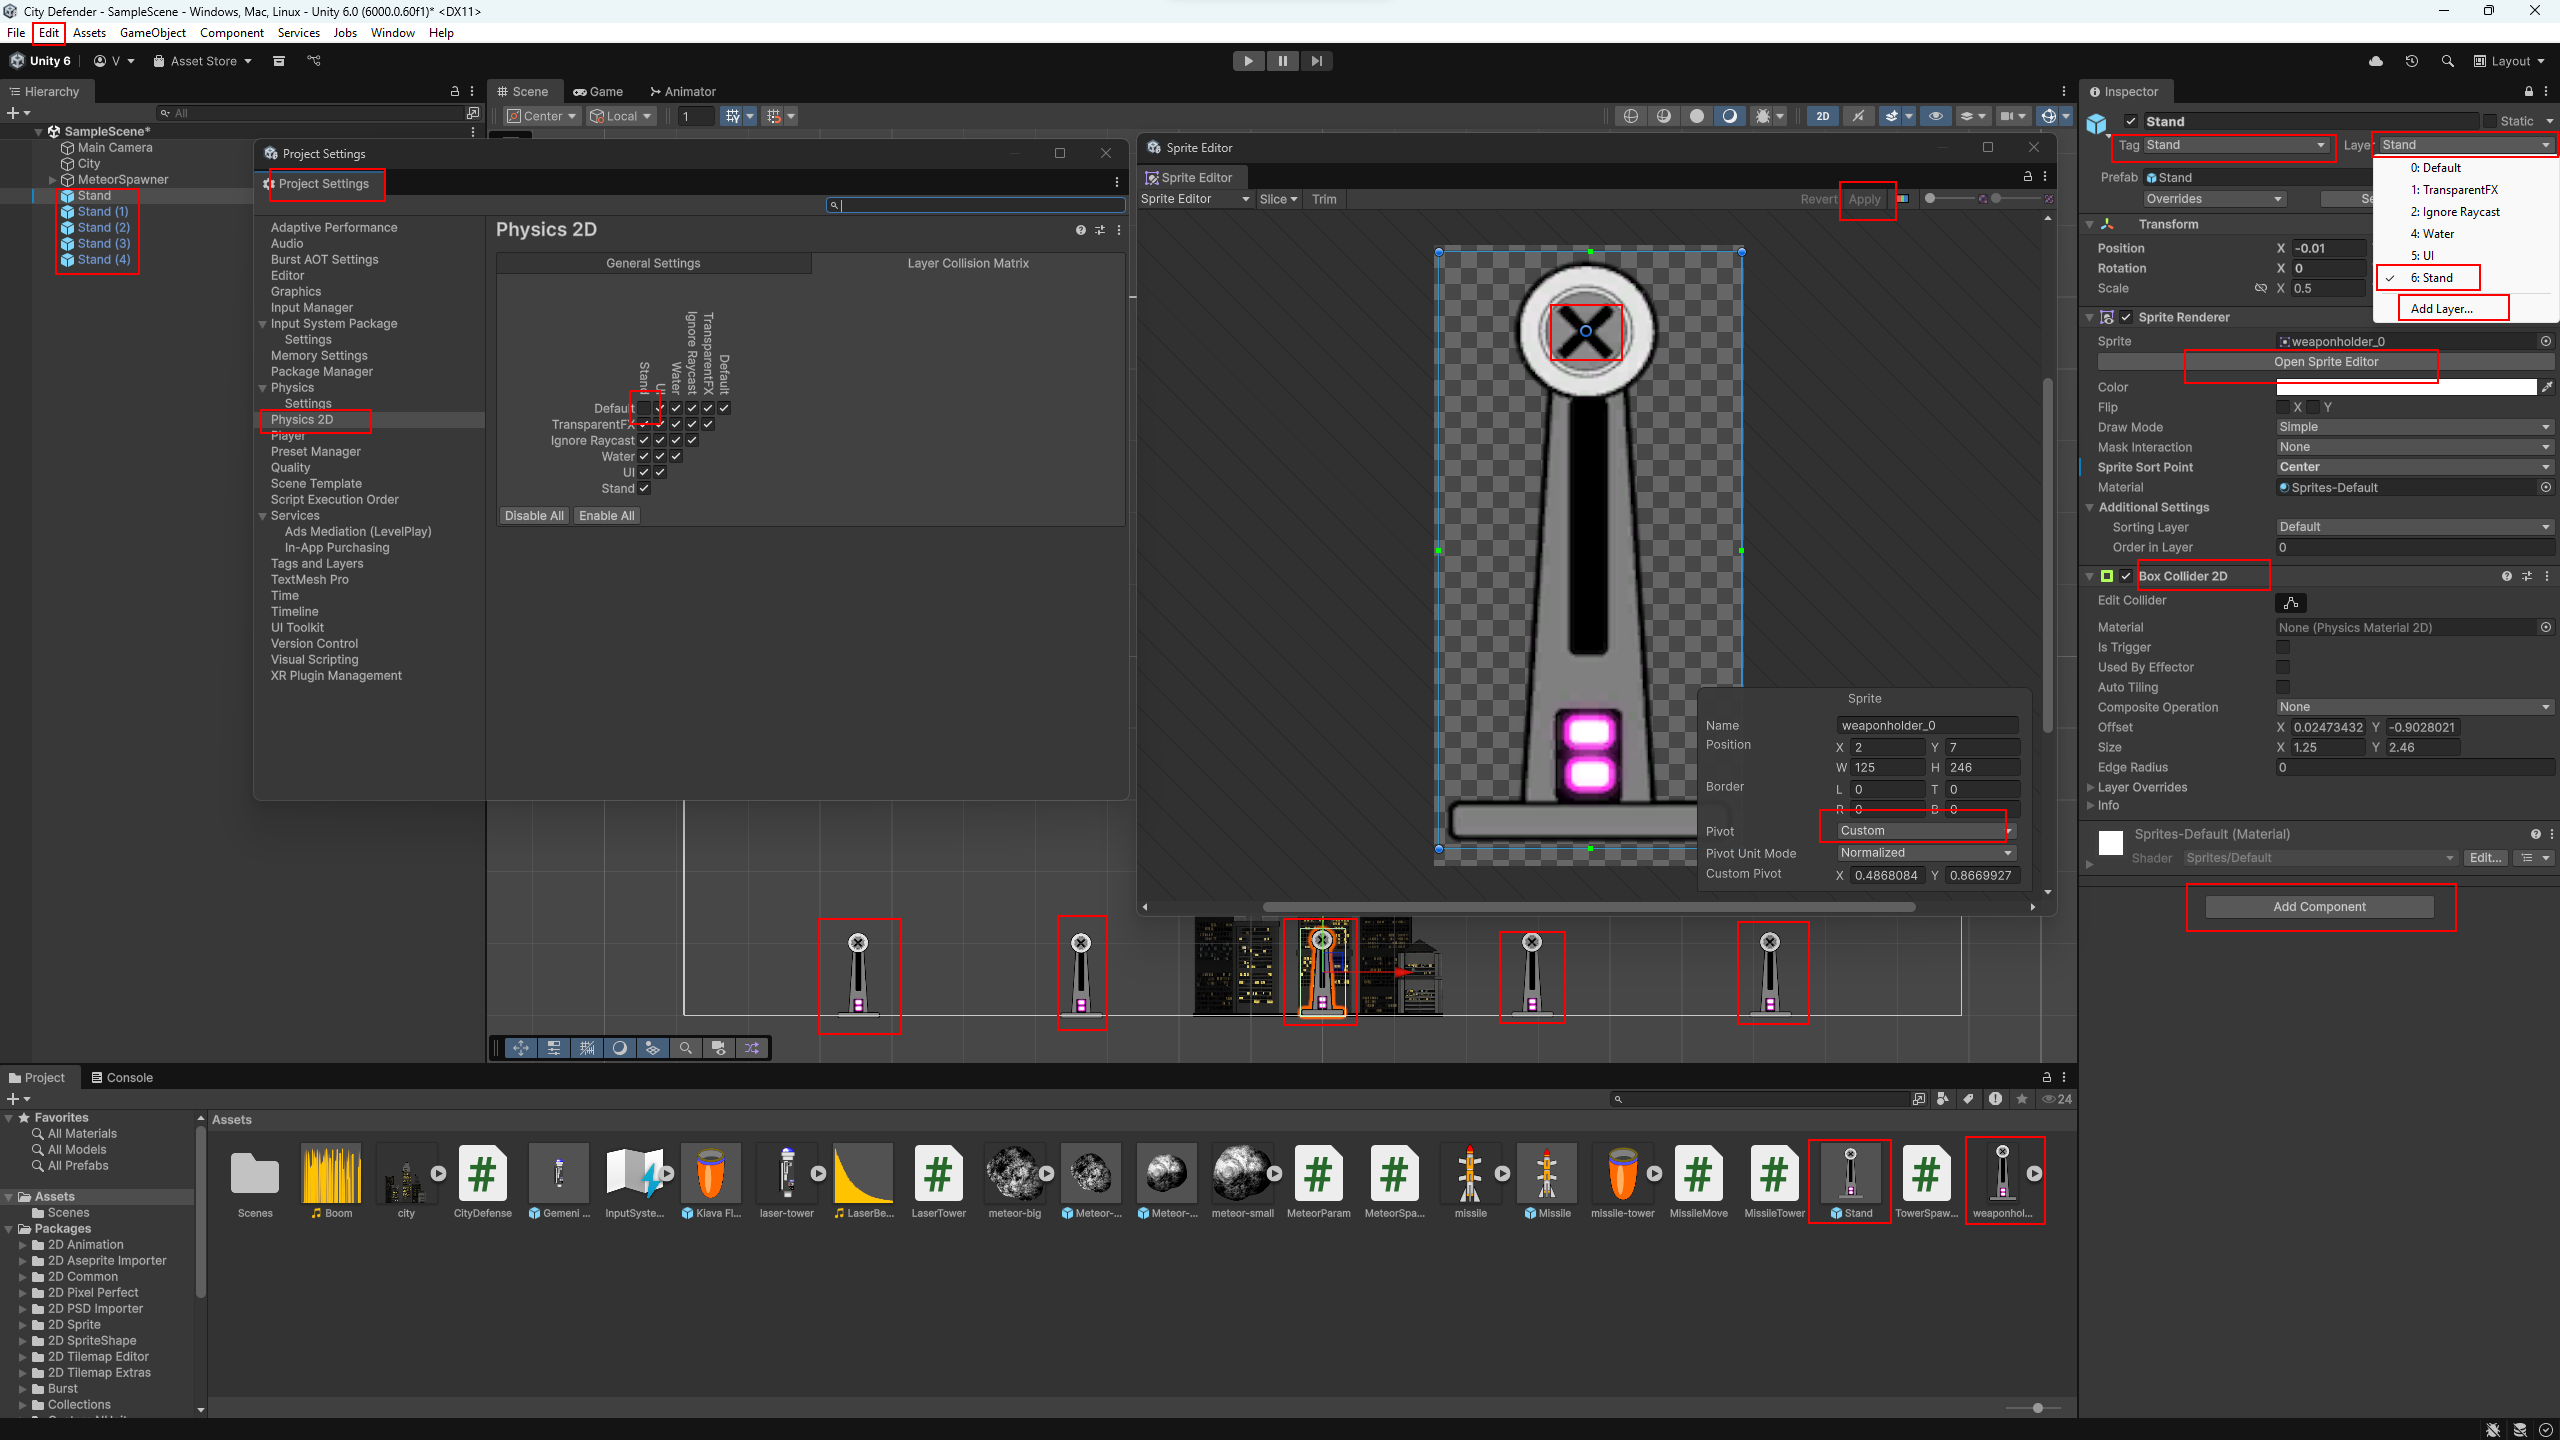
Stand with its own tag, physics layer, and
collider.
Now for the fun part — defend the city! We’ll make a small script that allows placing towers on the stands. A left mouse click will place a laser tower, and a right click — a rocket tower. After placement, the stand’s collider is automatically disabled so you can’t place a second tower on it.
Create a new MonoBehaviour script named
TowerSpawner.
using UnityEngine;
using UnityEngine.InputSystem;

public class TowerSpawner : MonoBehaviour
{
    public GameObject laserTower;   // Laser tower prefab (placed with LMB)
    public GameObject missileTower; // Rocket tower prefab (placed with RMB)

    void Update()
    {
        // Left mouse button — place a laser tower
        if (Mouse.current != null && Mouse.current.leftButton.wasPressedThisFrame)
            TryPlaceTower(laserTower);

        // Right mouse button — place a rocket tower
        if (Mouse.current != null && Mouse.current.rightButton.wasPressedThisFrame)
            TryPlaceTower(missileTower);
    }

    void TryPlaceTower(GameObject towerPrefab)
    {
        // Make sure a prefab is assigned
        if (towerPrefab == null) return;

        // Get the mouse click position in world coordinates
         Vector2 mousePos = Camera.main.ScreenToWorldPoint(
            Mouse.current.position.ReadValue()
        );

        // Check if we hit an object with a collider
        RaycastHit2D hit = Physics2D.Raycast(mousePos, Vector2.zero);
        if (hit.collider == null) return;

        // If it's a stand (tag Stand) — place the tower
        if (hit.collider.CompareTag("Stand"))
        {
            Instantiate(towerPrefab, hit.transform.position, Quaternion.identity);

            // Disable the stand's collider to prevent placing a second tower
            hit.collider.enabled = false;
        }
    }
}
In the scene, create a new empty object (its position doesn’t matter)
and add the TowerSpawner component to it.
In the Inspector, assign the prefab references:
Laser Tower — drag the laser tower prefab
Gemeni Analyzer.
Missile Tower — the rocket tower prefab
Kiava Flow.
The basic tower placement is ready! Play the scene, click on the stands, and build your city’s defense. Lasers and rockets will light up the sky — let the real fight for survival begin! ⚡
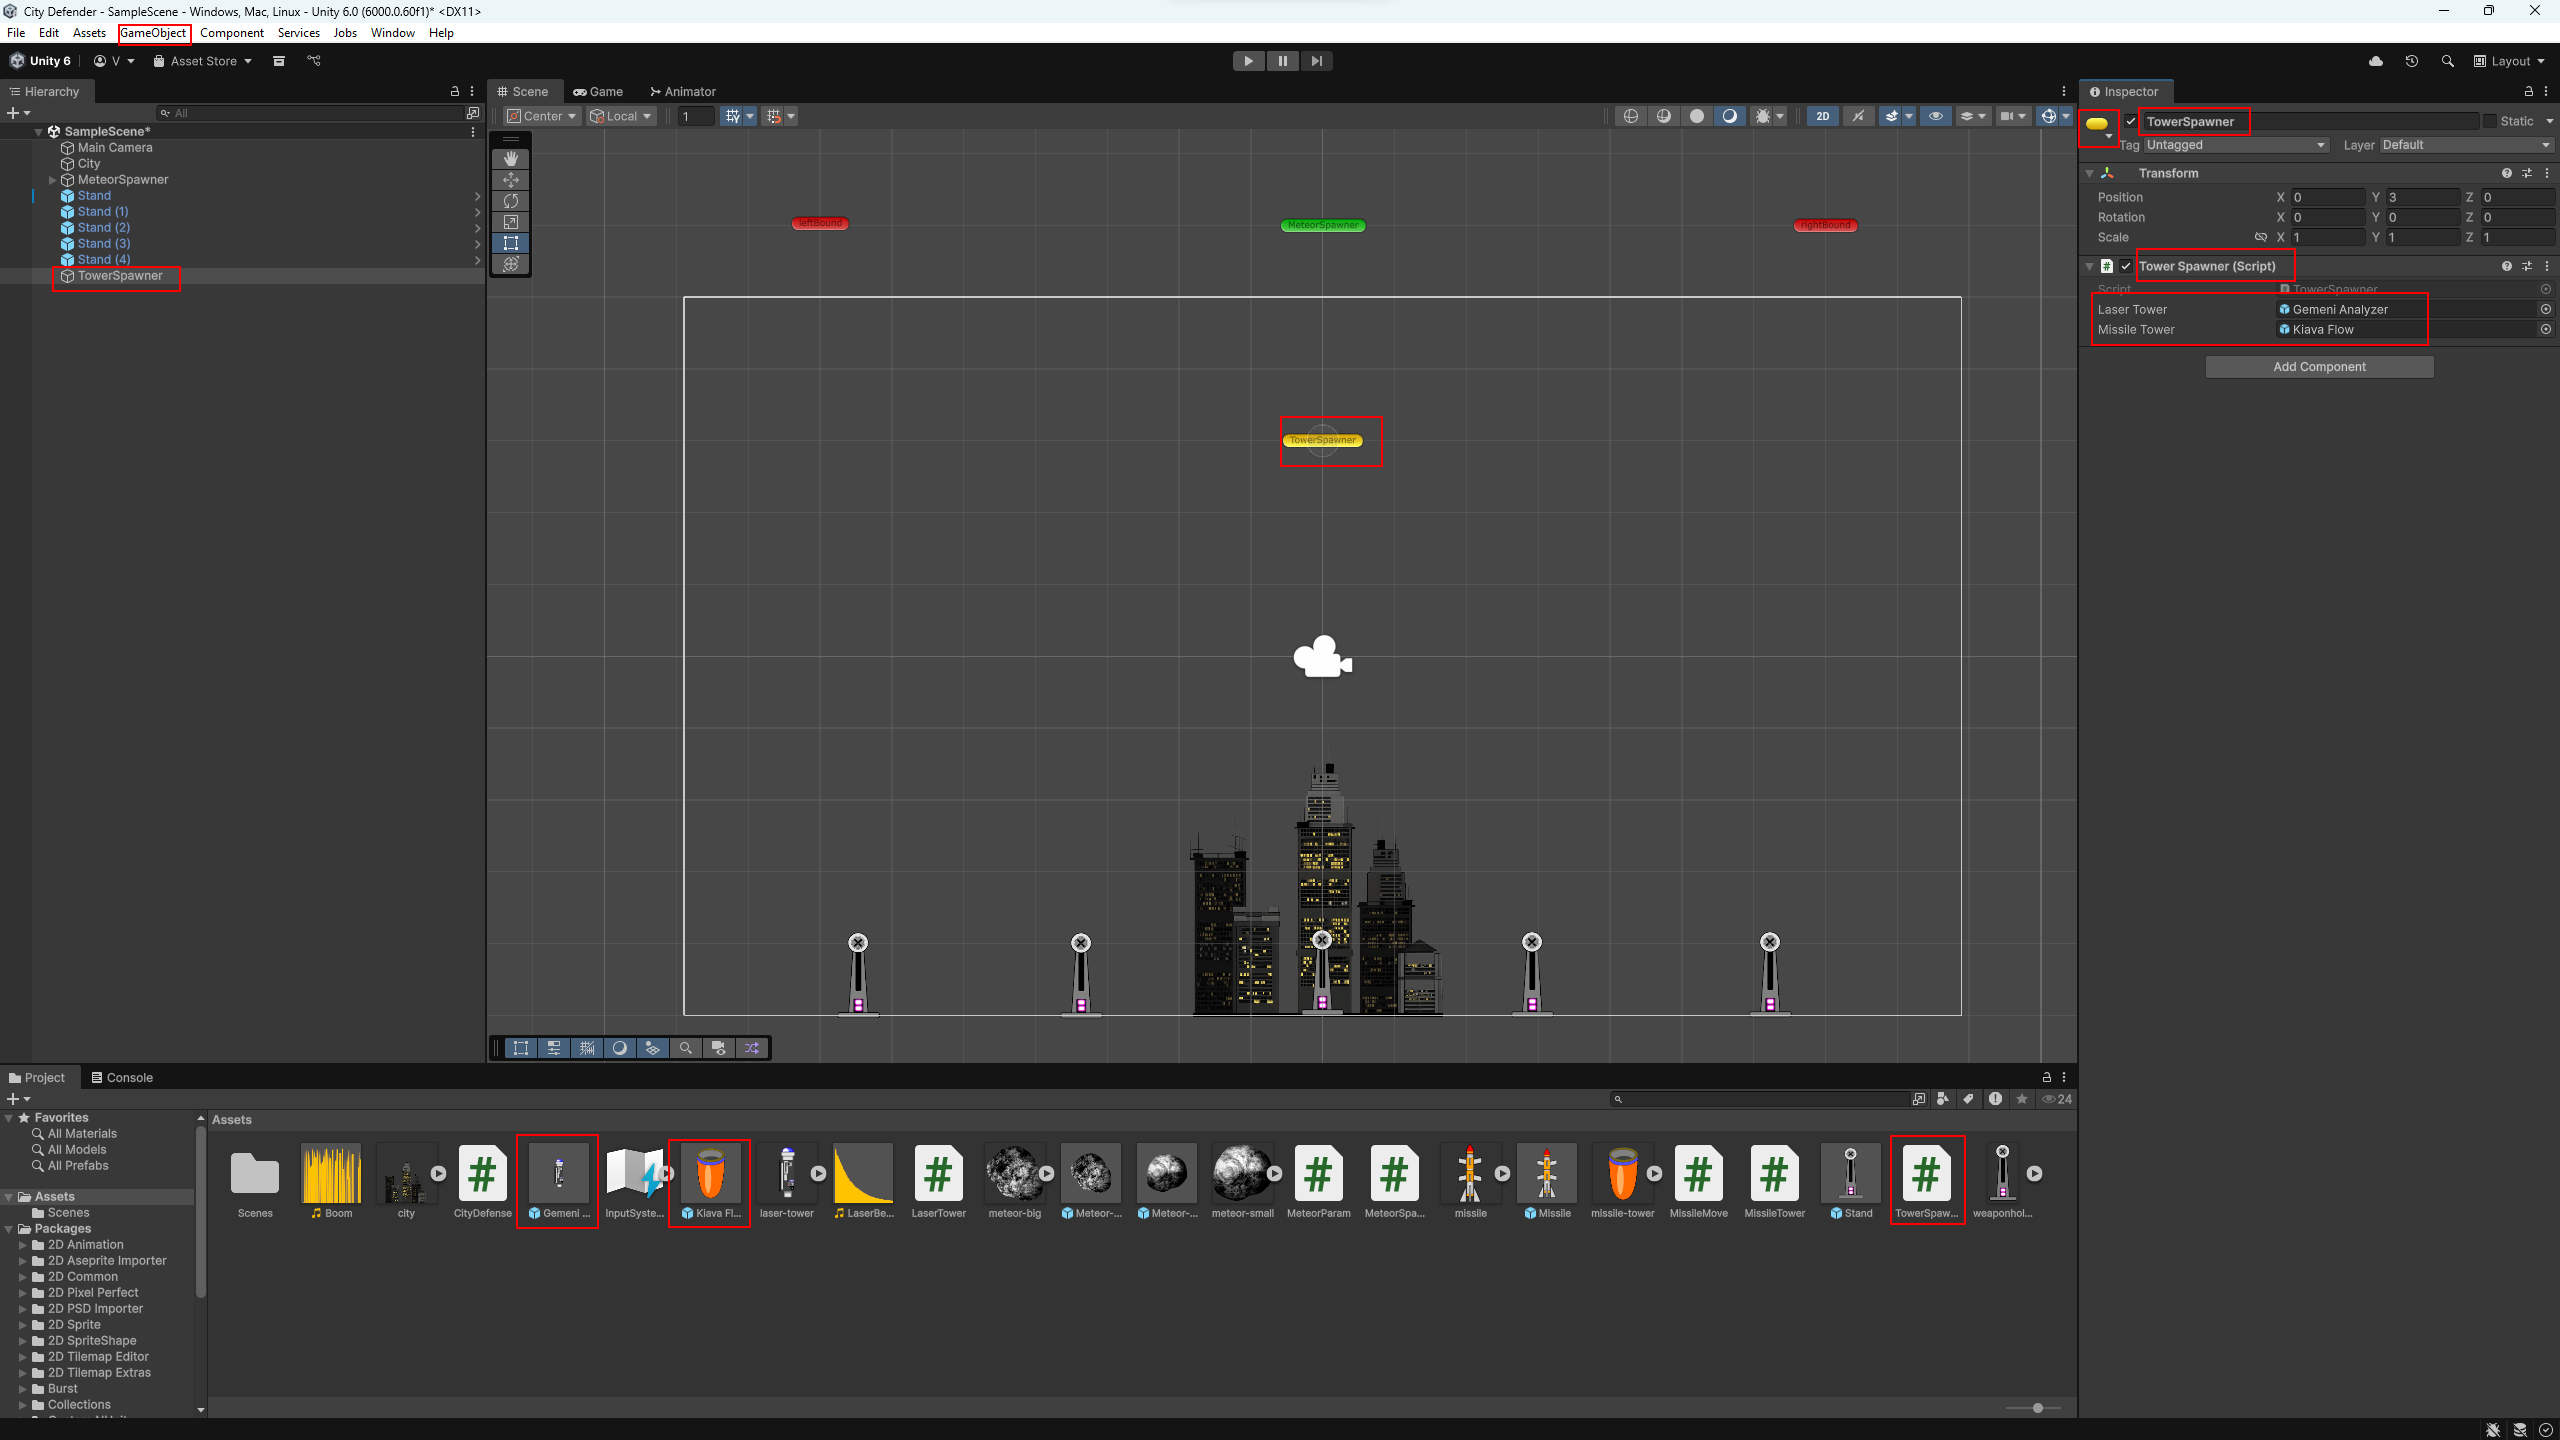
TowerSpawner object with linked tower prefabs.