Welcome to this Unity 2D tutorial. In this lesson, we’ll build a basic
foundation for a match-3 game step by step. No prior Unity experience is
required.
Install
Unity 6.0 LTS (or any other version with 2D support) if you haven’t
already — and let’s get started.
In fact, there are many ways to create such a game. We’ll make a simple
yet flexible implementation using a 2D space, sprites, and movement via
transform.Translate. To detect selected elements, we’ll use
the Raycast 2D system. We’ll split the game logic into
separate modules so the code remains clean and easy to extend.
Open Unity Hub and create a new 2D project by selecting the 2D (Built-In render Pipeline) template. To do this, go to the Projects tab and click New Project. Find the 2D (Built-In render Pipeline) template — it already includes the basic 2D graphics and physics. Depending on your Unity version, the template name might differ — if you don’t see it, pick 2D (URP) or the standard 2D.
Enter a project name, like MatchGame (or use your own)
and choose a folder where it will be created. Click
Create project and wait for the environment to set
up.
For this game prototype, a single sprite will be enough, whose appearance we’ll later vary by changing its color.
You can use the sample image below or pick your own. The only requirement is that the sprite should be 100×100 pixels, as this will be the base size of the grid elements.

To import the image into Unity: right-click in the Assets window, select Import New Asset..., find the downloaded file and click Import.
💡 Tip: you can simply drag the image file directly into the
Assets window — it might be even faster.
💡 Tip: start simple — you can always improve the visuals later.
Our game will consist of several key logic blocks. First, we will fill the game grid with gems. During this process, it’s important to immediately check to make sure that no lines of three or more identical gems are formed — this prevents accidental matches at the initial setup.
Once the grid is filled, we will give the turn to the player. For simplicity, at this stage the player can swap any two adjacent gems horizontally or vertically, not just moves that lead to matches.
After the player makes a move, the gems will swap places. Then we will check the entire grid for matches. If matches of three or more identical gems are found, we’ll remove them and fill the empty spaces with new gems. If there are no matches, the turn goes back to the player.
To control the main phases of the game, we'll create a separate
script. Create a new MonoBehaviour script and name it
GameManager. This script will determine the current game
phase and launch the appropriate logic blocks. It will also store
arrays for the game grid and the set of game objects (such as gems).
At this stage, running the logic blocks is disabled — we will connect them later when we implement the respective functions.
using UnityEngine;

public class GameManager : MonoBehaviour
{
    // 2D array representing the game board (6×6 grid)
    public GameObject[,] gemsGrid = new GameObject[6, 6];

    // Array of available gem prefabs (different colors)
    public GameObject[] gemsArray;

    // Counter to track how many gems are currently moving
    public int gemCounter = 0;

    // Flag: allows the player to make a move
    public bool canMove = false;

    // Flag: triggers match checking
    public bool canCheck = false;

    // Flag: triggers grid refill after matches are cleared
    public bool canRefill = false;

    // Flag: whether there are no matches left on the board
    public bool noMatches = true;

    private void Update()
    {
        // If all gems have stopped and match check is allowed — perform match check
        if (canCheck && gemCounter <= 0)
        {
            canCheck = false;
            gemCounter = 0;
            //GetComponent<GridChecker>().CheckForMatches();
        }

        // If all gems have stopped and refill is allowed — refill the grid
        if (canRefill && gemCounter <= 0)
        {
            canRefill = false;
            gemCounter = 0;
            //GetComponent<RefillGrid>().Refill();
        }

        // If no processes are running and there are no matches — allow player to move
        if (!canRefill && noMatches && !canCheck && gemCounter <= 0)
        {
            gemCounter = 0;
            canMove = true;
        }
    }
}
Now create an empty GameObject:
Rename it to GameManager and assign it the tag
GameManager.
Attach the GameManager script to this object. To do this,
select the object in the hierarchy and drag the script to the
inspector field or use the Add Component button.
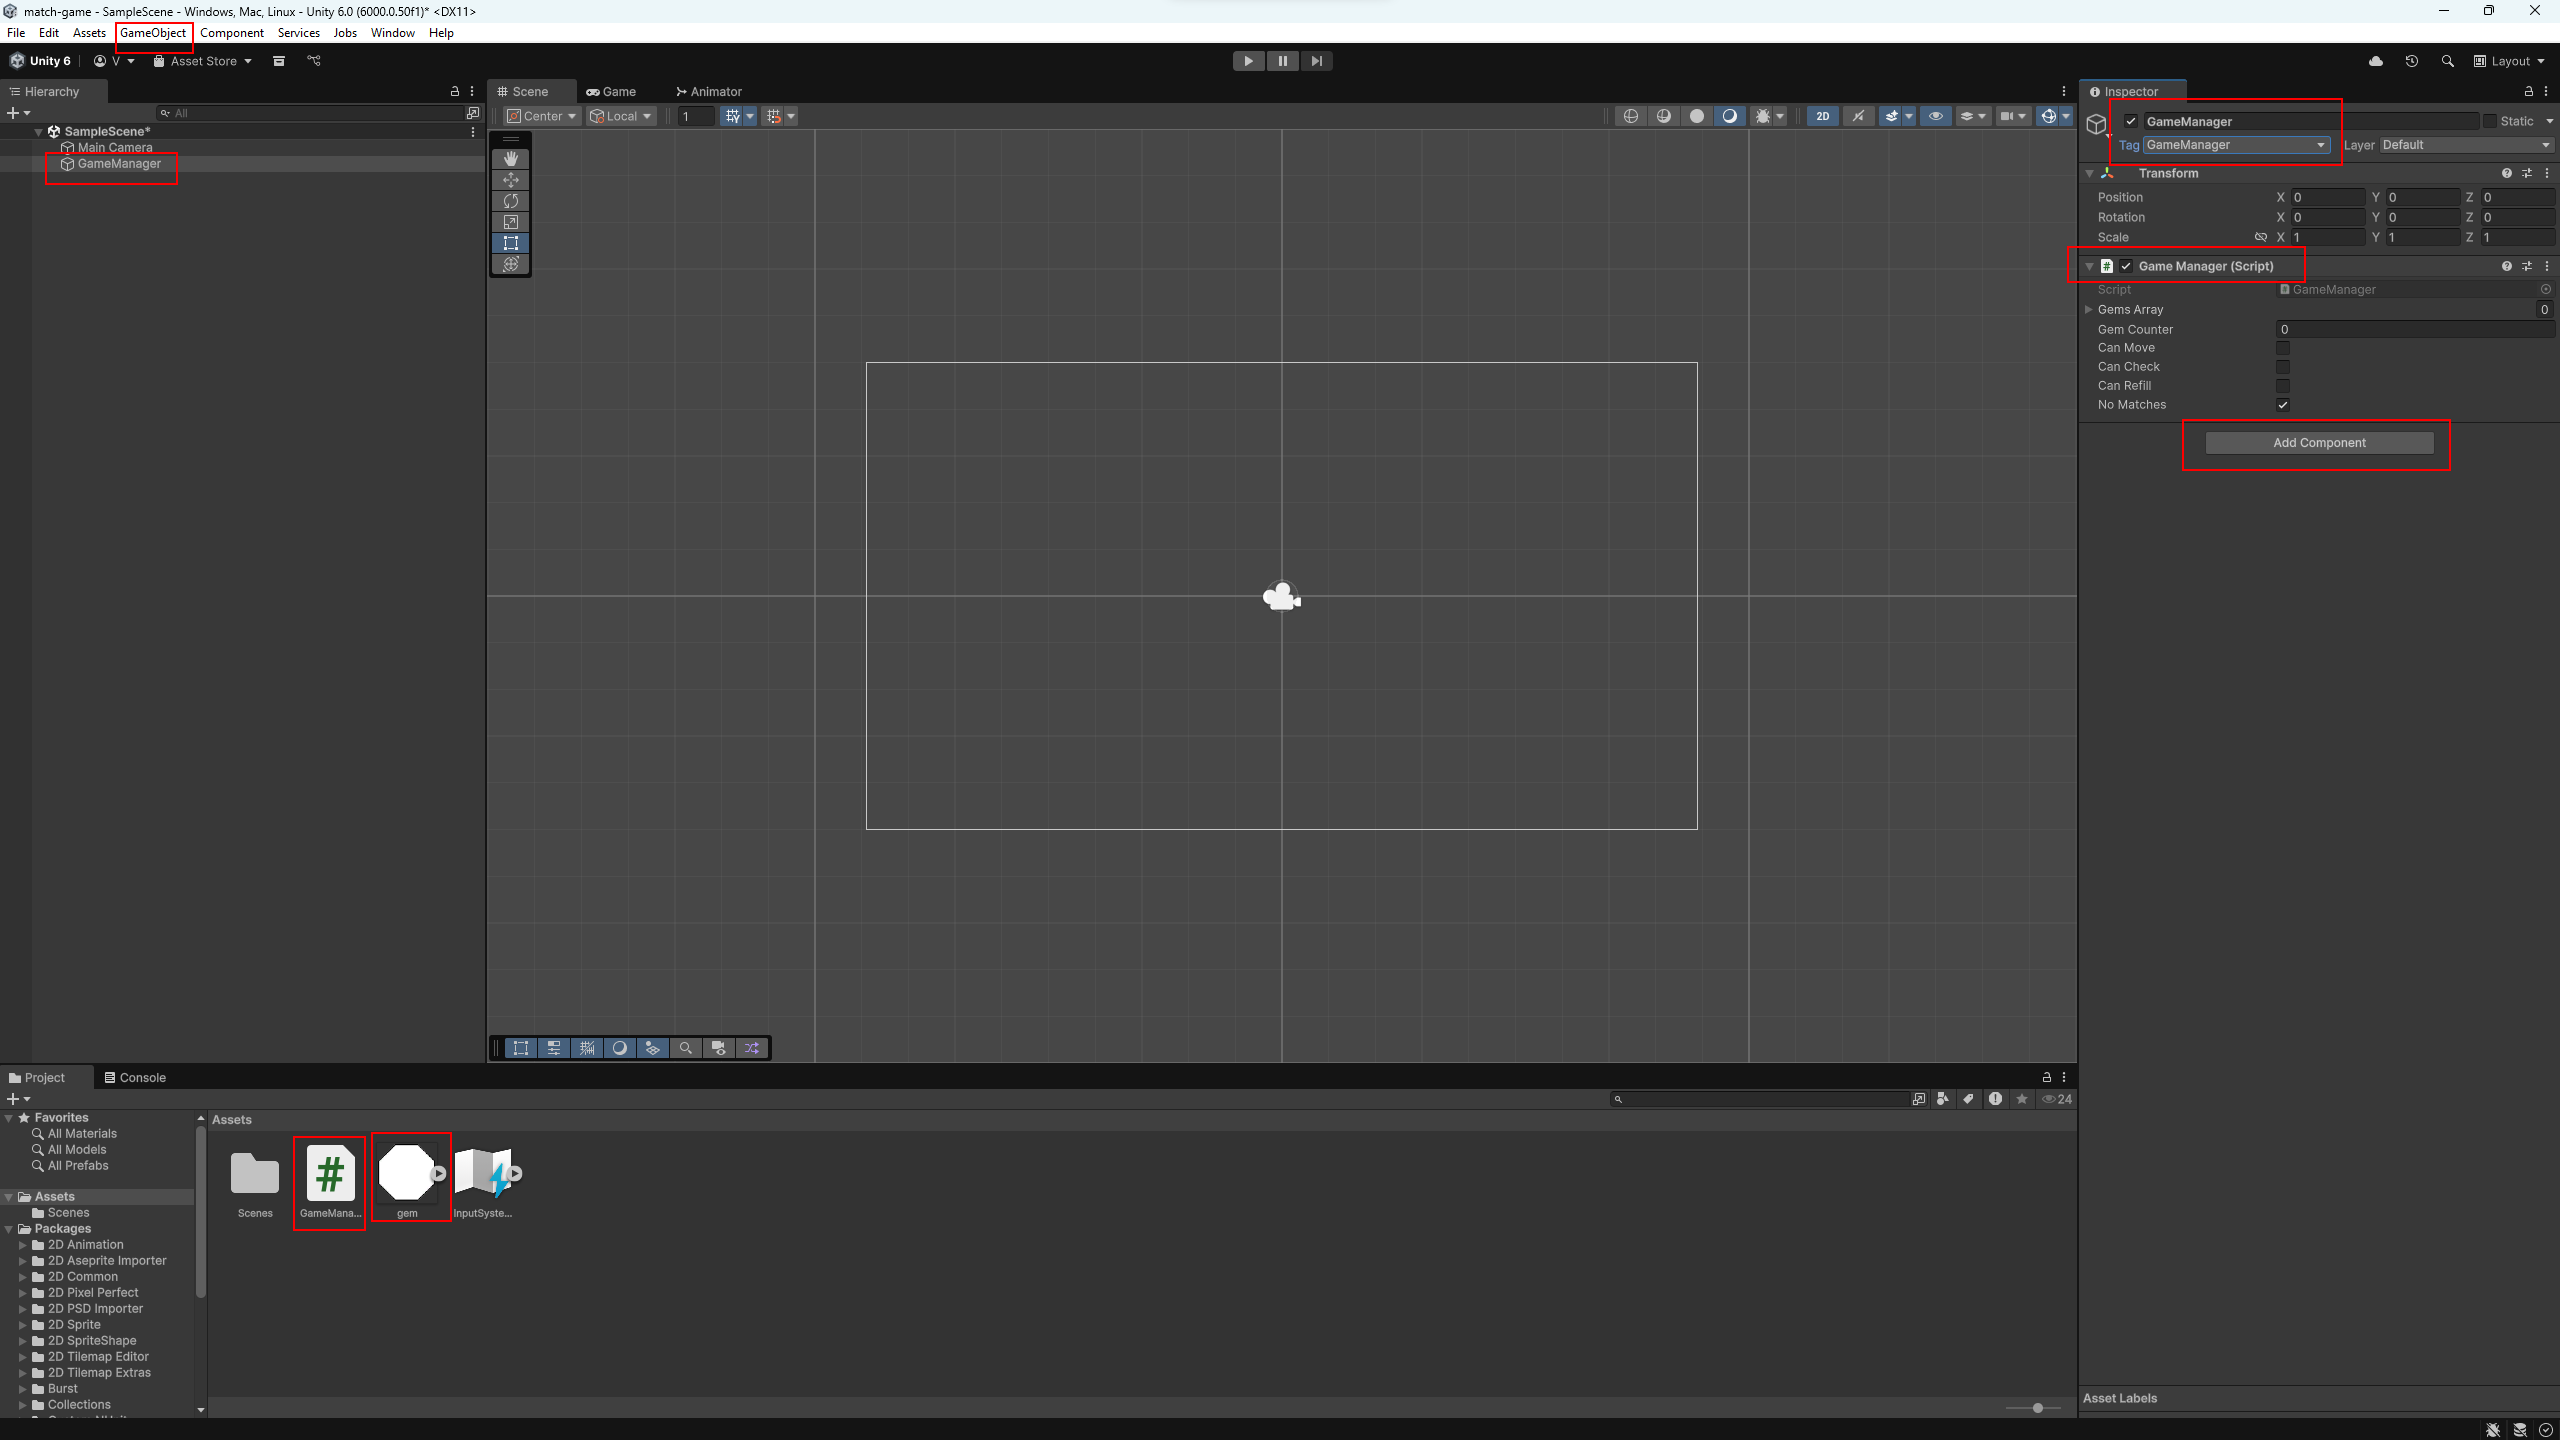
GameManager script.
Now let’s create a gem template for our game. In step two, you already imported the needed sprite. Drag it into the scene — Unity will automatically create a new GameObject.
In this game, we’ll move gems using
transform.Translate, changing their position in space.
We’ll also use built-in 2D physics to register interactions with the
player.
Part of the game logic will be placed directly on the gem object, so we won’t need a separate controller script. Each gem will store some of its own needed information.
First, add a Circle Collider 2D component to the gem, so we can use collision events.
Now create a new MonoBehaviour script and name it
GemData:
using UnityEngine;

public class GemData : MonoBehaviour
{
    // Position of this gem in the grid array,
    // matches its position in Unity world space
    public int gridPosX, gridPosY;

    // Reference to the gem's CircleCollider2D component
    private CircleCollider2D col;

    // Flag: whether movement towards the target position is allowed
    private bool canMoveToPos = false;

    // Movement speed
    public float speed;

    // Final position the gem should move to
    private Vector3 endPos;

    // Reference to the main GameManager script
    private GameManager manager;

    private void Awake()
    {
        // Find the object with the "GameManager" tag and get its script
        manager = GameObject.FindWithTag("GameManager").GetComponent<GameManager>();

        // Get this gem's own CircleCollider2D
        col = GetComponent<CircleCollider2D>();
    }

    private void Update()
    {
        // If movement is allowed — move towards the target
        if (canMoveToPos)
        {
            // Calculate the normalized direction to the target position
            Vector3 dir = (endPos - transform.position).normalized;

            // Move in that direction at the defined speed
            transform.Translate(dir * speed * Time.deltaTime);

            // If we're almost at the target position
            if ((endPos - transform.position).sqrMagnitude < 0.05f)
            {
                // Snap exactly to the final position to avoid jitter
                transform.position = endPos;

                // Re-enable the collider so the gem can interact again
                col.enabled = true;

                // Inform the GameManager that one gem finished moving
                manager.gemCounter--;

                // Reset rendering order to normal
                GetComponent<SpriteRenderer>().sortingOrder = 0;

                // Stop movement
                canMoveToPos = false;
            }
        }
    }

    // Called to start gem movement to its grid position
    public void Move()
    {
        // Calculate world position from grid coordinates
        endPos = new Vector3(gridPosX, gridPosY);

        // Disable collider during movement to avoid false collisions
        col.enabled = false;

        // Increase the counter of active movements in GameManager
        manager.gemCounter++;

        // Raise rendering order so this gem appears above others
        GetComponent<SpriteRenderer>().sortingOrder = 10;

        // Enable movement
        canMoveToPos = true;
    }
}
Notice an important point: although the gem has a 2D collider, we’re
using transform.Translate for movement without a
Rigidbody2D. This approach is faster for simple logic,
but it requires manually disabling the collider while moving.
When moving the gem, we also change its sorting order so it draws on top of other elements. Once movement finishes, we restore the sorting order.
To simplify things, our grid coordinates match the world scene. Since
by default in Unity one world unit equals 100 pixels, a sprite of
100×100 pixels fits exactly into one cell. This means that a gem with
position (1,4) in the array will appear at the same point
in the scene.
Change the speed in the inspector to 1 —
you can adjust this later for the best feel.
Done: now we have a full gem template. In the next step, we’ll add variety so they differ from each other.
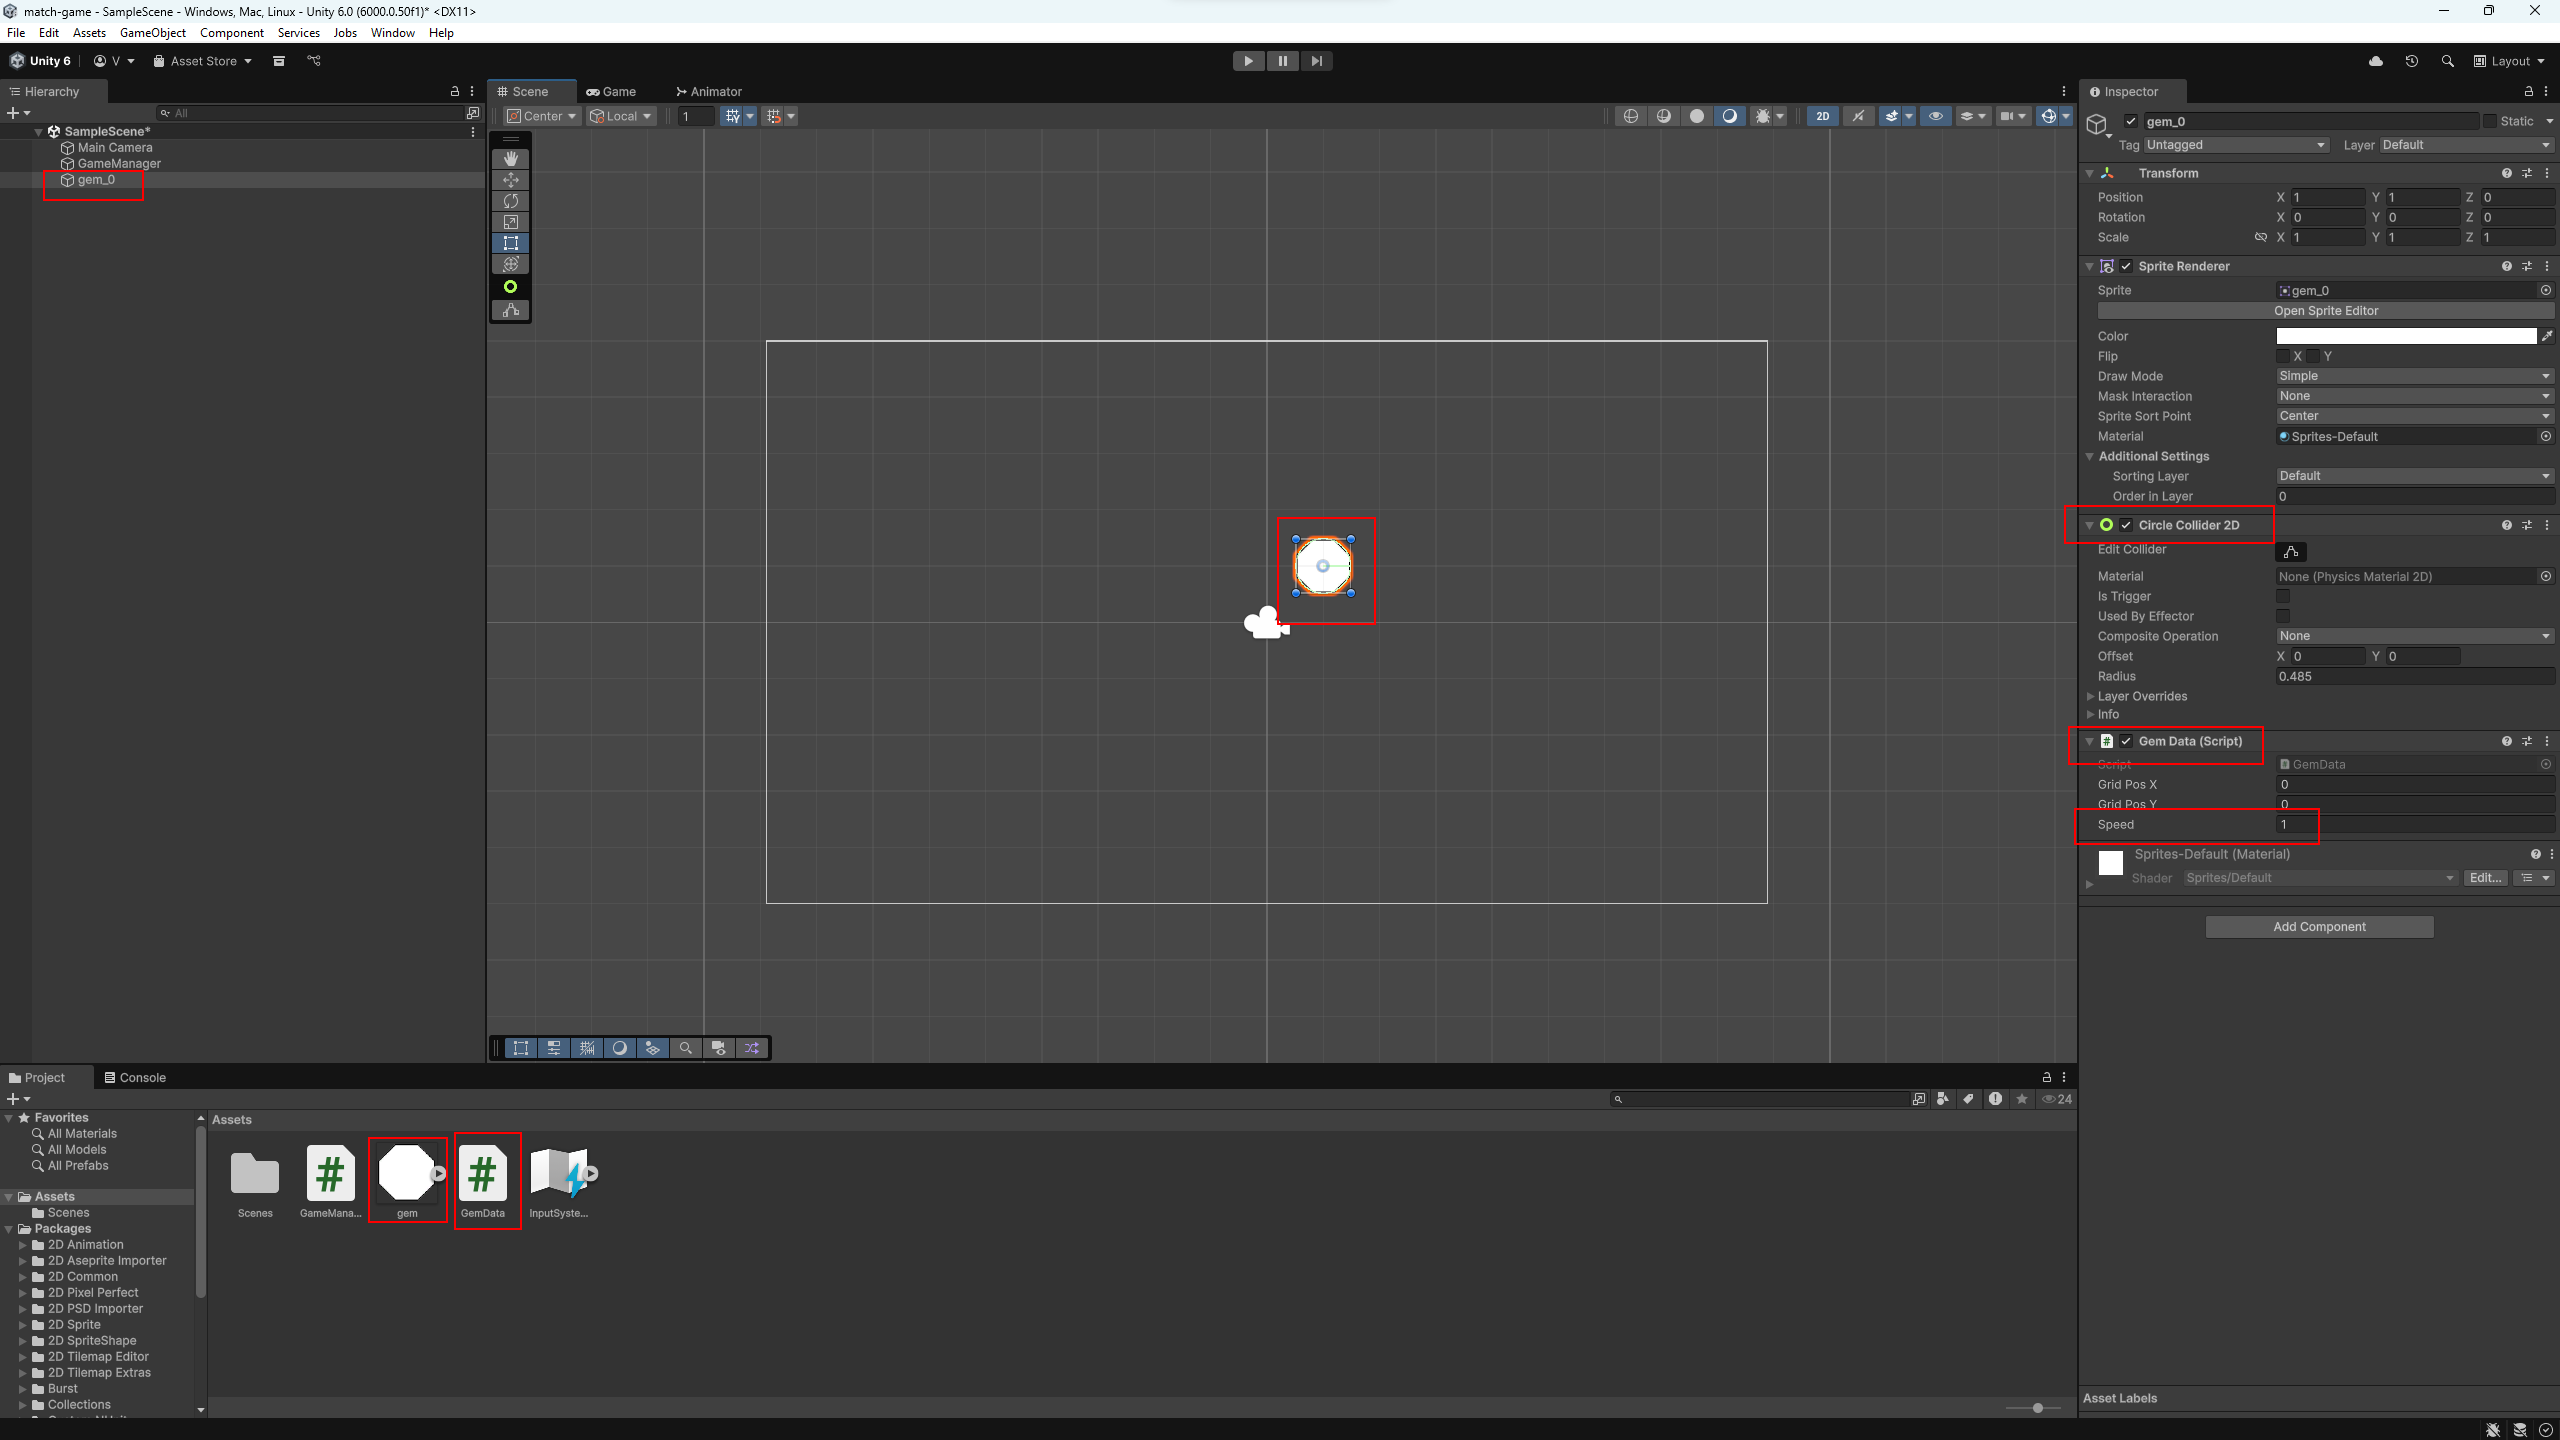
GemData script.
Now we already have a gem template in the scene, and it’s time to turn
it into real game prefabs. It’s important to keep balance here: if
there are too few variations, matches will happen too often, and the
player will just watch the board clear and refill itself (though maybe
that’s exactly the effect you want). But if there are too many types,
matches will be rare, and the game might get stuck without possible
moves for a long time.
For our 6×6 board, using 4–5 types is optimal. We’ll
go with five to keep a fun balance between randomness and player
planning.
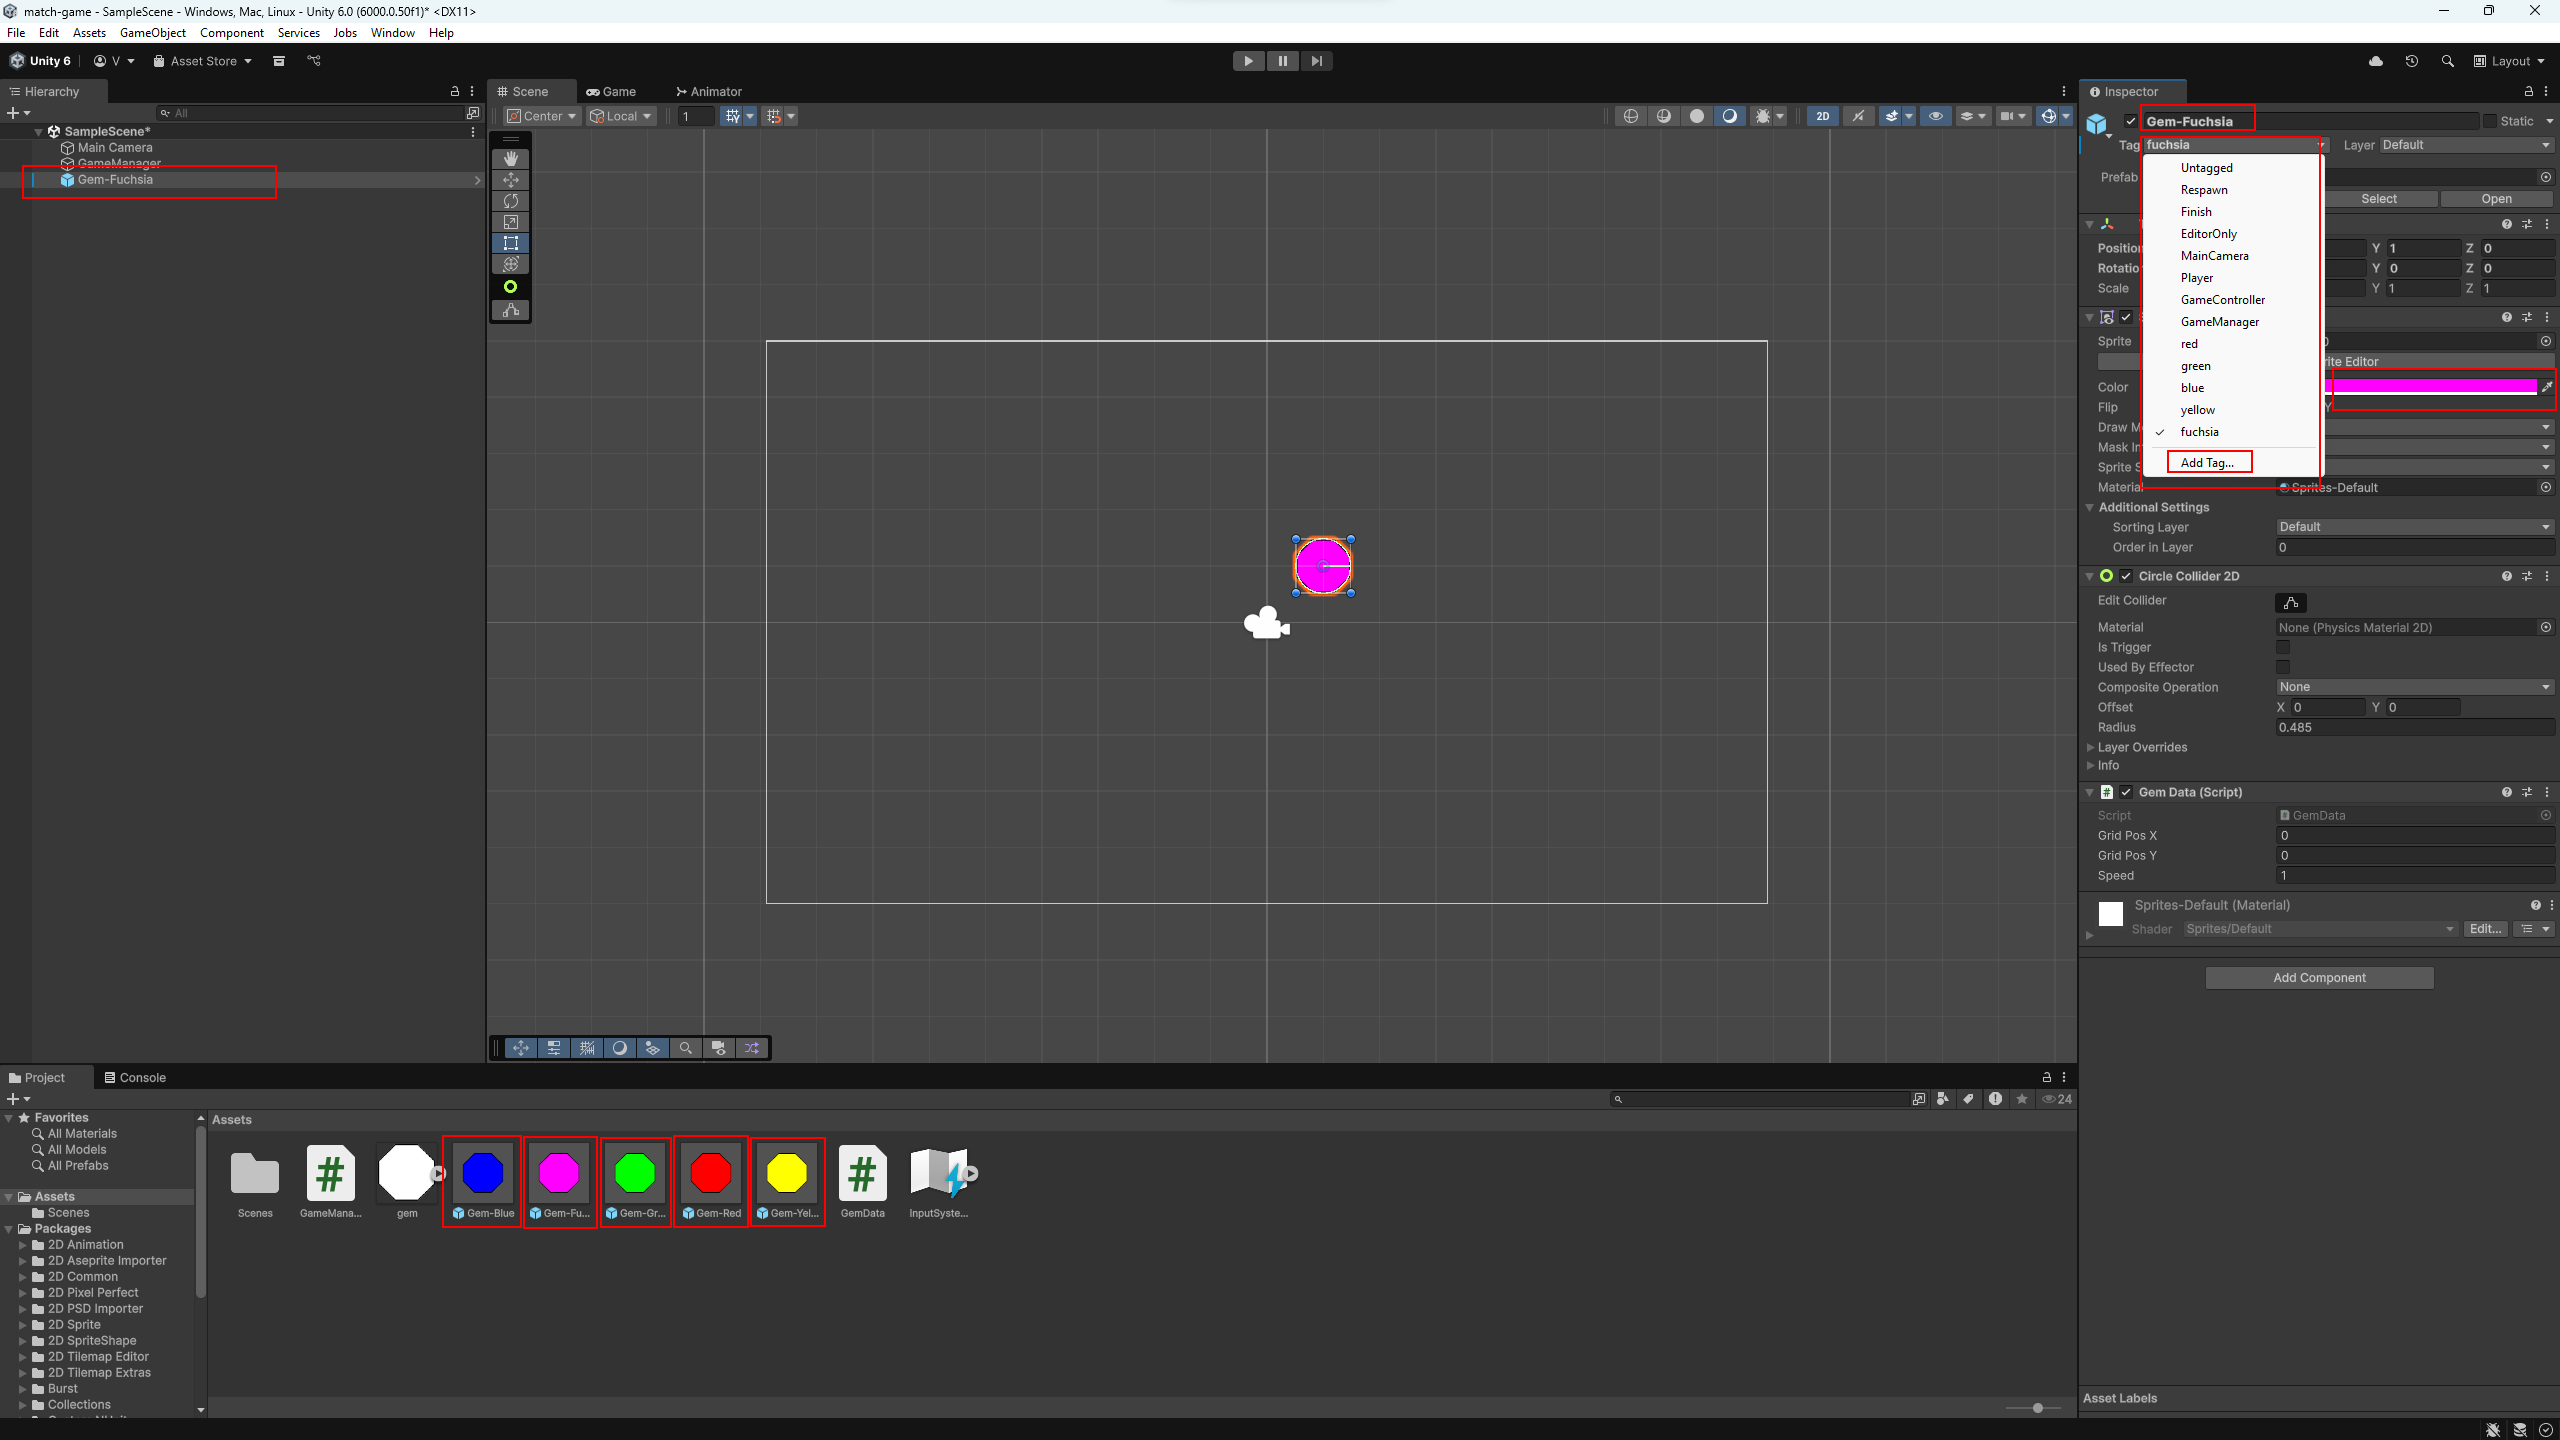
Select the gem in the scene (or in the hierarchy window) and rename it
to
Gem-Red.
Create a new tag red and assign it to the
Gem-Red object. Then in the
Sprite Renderer component, change the gem’s color to
red. Now drag the Gem-Red object from the hierarchy into
your Assets
folder — Unity will automatically create a prefab from it.
Then select the gem object in the scene again and repeat the process to create four more prefabs.
In the end, I got these prefabs:
Gem-Red with tag red,
Gem-Blue with tag blue,
Gem-Yellow with tag yellow,
Gem-Green with tag green, and
Gem-Fuchsia with tag fuchsia. Each with
matching colors.
Once you’ve created all five prefabs, you can safely delete the gem object from the scene — all needed templates are now stored in your project as prefabs.
The first logic step of our game is to fill the board with random gems. To start, we’ll prepare an array to hold the possible gem prefabs for spawning.
Select GameManager in the hierarchy. In the inspector,
find the GameManager script which has the
GemsArray field. It’s empty right now. Drag your five gem
prefabs into it.
Now let’s create a script to handle the initial filling of the board.
Create a new MonoBehaviour script and name it
SpawnController. Add it to the same
GameManager object.
using UnityEngine;
// For using List
using System.Collections.Generic;

public class SpawnController : MonoBehaviour
{
    private GameManager manager;

    void Start()
    {
        // Get a reference to the GameManager on the same GameObject
        manager = GetComponent<GameManager>();

        // Fill the game grid with gems when the scene starts
        FillTheGrid();
    }

    public void FillTheGrid()
    {
        // Loop through each grid cell by X and Y coordinates
        for (int i = 0; i < 6; i++)
        {
            for (int j = 0; j < 6; j++)
            {
                Vector2 position = new Vector2(i, j);

                // Make a copy of the gem prefab array for filtering
                List<GameObject> candidateTypes = new List<GameObject>(manager.gemsArray);

                // Check the gem to the left — remove if same type
                if (i >= 1)
                    candidateTypes.RemoveAll(gem => gem.tag == manager.gemsGrid[i - 1, j].tag);

                // Check the gem below — remove if same type
                if (j >= 1)
                    candidateTypes.RemoveAll(gem => gem.tag == manager.gemsGrid[i, j - 1].tag);

                // Choose a random prefab from the remaining candidates
                GameObject gem = Instantiate(
                    candidateTypes[Random.Range(0, candidateTypes.Count)],
                    position,
                    Quaternion.identity
                );

                // Assign grid coordinates to the gem
                GemData gemData = gem.GetComponent<GemData>();
                gemData.gridPosX = i;
                gemData.gridPosY = j;

                // Store the gem in the grid array
                manager.gemsGrid[i, j] = gem;
            }
        }

        // Allow the player to make the first move
        manager.canMove = true;
    }
}
This script runs once at the start of the game. It takes the array of available gem prefabs, copies it into a dynamic list, and while looping through each cell, it filters out any gem types that would immediately match with the gem to the left or below. That way we avoid starting the game with instant matches.
Then it randomly selects a gem from the remaining options, creates it
in the scene, sets its grid coordinates, and stores it in the
gemsGrid array. After filling the board, the player is
allowed to make the first move.
At this point, you can already run the game and see the board fill up with random gems.
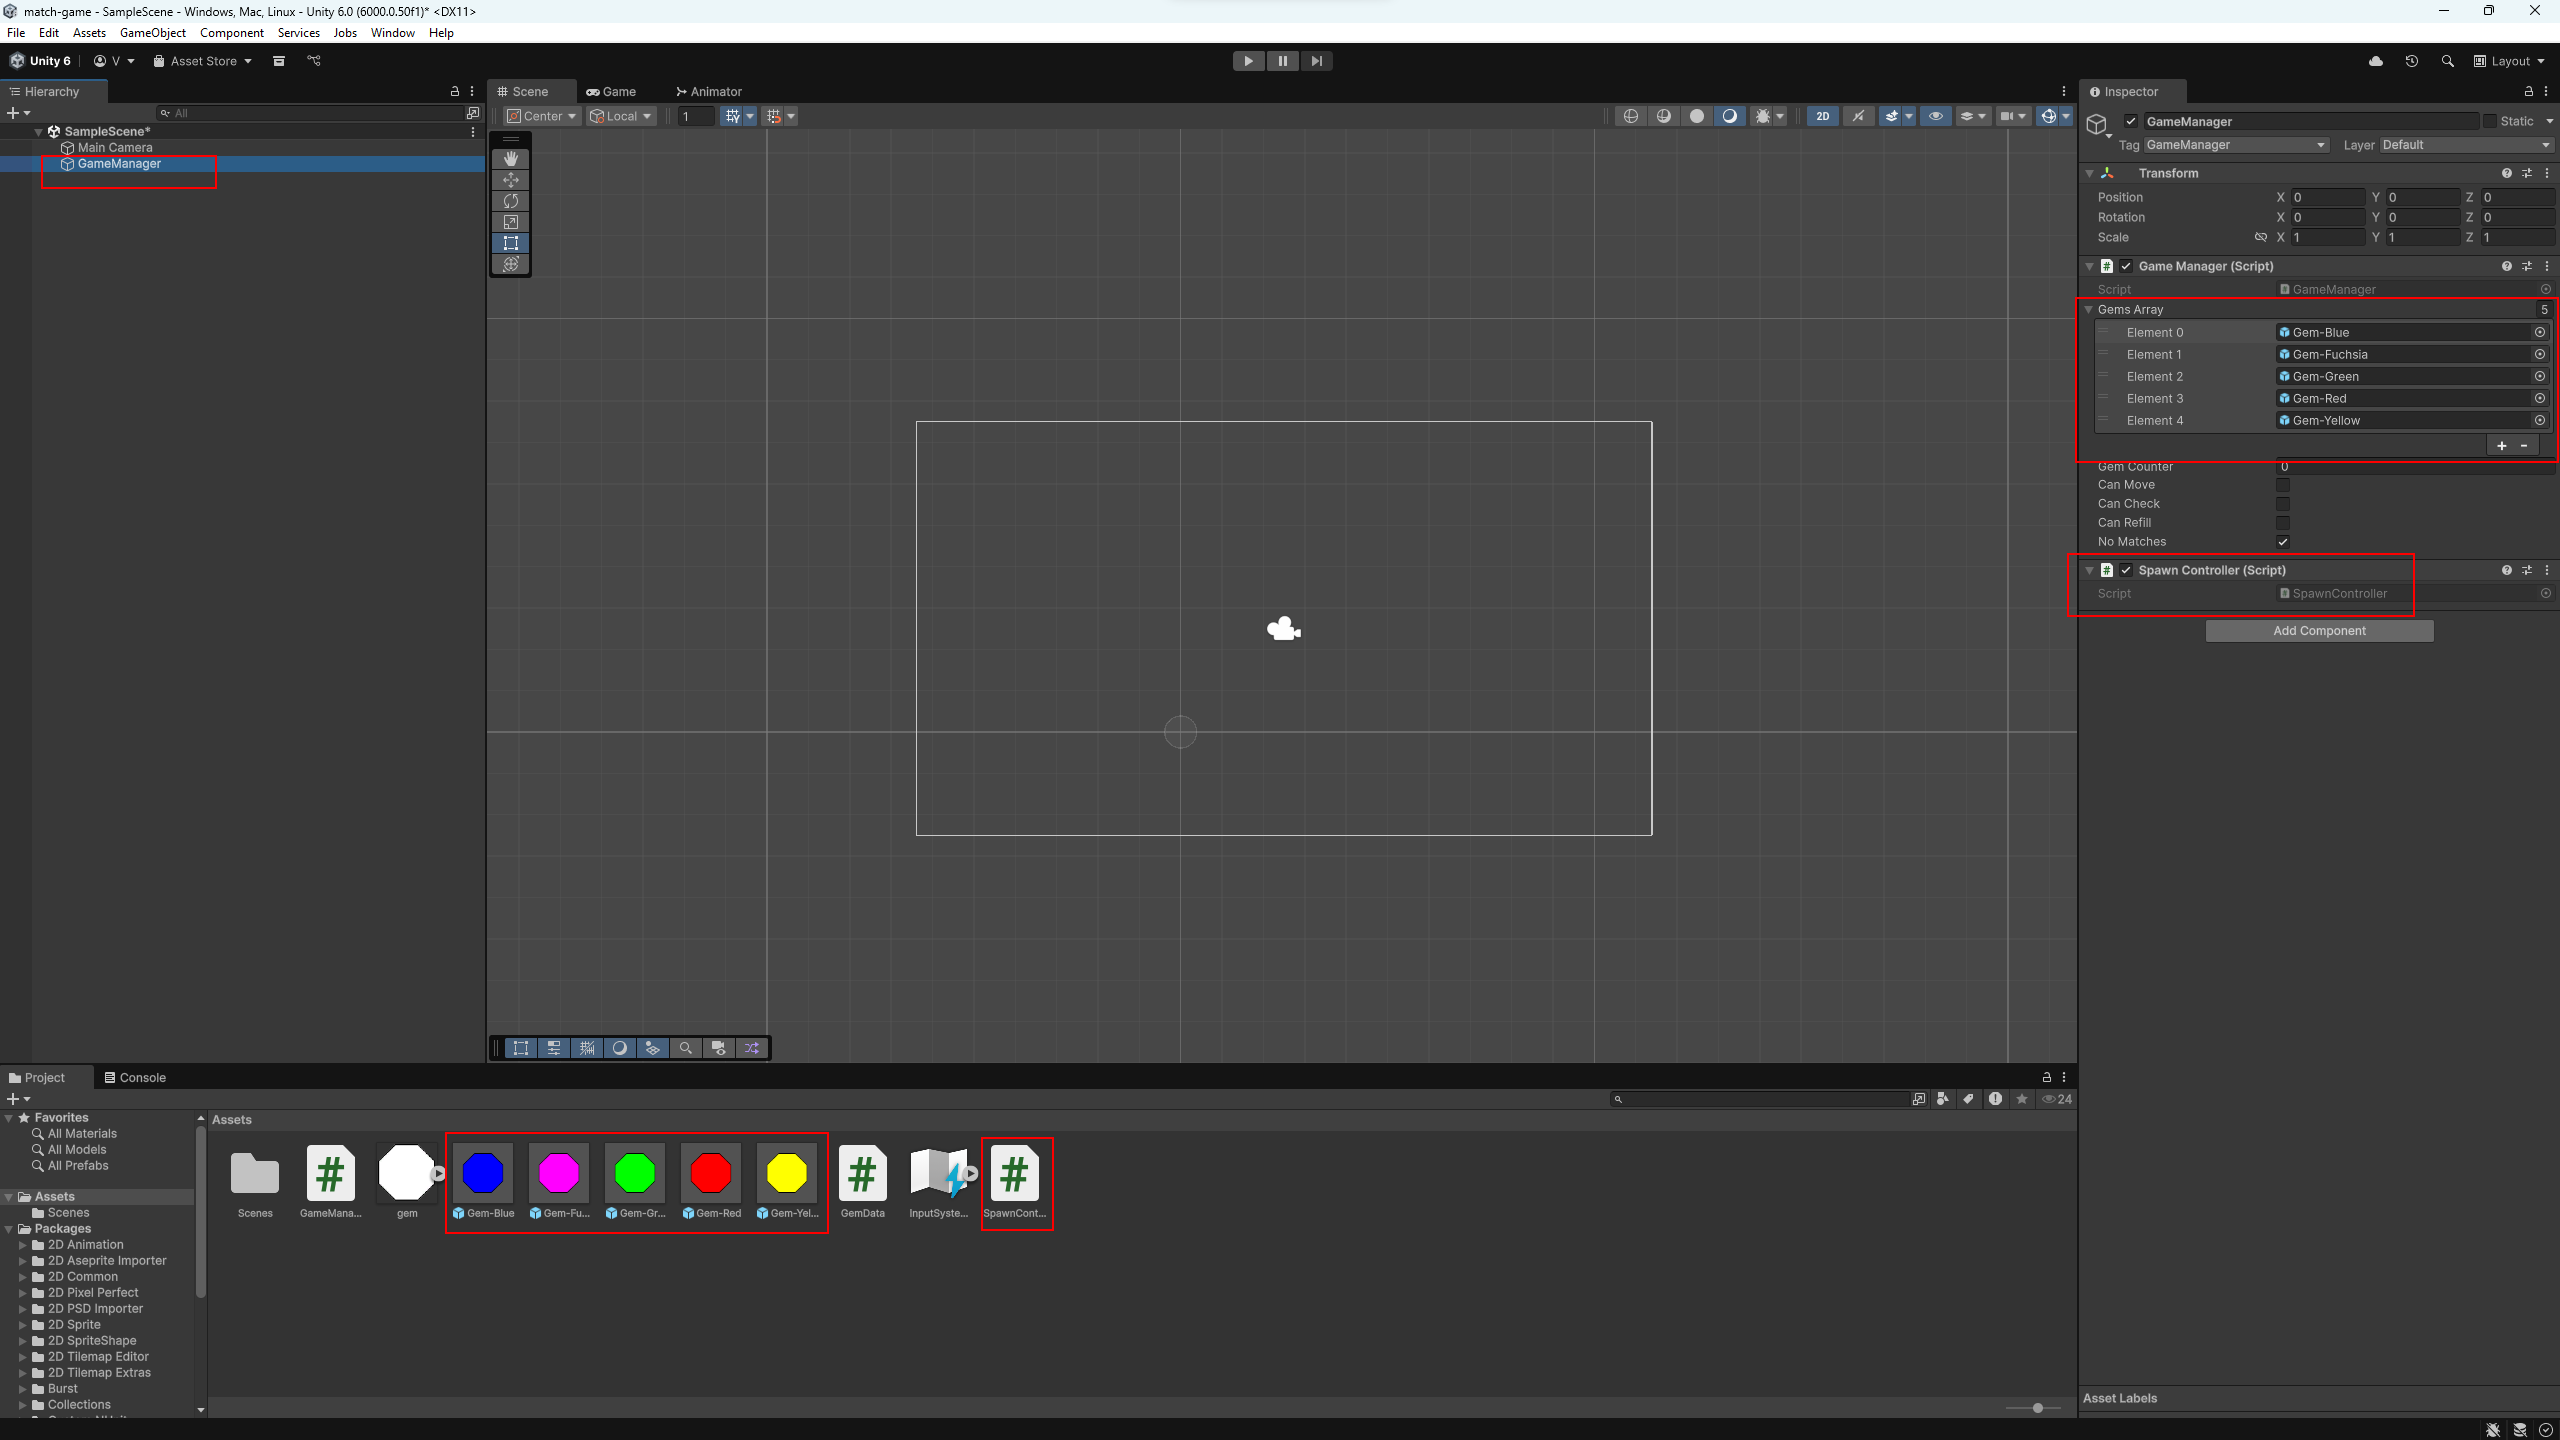
GemsArray filled with prefabs.
Now the player already sees a filled board and can make their first move. To do this, we’ll create a script that will handle mouse input and move the selected gems.
Create a new MonoBehaviour script and name it
MoveGem. Add this script to the
GameManager object.
using UnityEngine;
using UnityEngine.InputSystem;

public class MoveGem : MonoBehaviour
{
    // Minimum swipe distance to trigger a move (in world units)
    public float swipeThreshold = 0.5f;

    // Direction string: "left", "right", "up", "down"
    private string direction;

    // The gem selected by the player
    private GameObject selectedGem;

    // Start and end positions of the mouse
    private Vector2 startMouse;
    private Vector2 endMouse;

    private GameManager manager;

    void Start()
    {
        // Get reference to GameManager on the same GameObject
        manager = GetComponent<GameManager>();
    }

    void Update()
    {
        // Mouse button pressed — start swipe
        if (Mouse.current != null && Mouse.current.leftButton.wasPressedThisFrame && manager.canMove)
        {
            // Save starting mouse position (world space)
            Vector3 mousePos = Mouse.current.position.ReadValue();
            startMouse = Camera.main.ScreenToWorldPoint(mousePos);

            // Check if we clicked on something
            RaycastHit2D hit = Physics2D.Raycast(startMouse, Vector2.zero);
            if (hit.collider != null)
            {
                // Store selected gem
                selectedGem = hit.collider.gameObject;
            }
        }

        // Mouse button released — end swipe
        if (Mouse.current != null && Mouse.current.leftButton.wasReleasedThisFrame && selectedGem != null && manager.canMove)
        {
            // Save end mouse position and calculate movement vector
            Vector3 mousePos = Mouse.current.position.ReadValue();
            endMouse = Camera.main.ScreenToWorldPoint(mousePos);
            Vector2 delta = endMouse - startMouse;
            direction = "";

            // Only accept swipe if long enough
            if (delta.magnitude > swipeThreshold)
            {
                // Determine direction by dominant axis
                if (Mathf.Abs(delta.x) >= Mathf.Abs(delta.y))
                    direction = delta.x > 0 ? "right" : "left";
                else
                    direction = delta.y > 0 ? "up" : "down";
            }

            // If valid direction — trigger gem swap
            if (direction != "")
            {
                SwitchGems(direction);
            }
        }
    }

    // Convert direction string to actual movement
    void SwitchGems(string direction)
    {
        switch (direction)
        {
            case "right": GemSwap(Vector2Int.right); break;
            case "left":  GemSwap(Vector2Int.left);  break;
            case "up":    GemSwap(Vector2Int.up);    break;
            case "down":  GemSwap(Vector2Int.down);  break;
        }
    }

    // Swap two adjacent gems in the grid
    void GemSwap(Vector2Int dir)
    {
        int x1 = selectedGem.GetComponent<GemData>().gridPosX;
        int y1 = selectedGem.GetComponent<GemData>().gridPosY;
        int x2 = x1 + dir.x;
        int y2 = y1 + dir.y;

        // Check bounds
        if (x2 < 0 || x2 >= manager.gemsGrid.GetLength(0) || y2 < 0 || y2 >= manager.gemsGrid.GetLength(1))
            return;

        // Get both gems from the grid
        GameObject gem1 = manager.gemsGrid[x1, y1];
        GameObject gem2 = manager.gemsGrid[x2, y2];

        var data1 = gem1.GetComponent<GemData>();
        var data2 = gem2.GetComponent<GemData>();

        // Update grid coordinates in each gem
        data1.gridPosX = x2;
        data1.gridPosY = y2;
        data2.gridPosX = x1;
        data2.gridPosY = y1;

        // Swap in the array
        manager.gemsGrid[x1, y1] = gem2;
        manager.gemsGrid[x2, y2] = gem1;

        // Start movement
        data1.Move();
        data2.Move();

        // Disable further input until matches are checked
        manager.canMove = false;
        manager.canCheck = true;
    }
}
This script listens for and handles mouse clicks. When the player clicks the left mouse button, it stores the start point and the selected gem. When the button is released, it checks how far the cursor moved — this prevents accidental small clicks. If the movement is large enough, it determines the direction and calls a function to swap the gems.
Then we find the pair of gems (the selected one and its neighbor in
the chosen direction), update their positions in the array, update the
coordinates in the GemData scripts, and command both to
move to their new positions. After that, further moves are disabled
until movement finishes and we check for matches.
x = 2.5 and y = 2.5 to center the board on
screen.
Now you can run the game and see how the gems swap places.
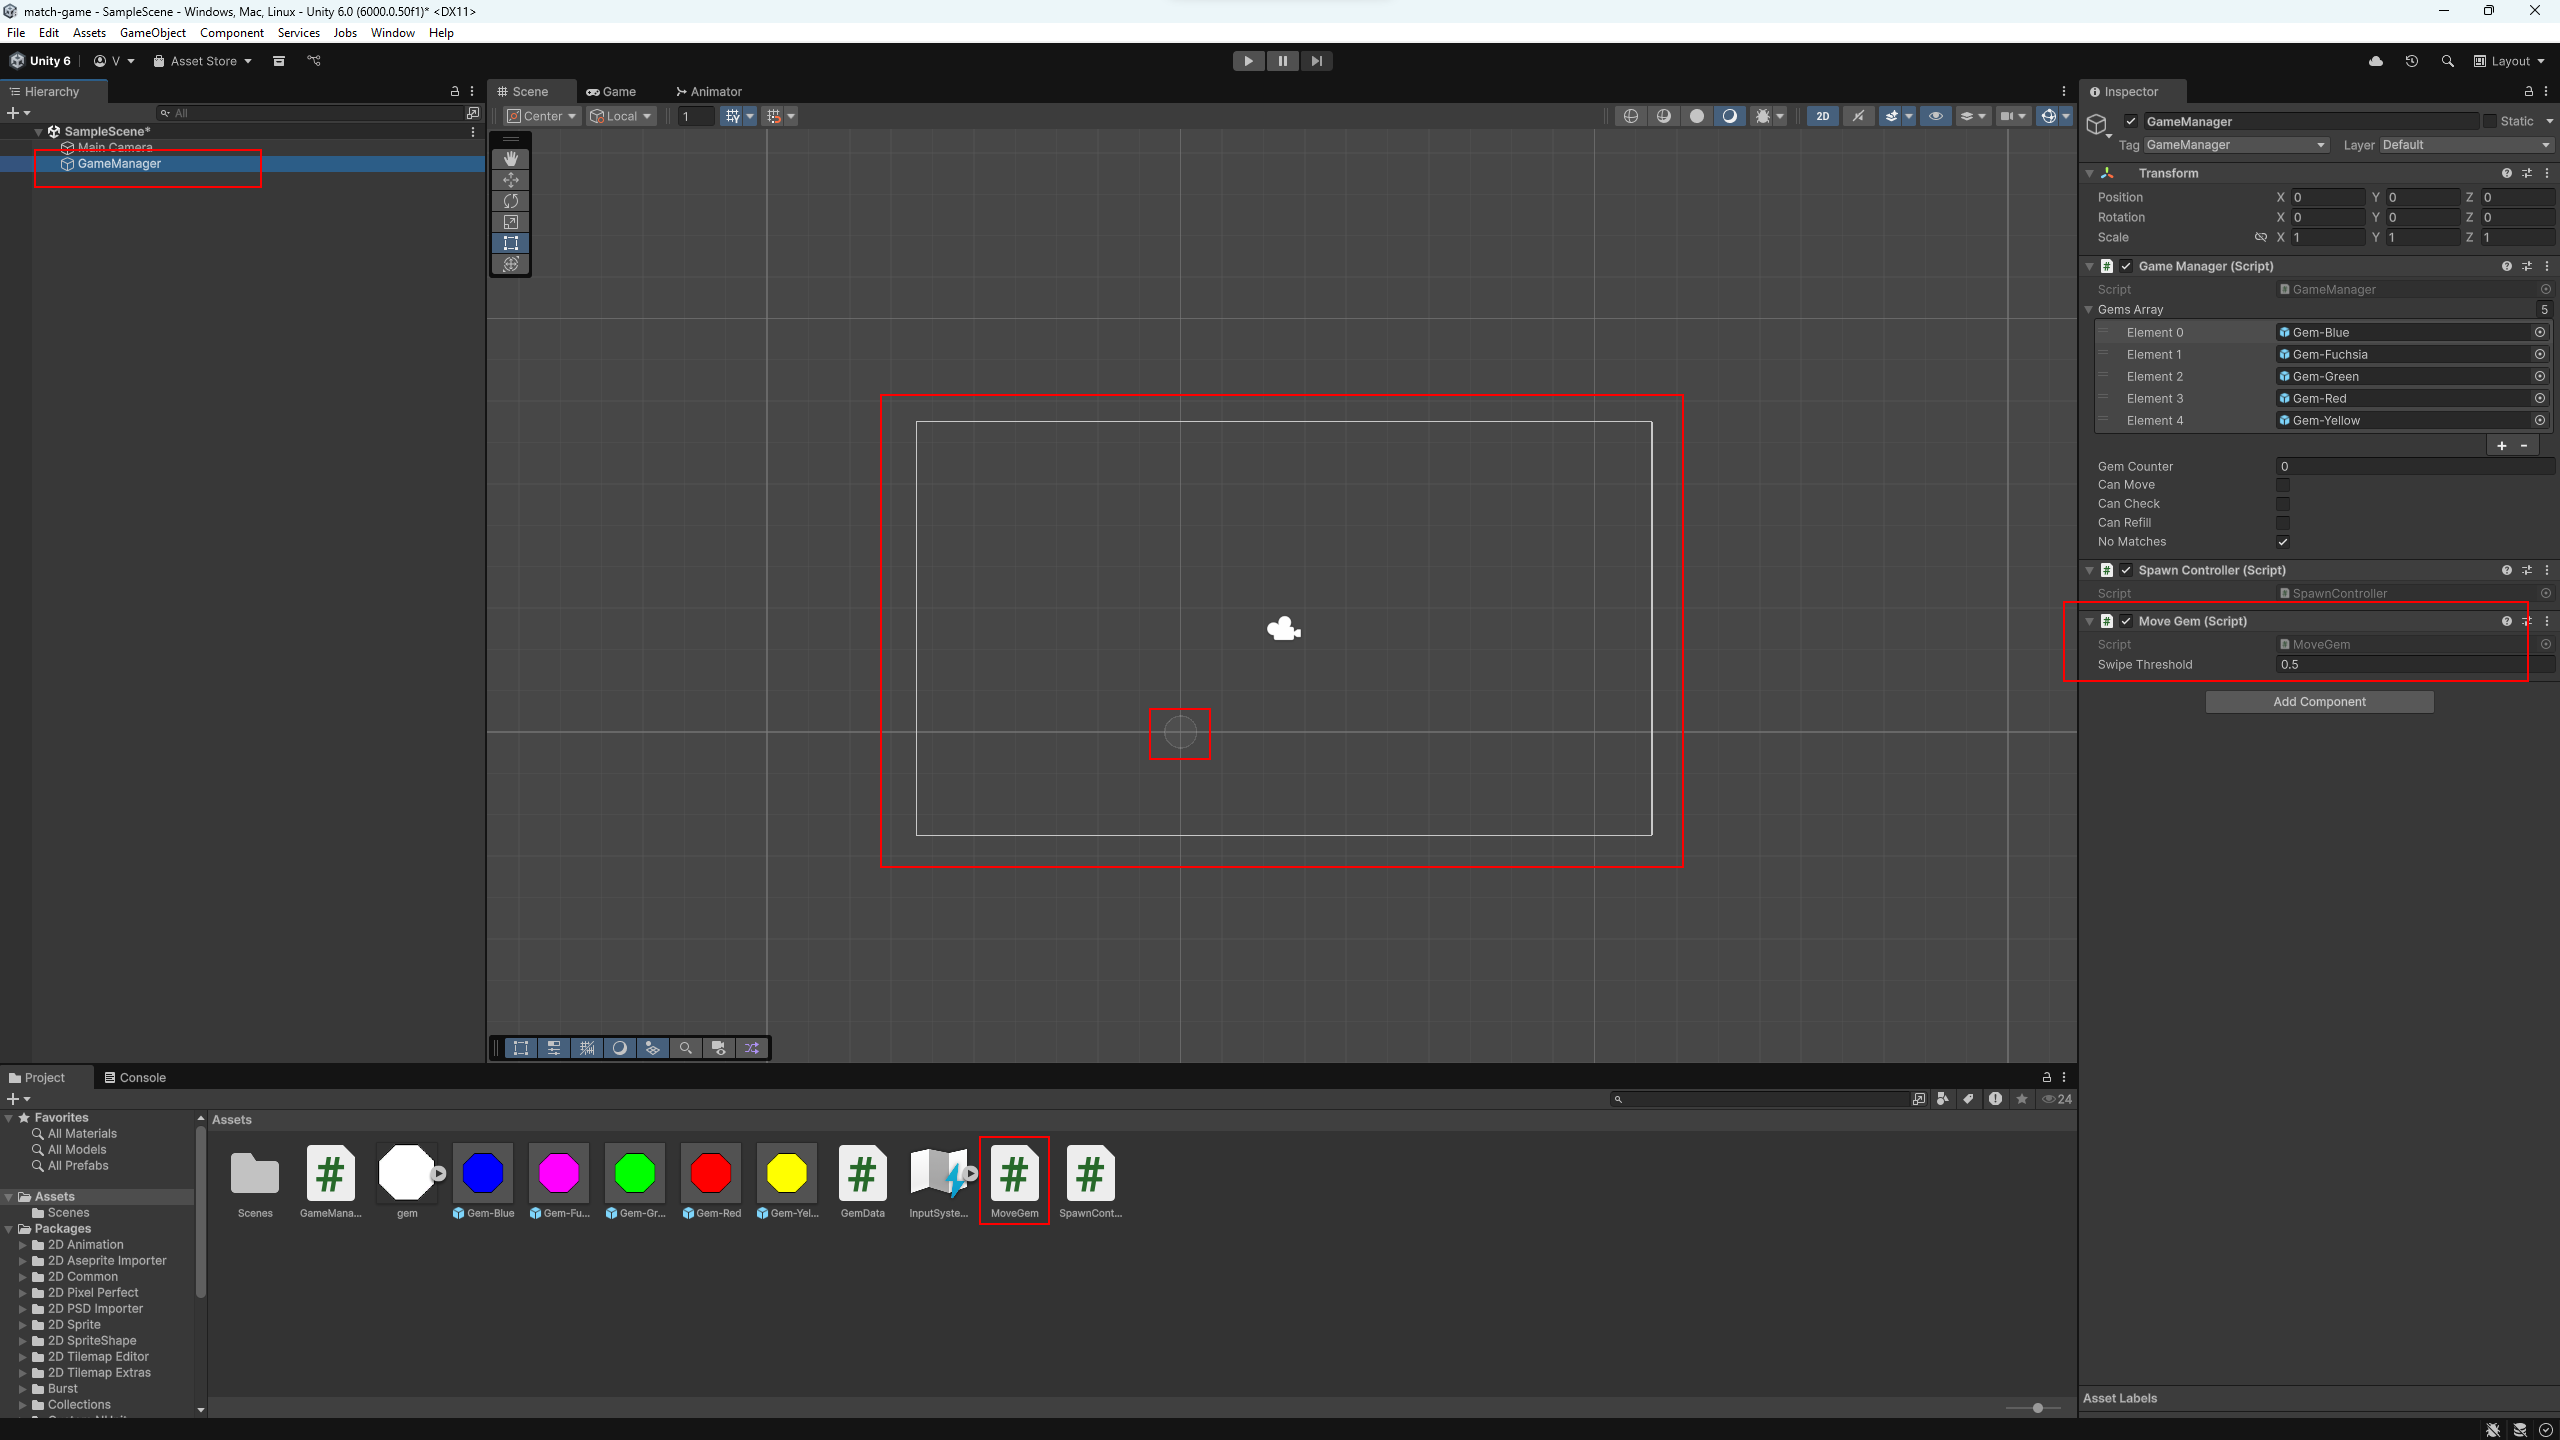
MoveGem script attached.
The next logical step after the player's move is to check the board
for matches. For this, we'll create a new
MonoBehaviour script and name it
GridChecker. Add this script to the
GameManager object.
using UnityEngine;
// For using lists (dynamic arrays)
using System.Collections.Generic;

// Class that checks the grid for 3+ gem matches
public class GridChecker : MonoBehaviour
{
    // List of all groups of matching gems
    private List<List<GameObject>> matchedGems;

    // Reference to the main GameManager
    private GameManager manager;

    // Cached grid of all gem objects
    private GameObject[,] gemsGrid;

    // Main method to find and remove matches
    public void CheckForMatches()
    {
        // Get GameManager and the gem grid
        manager = GetComponent<GameManager>();
        gemsGrid = manager.gemsGrid;

        // Create a new list to store all matches
        matchedGems = new List<List<GameObject>>();

        // First gem in a potential matching chain
        GameObject firstGemToCheck = null;

        // Temporary list for building a chain
        List<GameObject> tmpGems = new List<GameObject>();

        // === Horizontal check ===
        for (int y = 0; y < gemsGrid.GetLength(1); y++)
        {
            firstGemToCheck = null;
            tmpGems.Clear();

            for (int x = 0; x < gemsGrid.GetLength(0); x++)
            {
                // Get current gem
                GameObject current = gemsGrid[x, y];

                // If the slot is empty, finish current chain
                if (current == null)
                {
                    if (tmpGems.Count >= 3)
                        matchedGems.Add(new List<GameObject>(tmpGems));
                    tmpGems.Clear();
                    firstGemToCheck = null;
                    continue;
                }

                // New type or start of line
                if (firstGemToCheck == null || current.tag != firstGemToCheck.tag)
                {
                    if (tmpGems.Count >= 3)
                        matchedGems.Add(new List<GameObject>(tmpGems));
                    tmpGems.Clear();

                    tmpGems.Add(current);
                    firstGemToCheck = current;
                }
                else
                {
                    // Same type — continue chain
                    tmpGems.Add(current);
                }
            }

            // Save last chain in row
            if (tmpGems.Count >= 3)
                matchedGems.Add(new List<GameObject>(tmpGems));
        }

        // === Vertical check ===
        for (int x = 0; x < gemsGrid.GetLength(0); x++)
        {
            firstGemToCheck = null;
            tmpGems.Clear();

            for (int y = 0; y < gemsGrid.GetLength(1); y++)
            {
                GameObject current = gemsGrid[x, y];

                if (current == null)
                {
                    if (tmpGems.Count >= 3)
                        matchedGems.Add(new List<GameObject>(tmpGems));
                    tmpGems.Clear();
                    firstGemToCheck = null;
                    continue;
                }

                if (firstGemToCheck == null || current.tag != firstGemToCheck.tag)
                {
                    if (tmpGems.Count >= 3)
                        matchedGems.Add(new List<GameObject>(tmpGems));
                    tmpGems.Clear();

                    tmpGems.Add(current);
                    firstGemToCheck = current;
                }
                else
                {
                    tmpGems.Add(current);
                }
            }

            // Save last vertical chain
            if (tmpGems.Count >= 3)
                matchedGems.Add(new List<GameObject>(tmpGems));
        }

        // === Remove all matched gems ===
        foreach (List<GameObject> group in matchedGems)
        {
            foreach (GameObject gem in group)
            {
                if (gem != null)
                {
                    // Remove from grid array
                    GemData data = gem.GetComponent<GemData>();
                    manager.gemsGrid[data.gridPosX, data.gridPosY] = null;

                    // Remove from scene
                    Destroy(gem);
                }
            }
        }

        // Check if any matches were found
        bool hadMatches = matchedGems.Count > 0;

        // Clear the matches list
        matchedGems.Clear();

        // === Update game state ===
        if (hadMatches)
        {
            manager.noMatches = false;
            manager.canRefill = true;
            manager.canCheck = false;
        }
        else
        {
            manager.noMatches = true;
            manager.canRefill = false;
            manager.canCheck = false;
        }
    }
}
This script checks rows and columns on the board to find groups of
three or more identical gems. It uses a temporary list
tmpGems to collect consecutive gems of the same type.
When it encounters a different type or an empty space, it checks if
there were at least three and if so, saves them to the global
matchedGems list.
After checking, all matched gems are destroyed, and depending on whether there were any matches, the game either triggers filling empty spaces or gives the turn back to the player.
GetComponent<GridChecker>().CheckForMatches(); in
your GameManager script to see how the matching works.
Note that interacting with empty spaces might still cause errors —
we’ll handle that later.
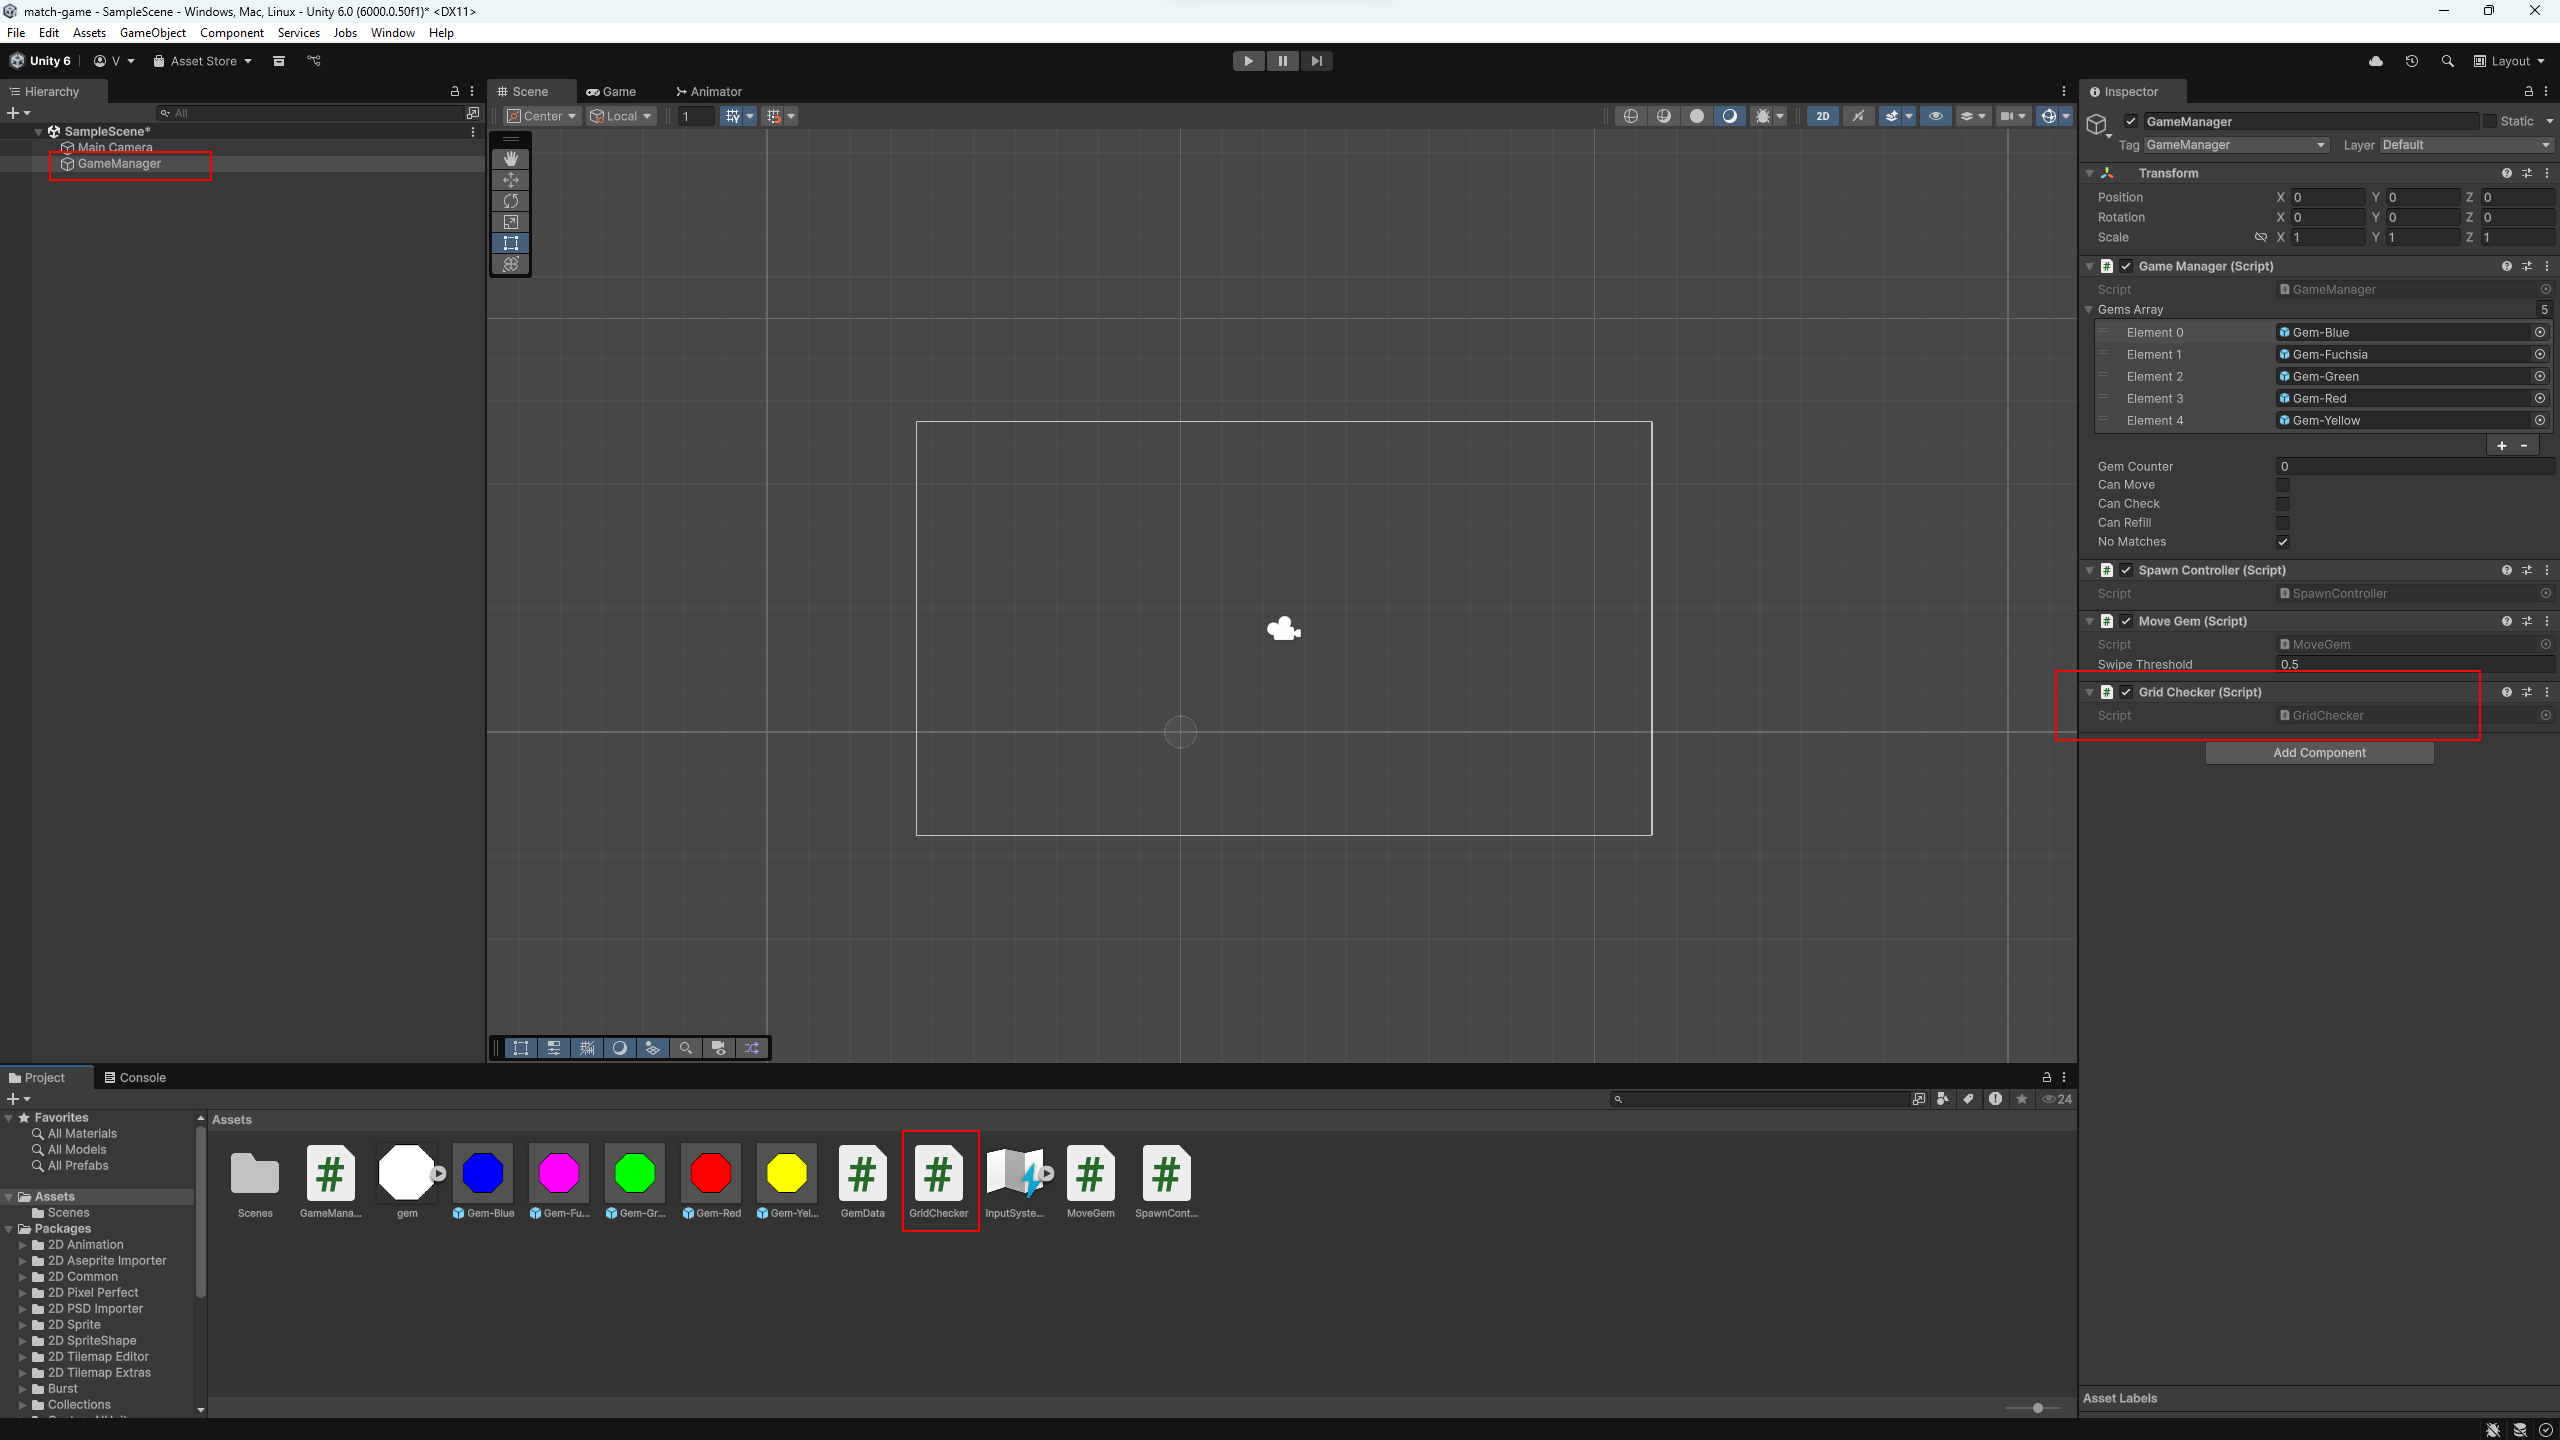
GridChecker script attached.
Now we have the last logical step of the game. At this stage, there are empty cells on the board — where gems were previously removed. We need to find these empty spots, move the gems above them down, and then spawn new gems into the remaining empty cells.
To do this, create a new MonoBehaviour script called
RefillGrid. Add this script to the
GameManager.
using UnityEngine;
// Needed for coroutines (IEnumerator)
using System.Collections;

public class RefillGrid : MonoBehaviour
{
    // Reference to the main GameManager
    private GameManager manager;

    // The grid holding all gem objects
    private GameObject[,] gemsGrid;

    // Array of gem prefabs to choose from
    private GameObject[] gemsArray;

    private void Start()
    {
        // Get references from GameManager
        manager = GetComponent<GameManager>();
        gemsArray = manager.gemsArray;
        gemsGrid = manager.gemsGrid;
    }

    // Starts the refill process
    public void Refill()
    {
        // Start the sequence: falling → spawning → checking
        StartCoroutine(DoRefillSequence());

        // Disable refill flag until finished
        manager.canRefill = false;
    }

    // Sequence of falling and spawning gems
    IEnumerator DoRefillSequence()
    {
        // First, let existing gems fall into empty spots
        yield return StartCoroutine(SlowFall());

        // Then spawn new gems where needed
        yield return StartCoroutine(SlowSpawn());

        // Small pause to allow animations to complete
        yield return new WaitForSeconds(0.2f);

        // Allow the system to check for new matches
        manager.canCheck = true;
    }

    // Moves gems downward into empty cells
    IEnumerator SlowFall()
    {
        for (int x = 0; x < gemsGrid.GetLength(0); x++)
        {
            for (int y = 0; y < gemsGrid.GetLength(1) - 1; y++)
            {
                // If the cell is empty
                if (gemsGrid[x, y] == null)
                {
                    // Look for a gem above to fall into this spot
                    for (int aboveY = y + 1; aboveY < gemsGrid.GetLength(1); aboveY++)
                    {
                        if (gemsGrid[x, aboveY] != null)
                        {
                            // Move gem down
                            GameObject gem = gemsGrid[x, aboveY];
                            gemsGrid[x, y] = gem;
                            gemsGrid[x, aboveY] = null;

                            // Update grid position and start moving
                            GemData data = gem.GetComponent<GemData>();
                            data.gridPosY = y;
                            data.Move();

                            // Wait to create a step-by-step fall effect
                            yield return new WaitForSeconds(0.1f);
                            break;
                        }
                    }
                }
            }
        }
    }

    // Spawns new gems into empty positions
    IEnumerator SlowSpawn()
    {
        for (int x = 0; x < gemsGrid.GetLength(0); x++)
        {
            for (int y = 0; y < gemsGrid.GetLength(1); y++)
            {
                // If still empty, spawn a new gem
                if (gemsGrid[x, y] == null)
                {
                    // Spawn it just above the top of the grid
                    GameObject newGem = Instantiate(
                        gemsArray[Random.Range(0, gemsArray.Length)],
                        new Vector2(x, gemsGrid.GetLength(1) + 1),
                        Quaternion.identity
                    );

                    // Store it in the grid
                    gemsGrid[x, y] = newGem;

                    // Set its target position and begin movement
                    GemData data = newGem.GetComponent<GemData>();
                    data.gridPosX = x;
                    data.gridPosY = y;
                    data.Move();

                    // Wait to visualize one-by-one spawning
                    yield return new WaitForSeconds(0.2f);
                }
            }
        }
    }
}
This script does two key tasks: first it looks for empty spaces and moves gems above them down, then it finds any remaining empty cells and spawns new gems there.
With this, your core game logic is complete! Now you
can uncomment the calls to
GetComponent<GridChecker>().CheckForMatches() and
GetComponent<RefillGrid>().Refill() in the
GameManager script — and your game will run in a full
cycle.
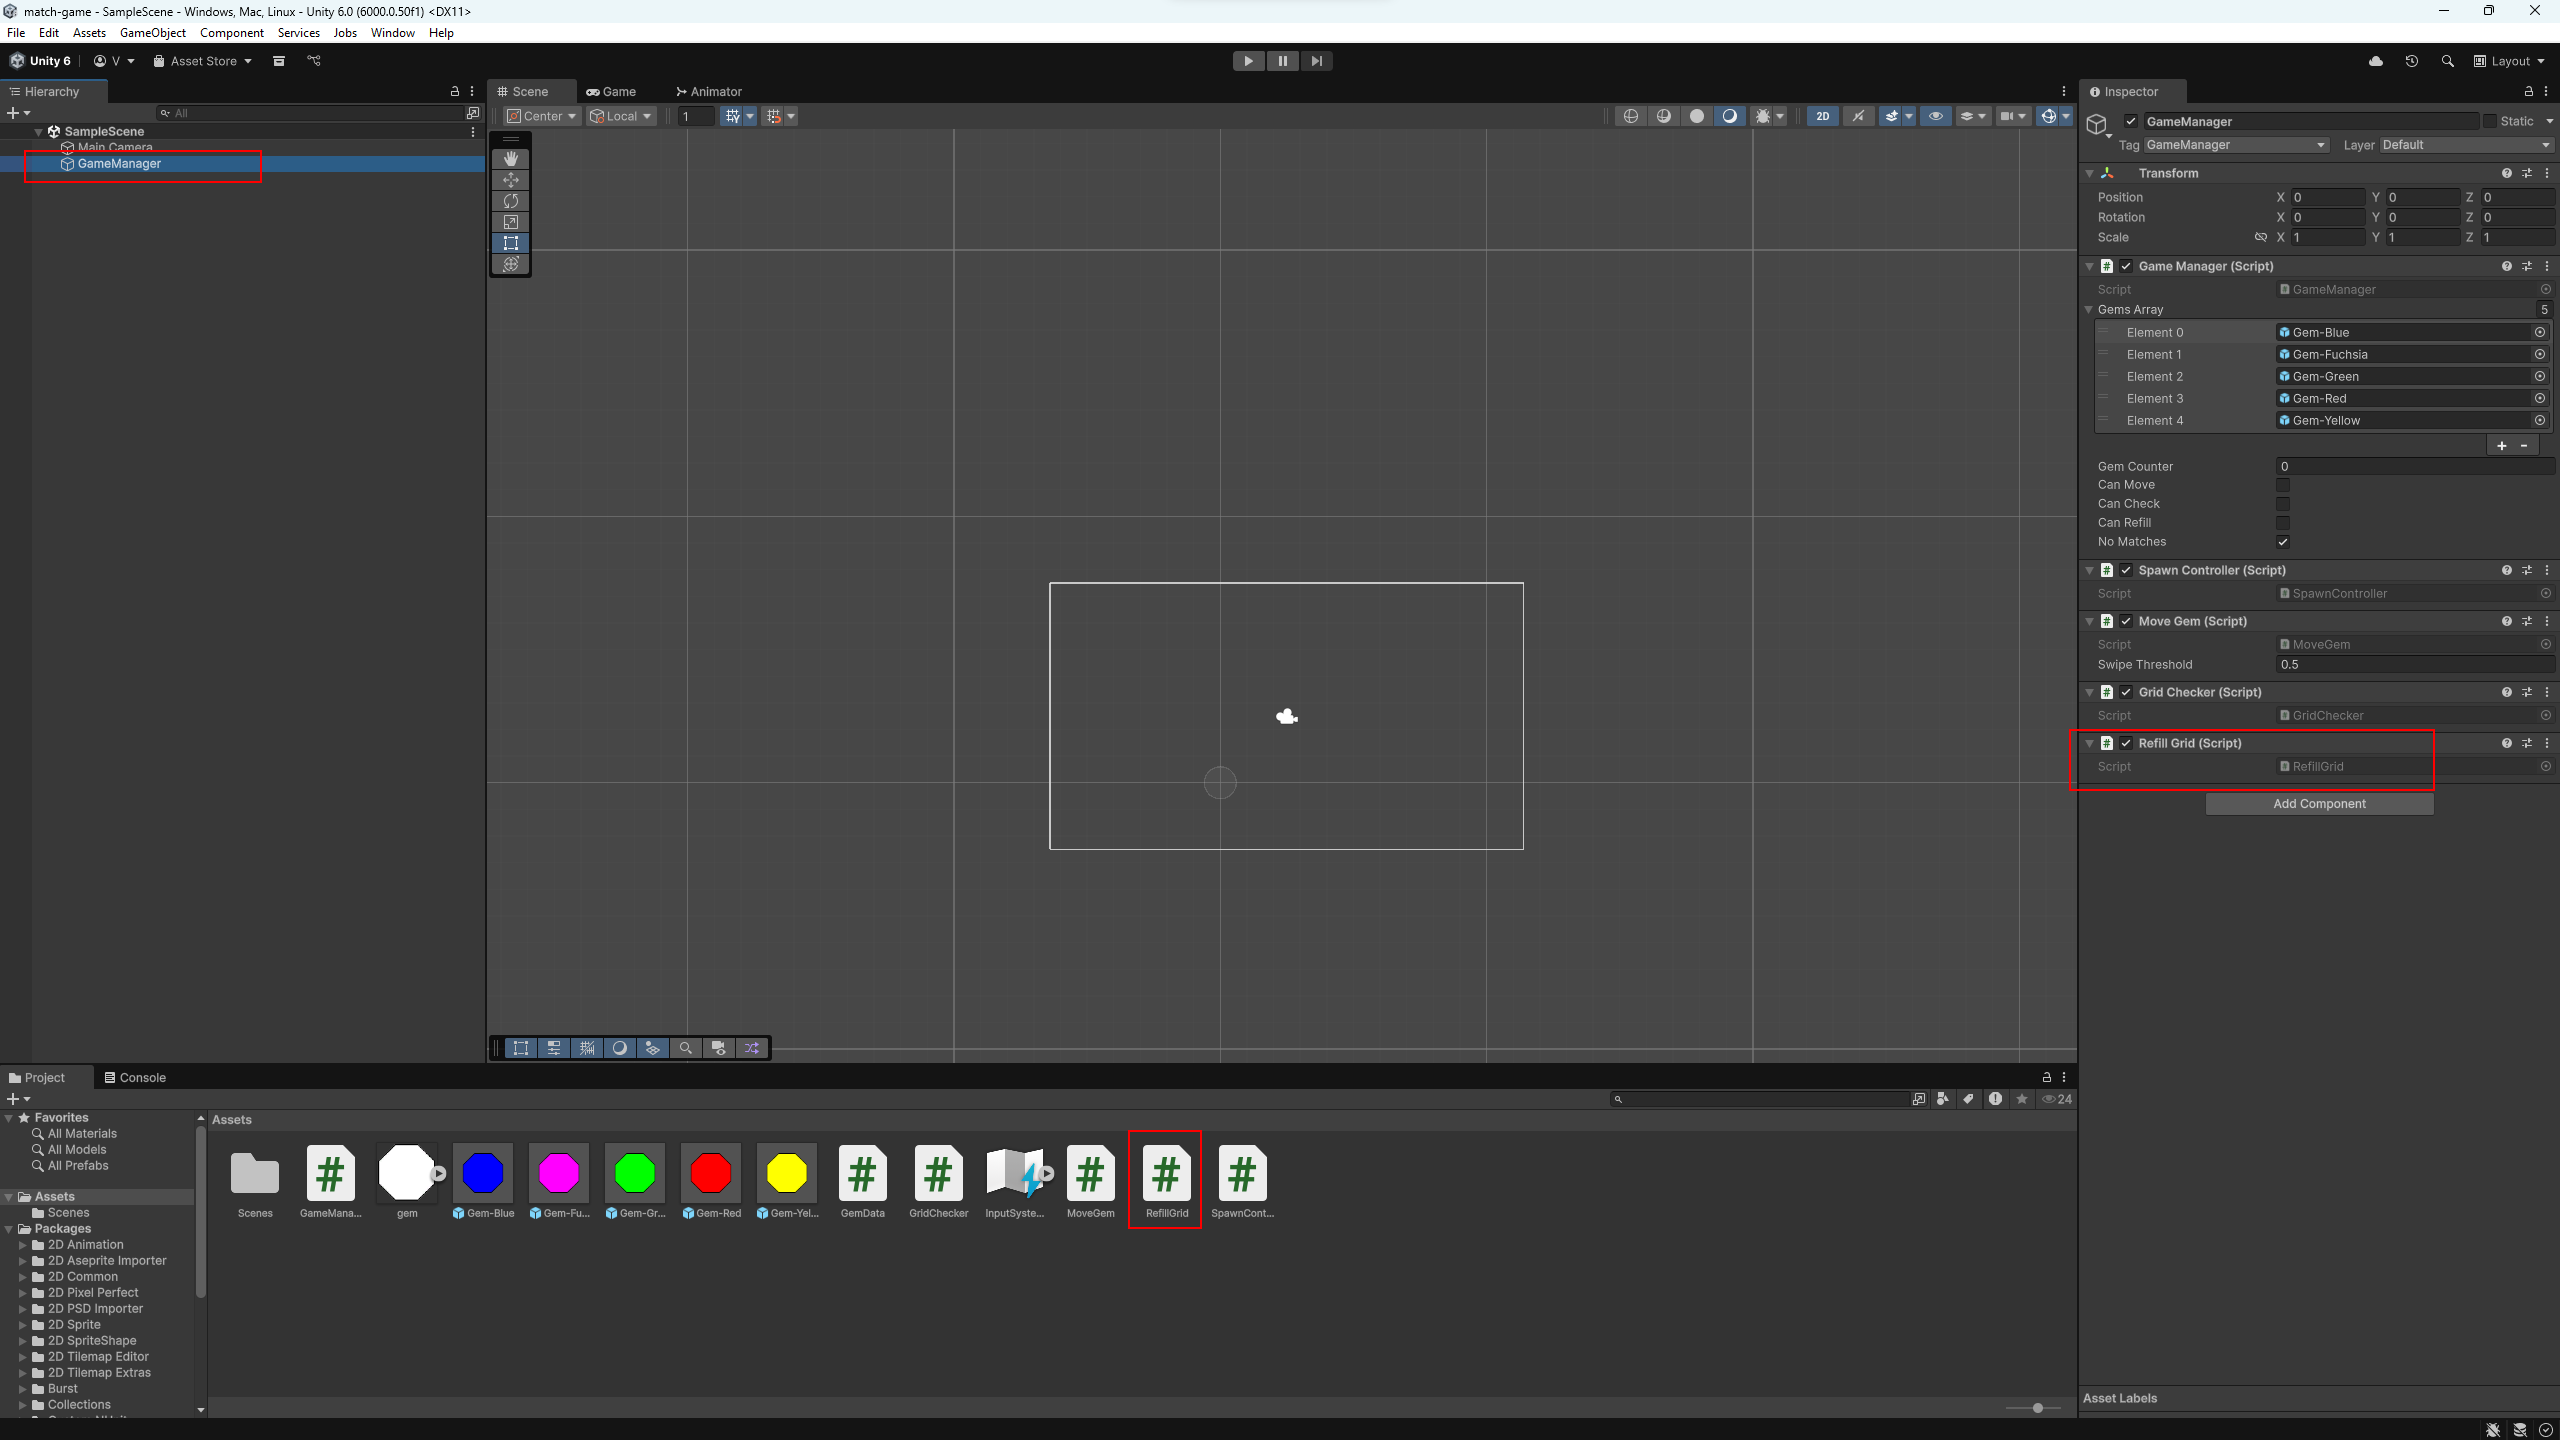
RefillGrid script attached.
Hope you didn’t forget to uncomment the calls to
CheckForMatches() and Refill() in your
GameManager script — your game is now fully working!
From here, it’s all up to your imagination 🤗. Add special effects, animations, sounds, power-ups, timers, levels — and turn your match-3 into something truly unique.